On this page:
Related topics:
Managing Alerts
You can take the following actions for alerts generated by alert rules: assign alerts to analysts for investigation, record triage verdicts to capture your assessment, escalate confirmed threats to incidents, suppress alert rules that are generating unwanted alerts, and dismiss alerts as false positive that don't require further action.
Assigning Alerts
Open and In Progress alerts can be manually assigned to analysts for investigation. You can assign an individual alert from the alert details panel or multiple alerts from the Alerts page.
To assign an individual alert from the alert details panel:
-
Navigate to ThreatStream Next Gen > Security Operations > Alerts.
-
Click the alert you want to assign to open the alert details panel.
-
Select an analyst from the Assignee drop-down list.
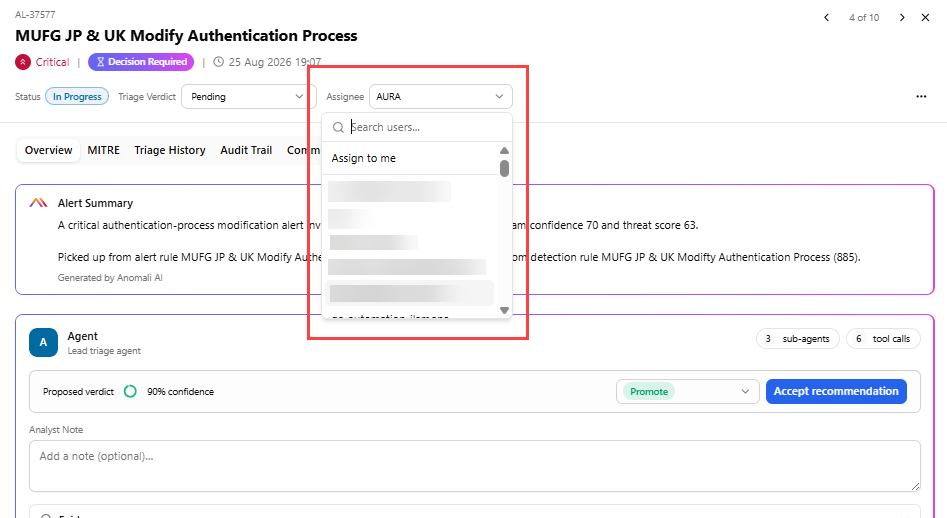
The alert is assigned to the selected analyst.
To assign alerts in bulk:
-
Navigate to ThreatStream Next Gen > Security Operations > Alerts.
-
Using the checkbox column, select one or more alerts you want to assign.
-
Click Assign To .
-
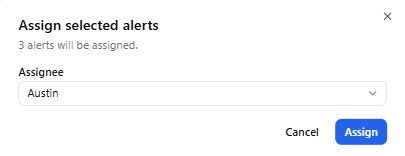
Select a user from the Assignee drop-down list.
-
Click Assign.
The alert is assigned.
Triaging Alerts
-
You must have the Triage Alerts permission to triage alerts. See Managing Rolesfor details.
-
Unassigned alerts cannot be triaged.
You can set one of the following triage verdicts for alerts from the alert details panel or from the Alerts page:
-
Promote: recommends creating an incident. Choose this when the alert represents a real security event that needs formal investigation and tracking. You can promote a single alert or select multiple related alerts to promote together into one incident. Note that this verdict does not automatically create an incident.
-
Investigate: sends the alert for further investigation before a final call is made. Use this when you suspect something is wrong but don't yet have enough evidence to promote or dismiss it. If the investigation confirms a real threat, you'll still need to approve creating an incident .
-
Monitor: keeps the alert open for ongoing observation instead of resolving it right away. Use this for alerts that aren't clearly malicious but are worth watching, For example, low-confidence signals that may escalate over time. The alert will be periodically re-evaluated and will eventually be promoted or closed, depending on what happens next.
-
False Positive: marks the alert as not a genuine security concern. Alerts classified as false positive are automatically resolved and removed from the active work queue. The decision, rationale, and supporting evidence remain part of the auditable history for later review of these alerts.
To set a triage verdict from the alert details panel:
-
Navigate to ThreatStream Next Gen > Security Operations > Alerts.
-
Open an alert details panel for the alert.
-
Review the associated detections, involved entities, and MITRE techniques in the Overview and MITRE tabs.
-
When ready, select one of the following verdicts from the Triage Verdict drop-down list: Promote, Investigate, Monitor, or False Positive. Alternatively, click the more options menu (...) and select a triage verdict.
Note: Pending means that no verdict has been recorded yet. This is the default state for any alert awaiting triage and it cannot be selected.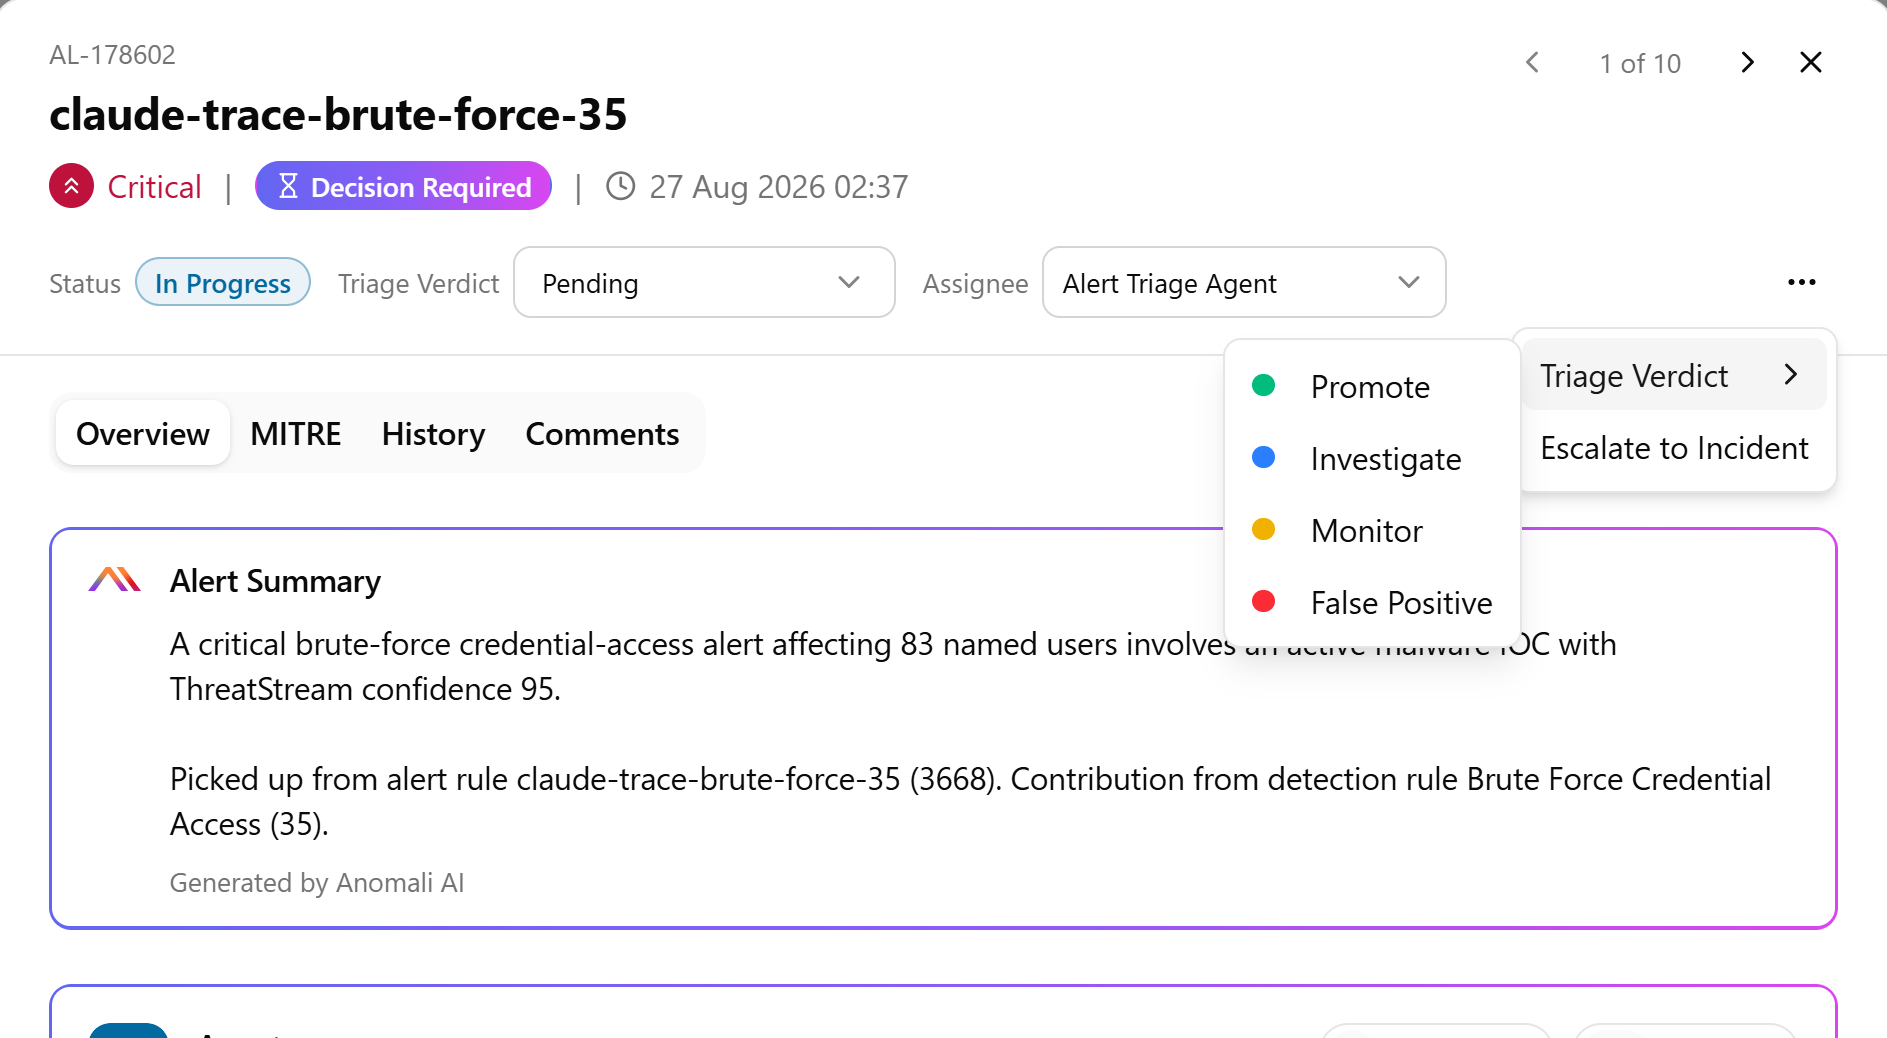
The verdict is recorded in the Triage History tab. See History Tab for details.
The triaged alerts with Promote, Investigate, and Monitor verdicts appears under the Triaged tab on the Alerts page. See Alerts for details.
To set a triage verdict from the alert details panel:
-
Navigate to ThreatStream Next Gen > Security Operations > Alerts.
-
Locate the alert of your interest and click the corresponding more options menu (...).
-
Click Triage Verdict and select one of the following verdicts: Promote, Investigate, Monitor, or False Positive.
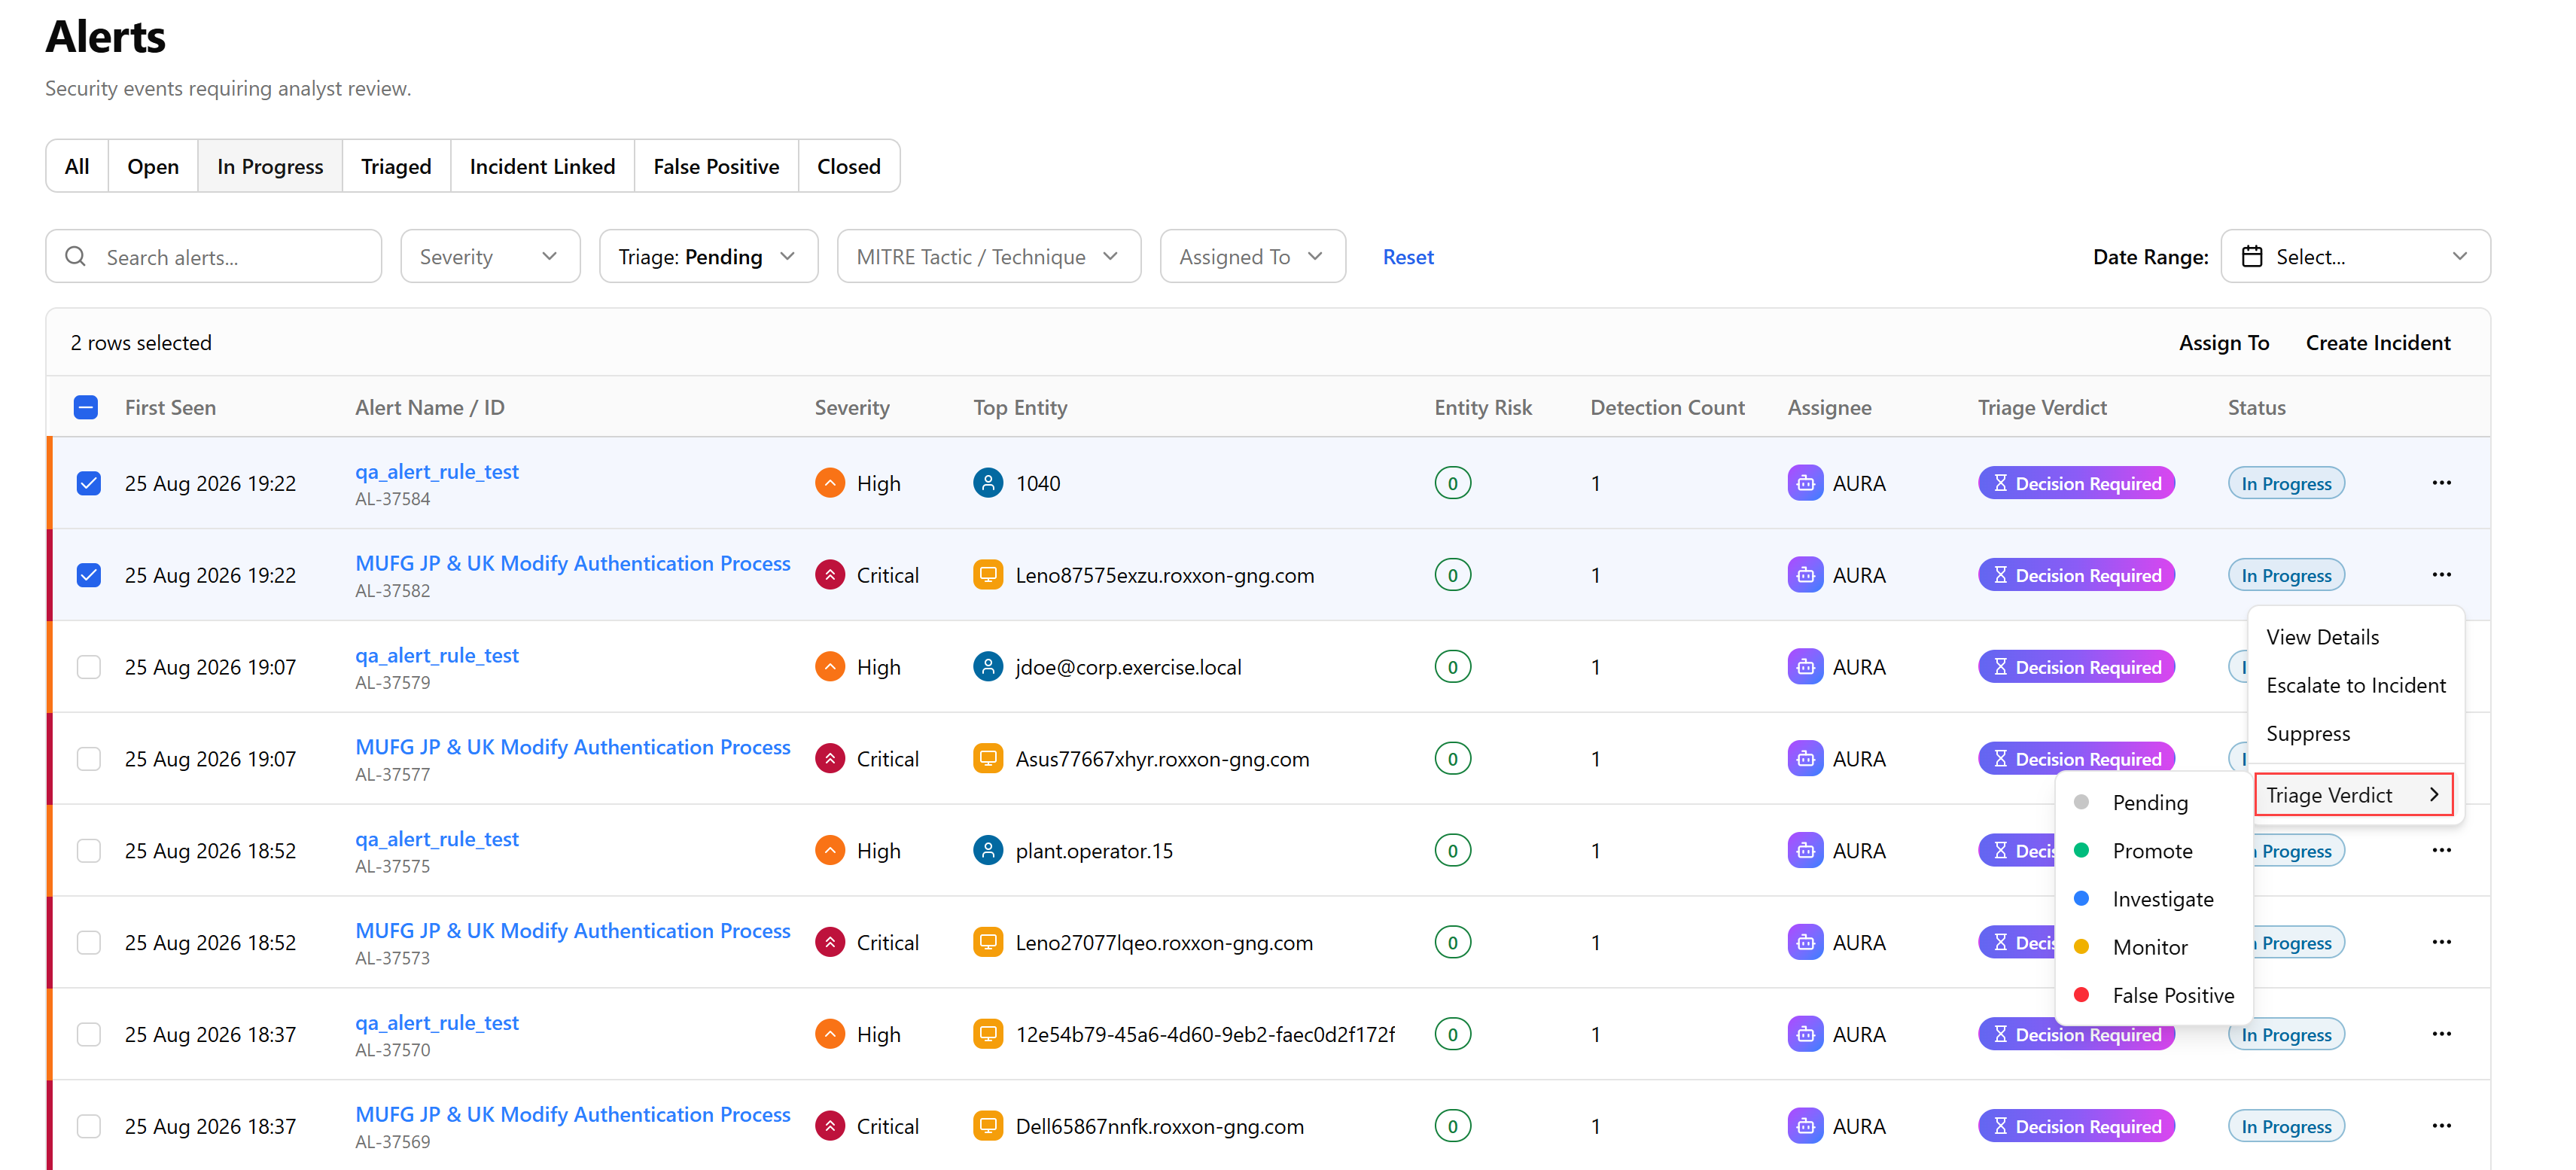
The verdict is recorded in the Triage History tab. See History Tab for details.
The triaged alerts with Promote, Investigate, and Monitor verdicts appears under the Triaged tab on the Alerts page. See Alerts for details.
Escalating Alerts to Incidents
When an alert is confirmed as a true positive, escalate it to an incident for formal investigation. Alerts can be escalated to incidents from the alert details panels and the Alerts page.
To escalate an alert from the alert details panel:
-
Navigate to ThreatStream Next Gen > Security Operations > Alerts.
-
Open the details panel of the alert which you want to escalate to an incident.
-
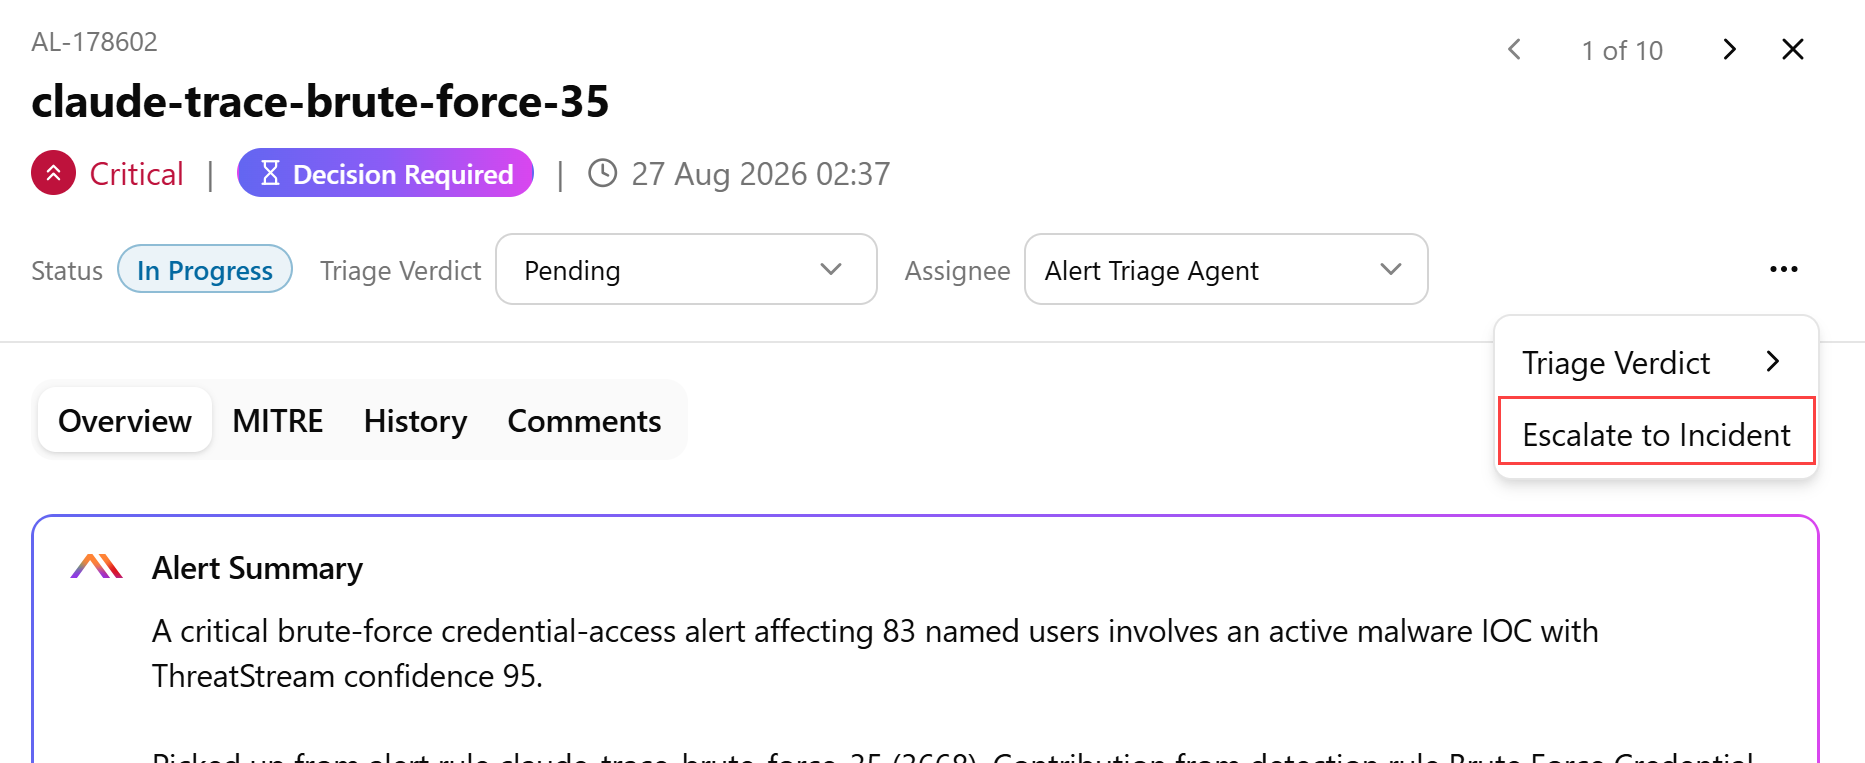
In the top right corner, click the more options menu (...) and select Escalate to Incident. The Create Incident dialog box opens.
-
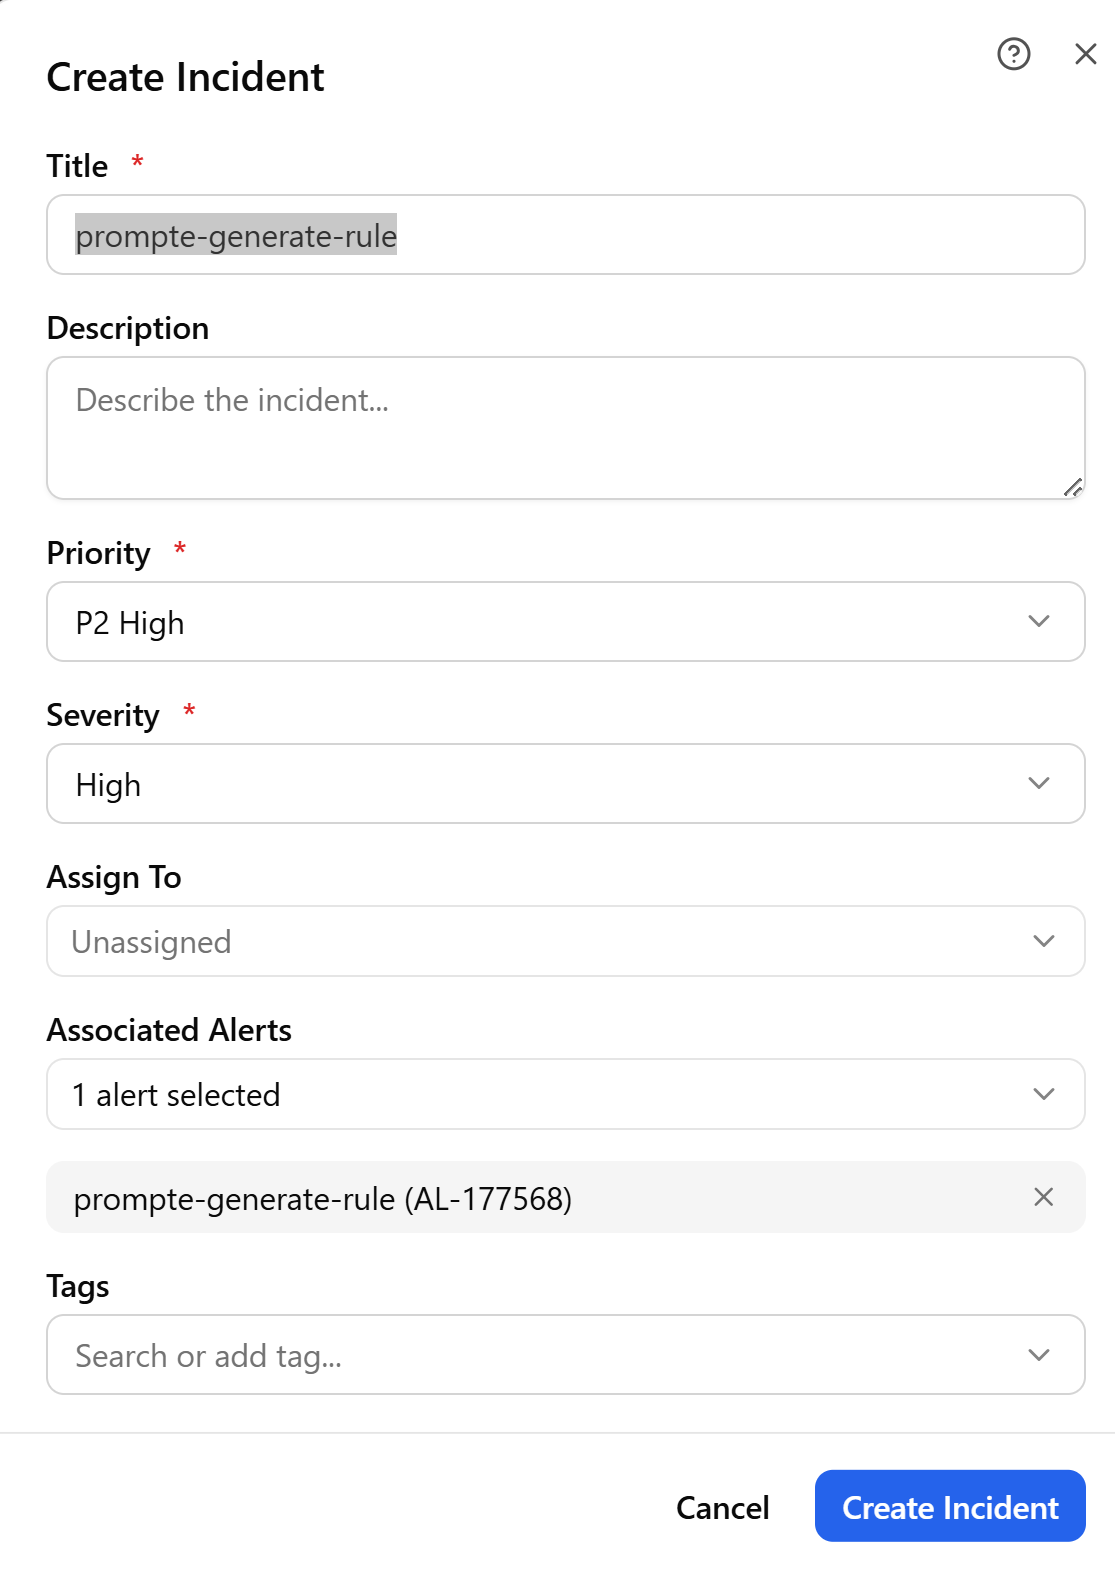
In the Create Incident dialog box, review the pre-populated title and severity (drawn from the alert), adjust as needed, and optionally assign an analyst. For details on the fields in the Create Incident dialog box, see Creating Incidents.
-
Click Create Incident.
The alert transitions to the Incident Linked status on the Incident page.
To escalate alerts to an incident from the Alerts page:
-
Navigate to ThreatStream Next Gen > Security Operations > Alerts.
-
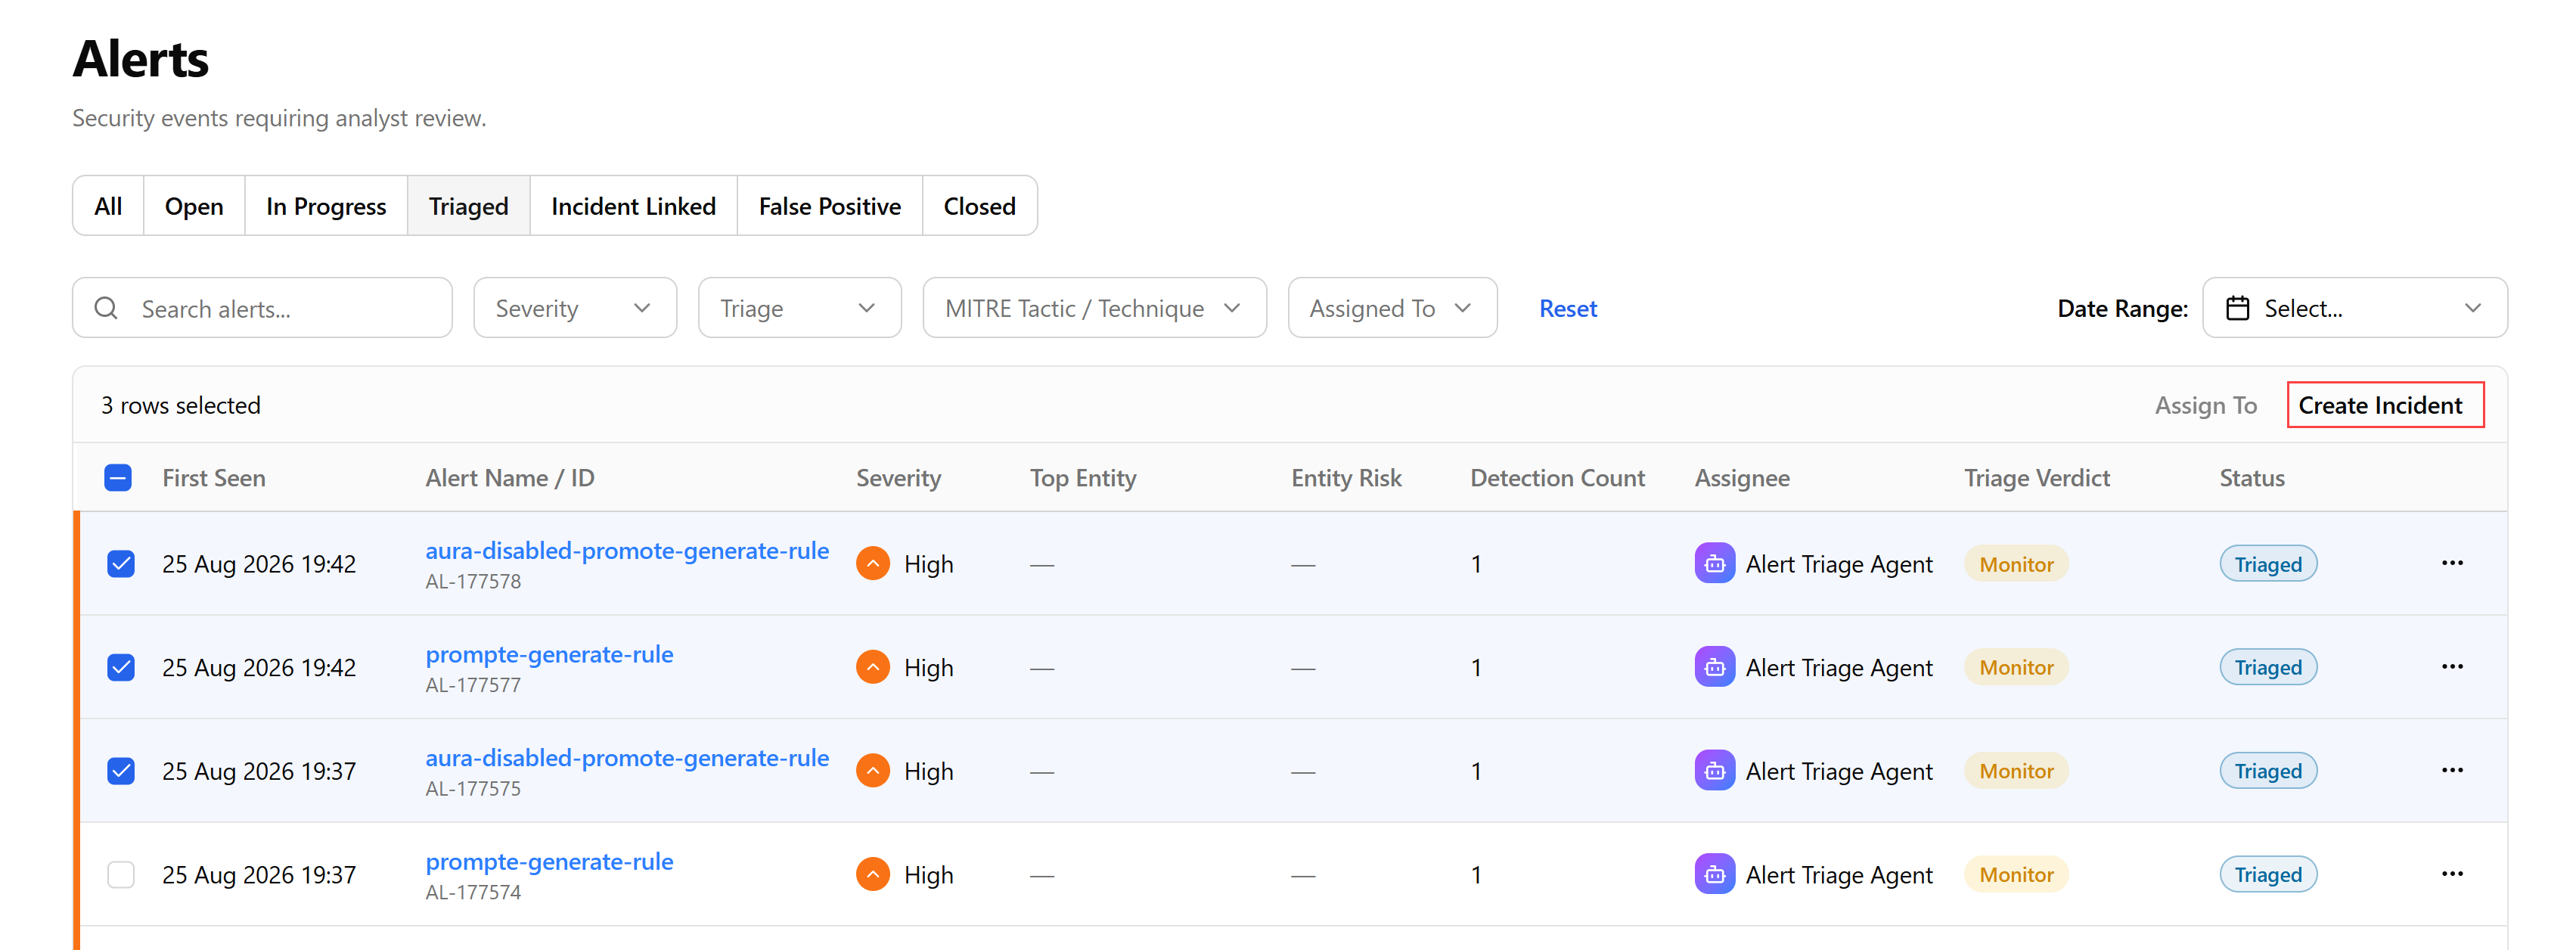
Select one or more related alerts using the checkbox column.
-
Click Create Incident.
-
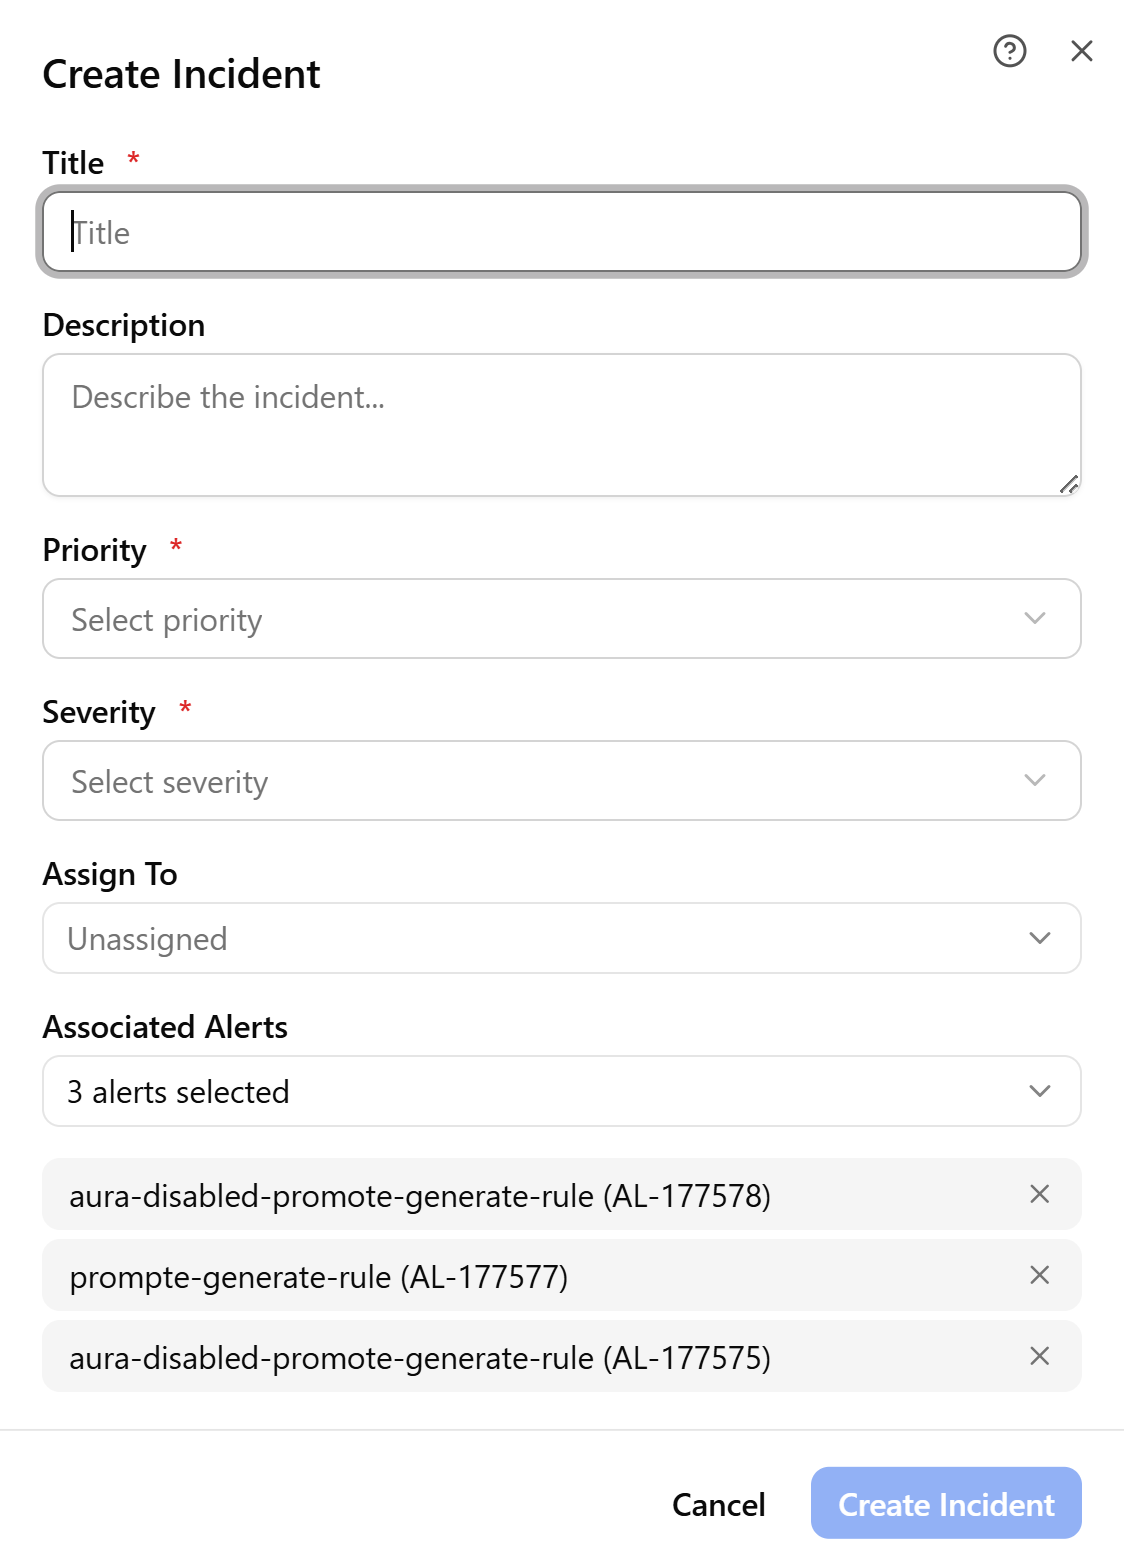
Fill out the fields in the Create Incident dialog box. For details on the fields in the Create Incident dialog box, see Creating Incidents.
-
Click Create Incident.
All selected alerts transition to the Incident Linked status and are linked to the same incident record. Use this method when related alerts represent a single coordinated event that should be investigated together.
Adding Suppression to Alerts
Suppressing an alert temporarily pauses the alert rule that produced it, so it stops generating new alerts for a defined window.
To add suppression to an alert:
-
Navigate to ThreatStream Next Gen > Security Operations > Alerts.
-
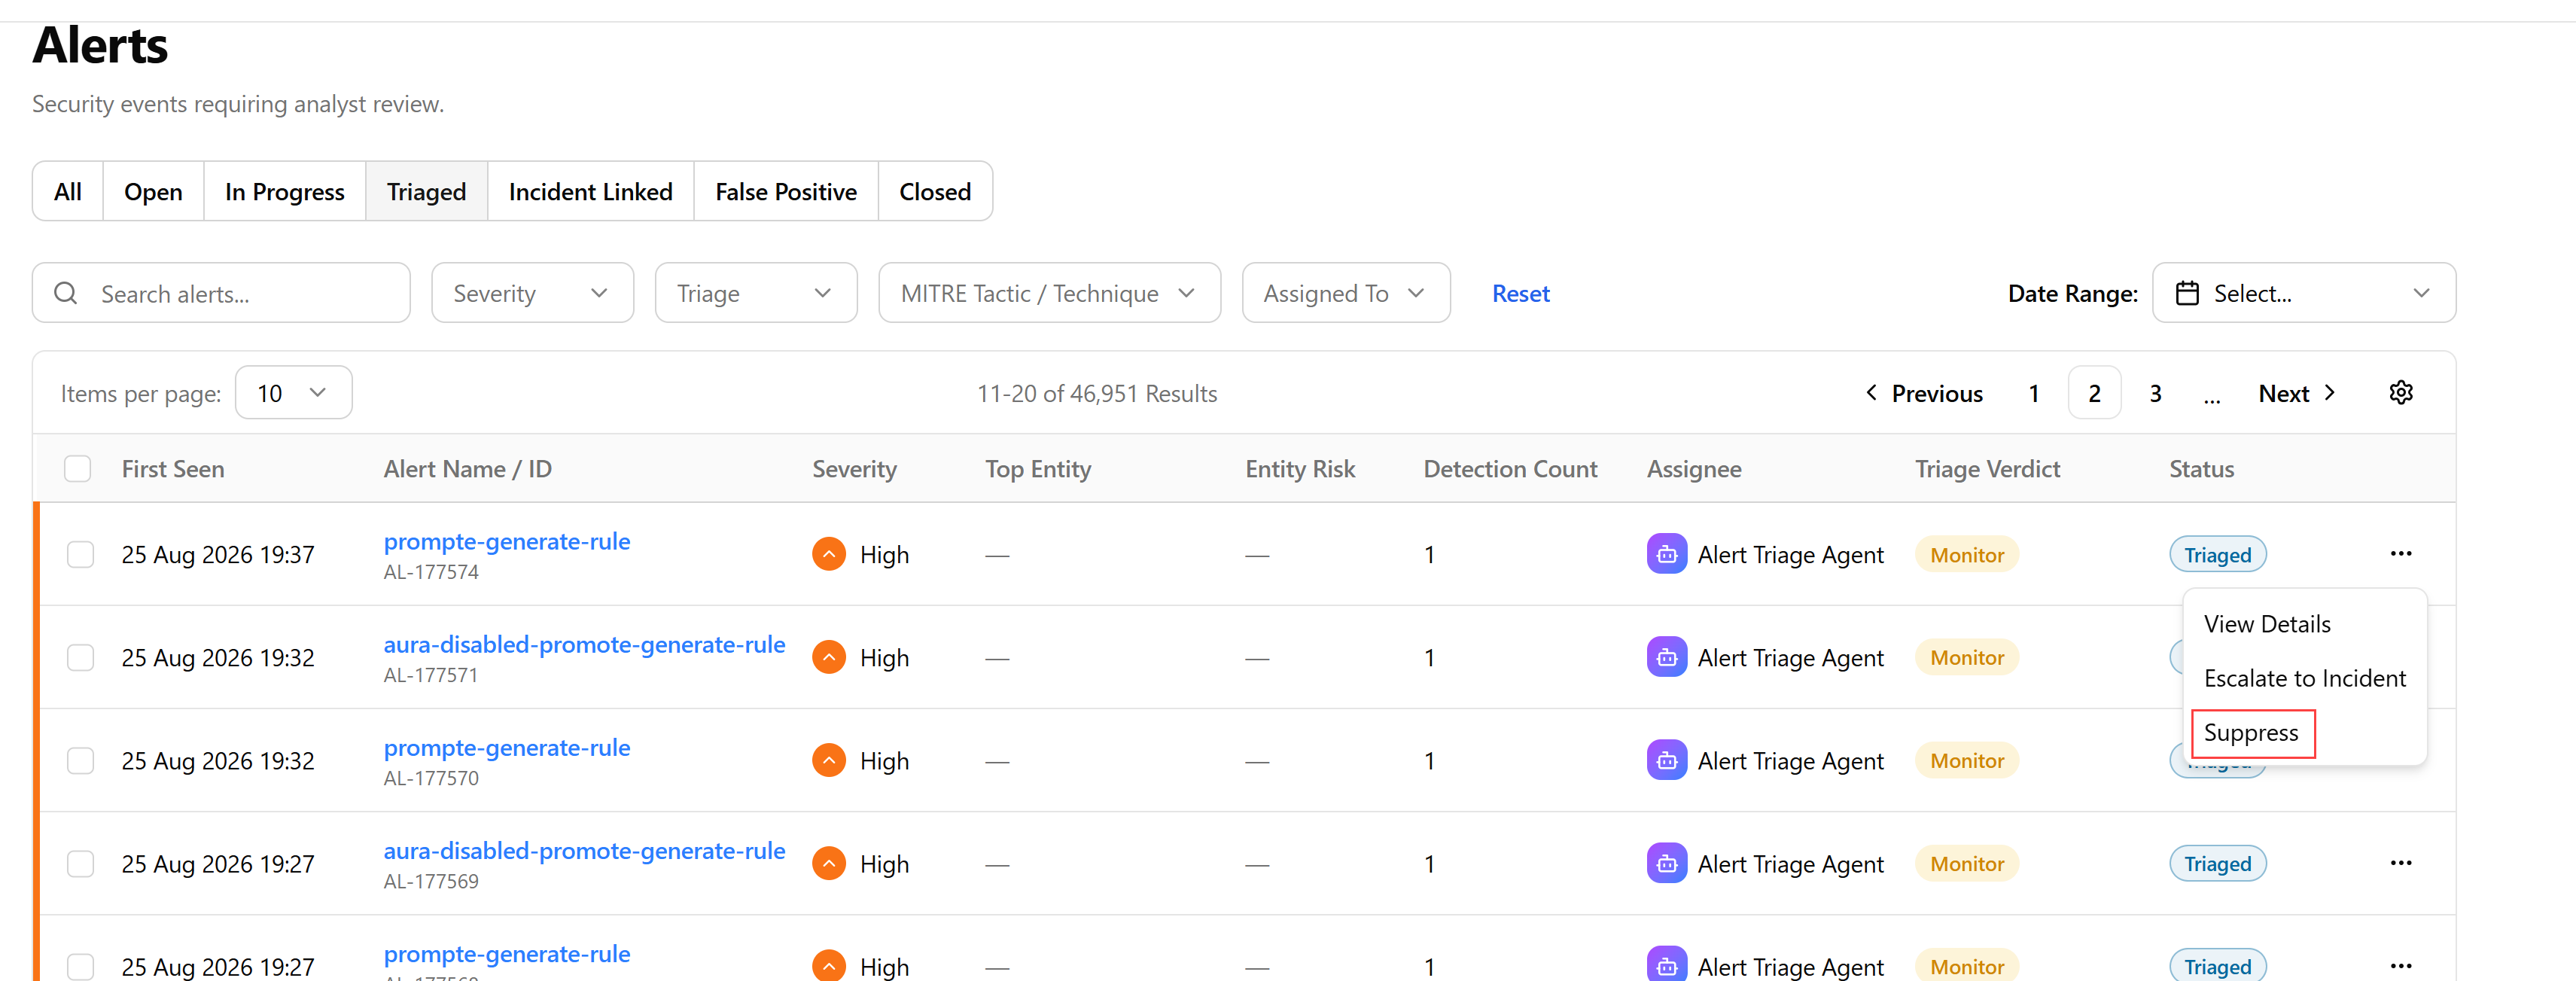
Open the more options menu (...) of the alert you want to suppress and click Suppress.
-
Select a suppression duration from the Suppress For drop-down and enter a mandatory reason.
-
Click Apply Suppression to activate the suppression window.
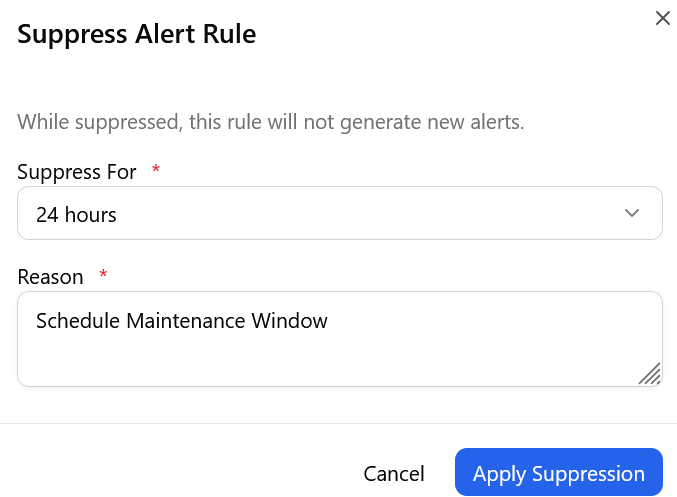
While suppressed, the alert rule does not generate new alerts.
Alternatively, alert ruels can be suppressed on the Alert Rules page. See Adding Suppression to Alert Rules for details.
Viewing Alert Details
See Viewing Alert Details for details on the Alert Detail panel and its five tabs.