On this page:
Related topics:
Viewing Alert Details
The alert details panel provides full context of an alert, including its constituent detections, involved entities, MITRE technique mappings, lifecycle history, and analyst comments.
Note: Viewing an alert and adding comments require the View Alerts permission. Which specific alerts you can see also depends on the eventlog or OCSF data filters configured for your role, since alert visibility follows the detections and events that produced the alert. For details, see Managing Roles.
To access an alert details panel, on the Alerts page, click the name of the alert whose details you want to view, or click the more options menu (...) and select View Details to open the alert details panel.
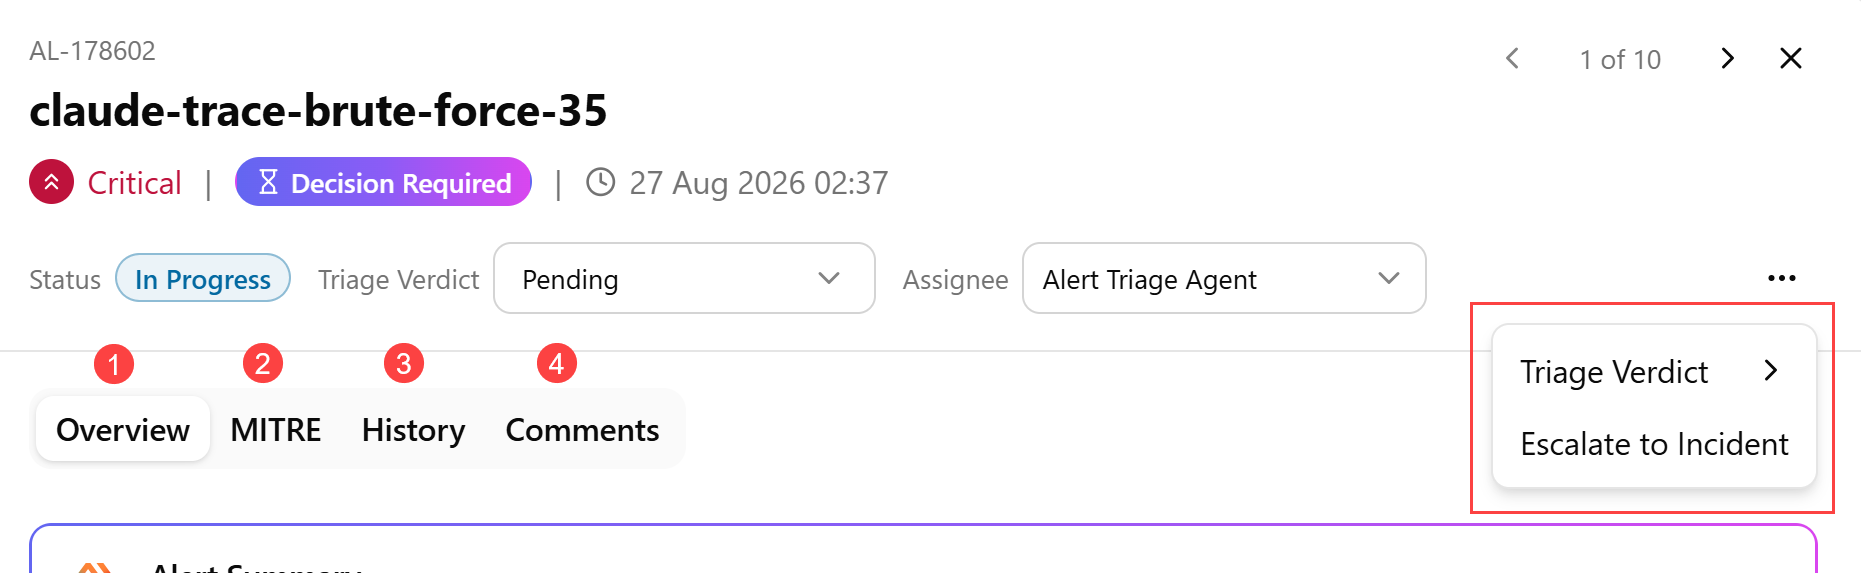
The page header displays the alert ID, alert rule name, severity badge, triage verdict badge, and the timestamp of the first detection. The header also contains the following three inline drop-downs that can be updated from any tab without switching context:
-
Status—current lifecycle status of the alert.
-
Triage Verdict— triage verdict on this alert. Setting a verdict transitions the alert to Triaged status automatically. Triage verdict cannot be configured for open alerts.
-
Assignee— user or agent assigned to the alert. Setting an assignee on an Open alert transitions its status to In Progress automatically.
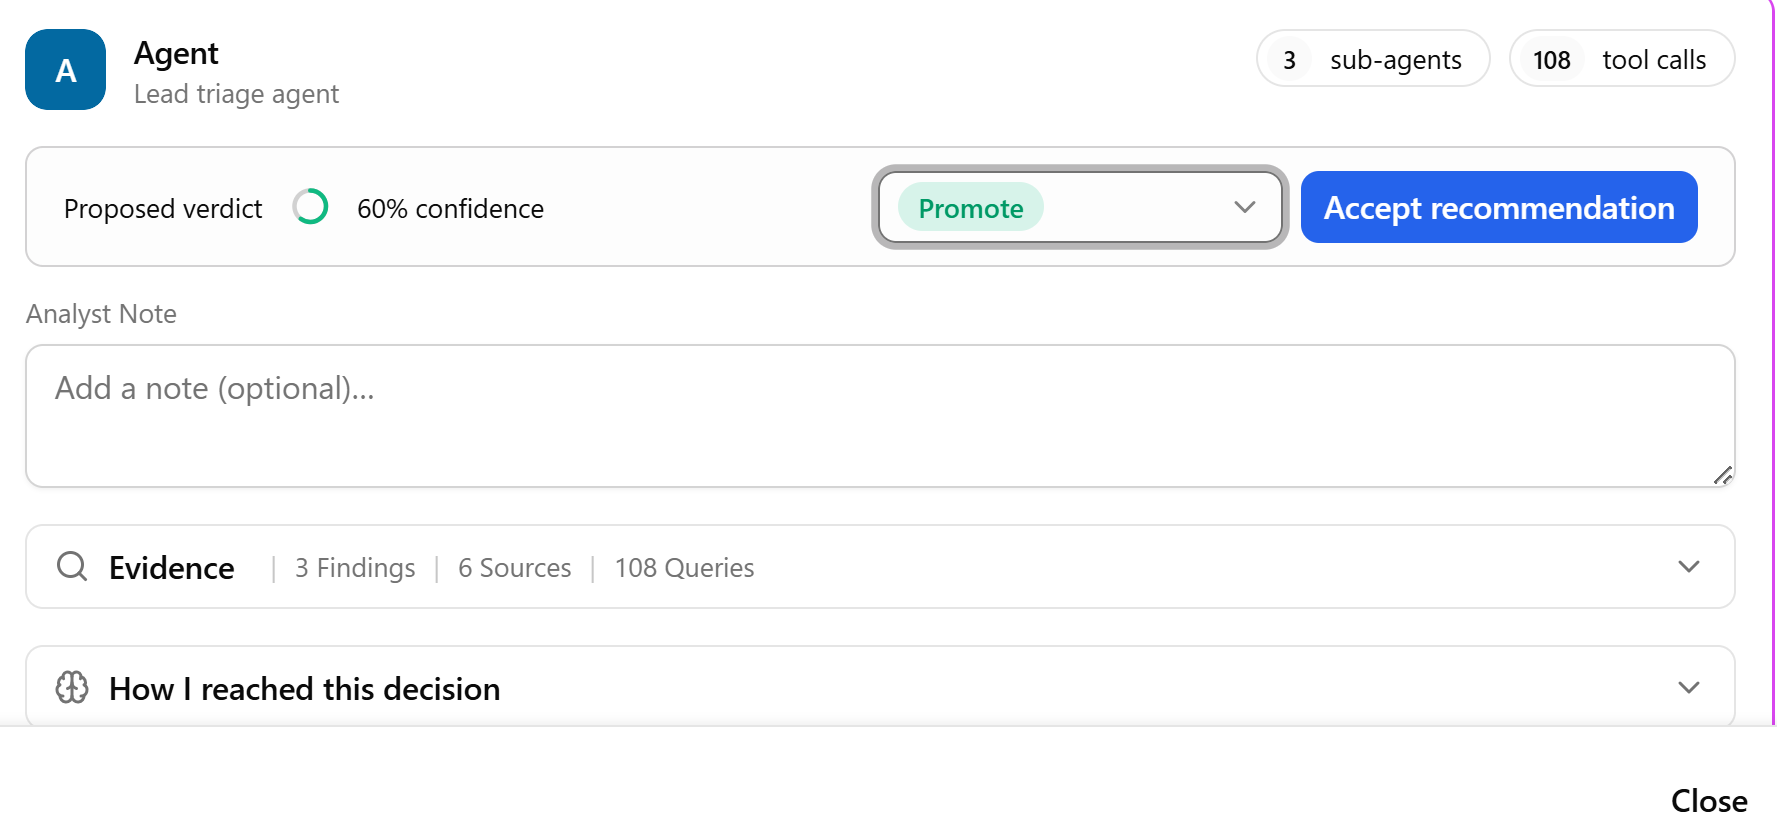
If you want the Alert Triage Agent to analyze the alert, click Triage with Aura. The Overview tab is populated with the Agent's analysis. See Overview Tab for details.

If you need to stop the analysis before it is fully completed, select Analyzing.
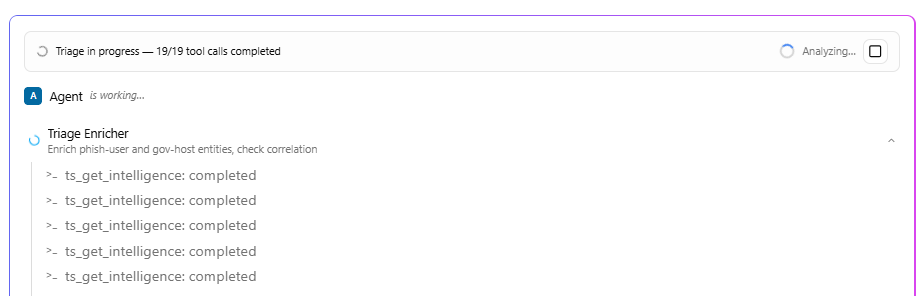
The more options menu (...) in the top-right of the header includes two additional actions:
-
Escalate to Incident: Promote this alert to an incident. Clicking this option opens the Create Incident dialog-box pre-populated with the alert rule name, severity, and priority. Fill out the details using the instruction from Creating Incidents. You must have the required permissions to perform this action. See Incident Actions and Their Required Permissions.
-
Triage Verdict: Select a triage verdict (Promote, Investigate, Monitor, or False Positive). In the Set triage verdic dialog box that opens, select High, Medium, or Low confidence, provide a rationale, and then click Save verdict.
 Overview Tab
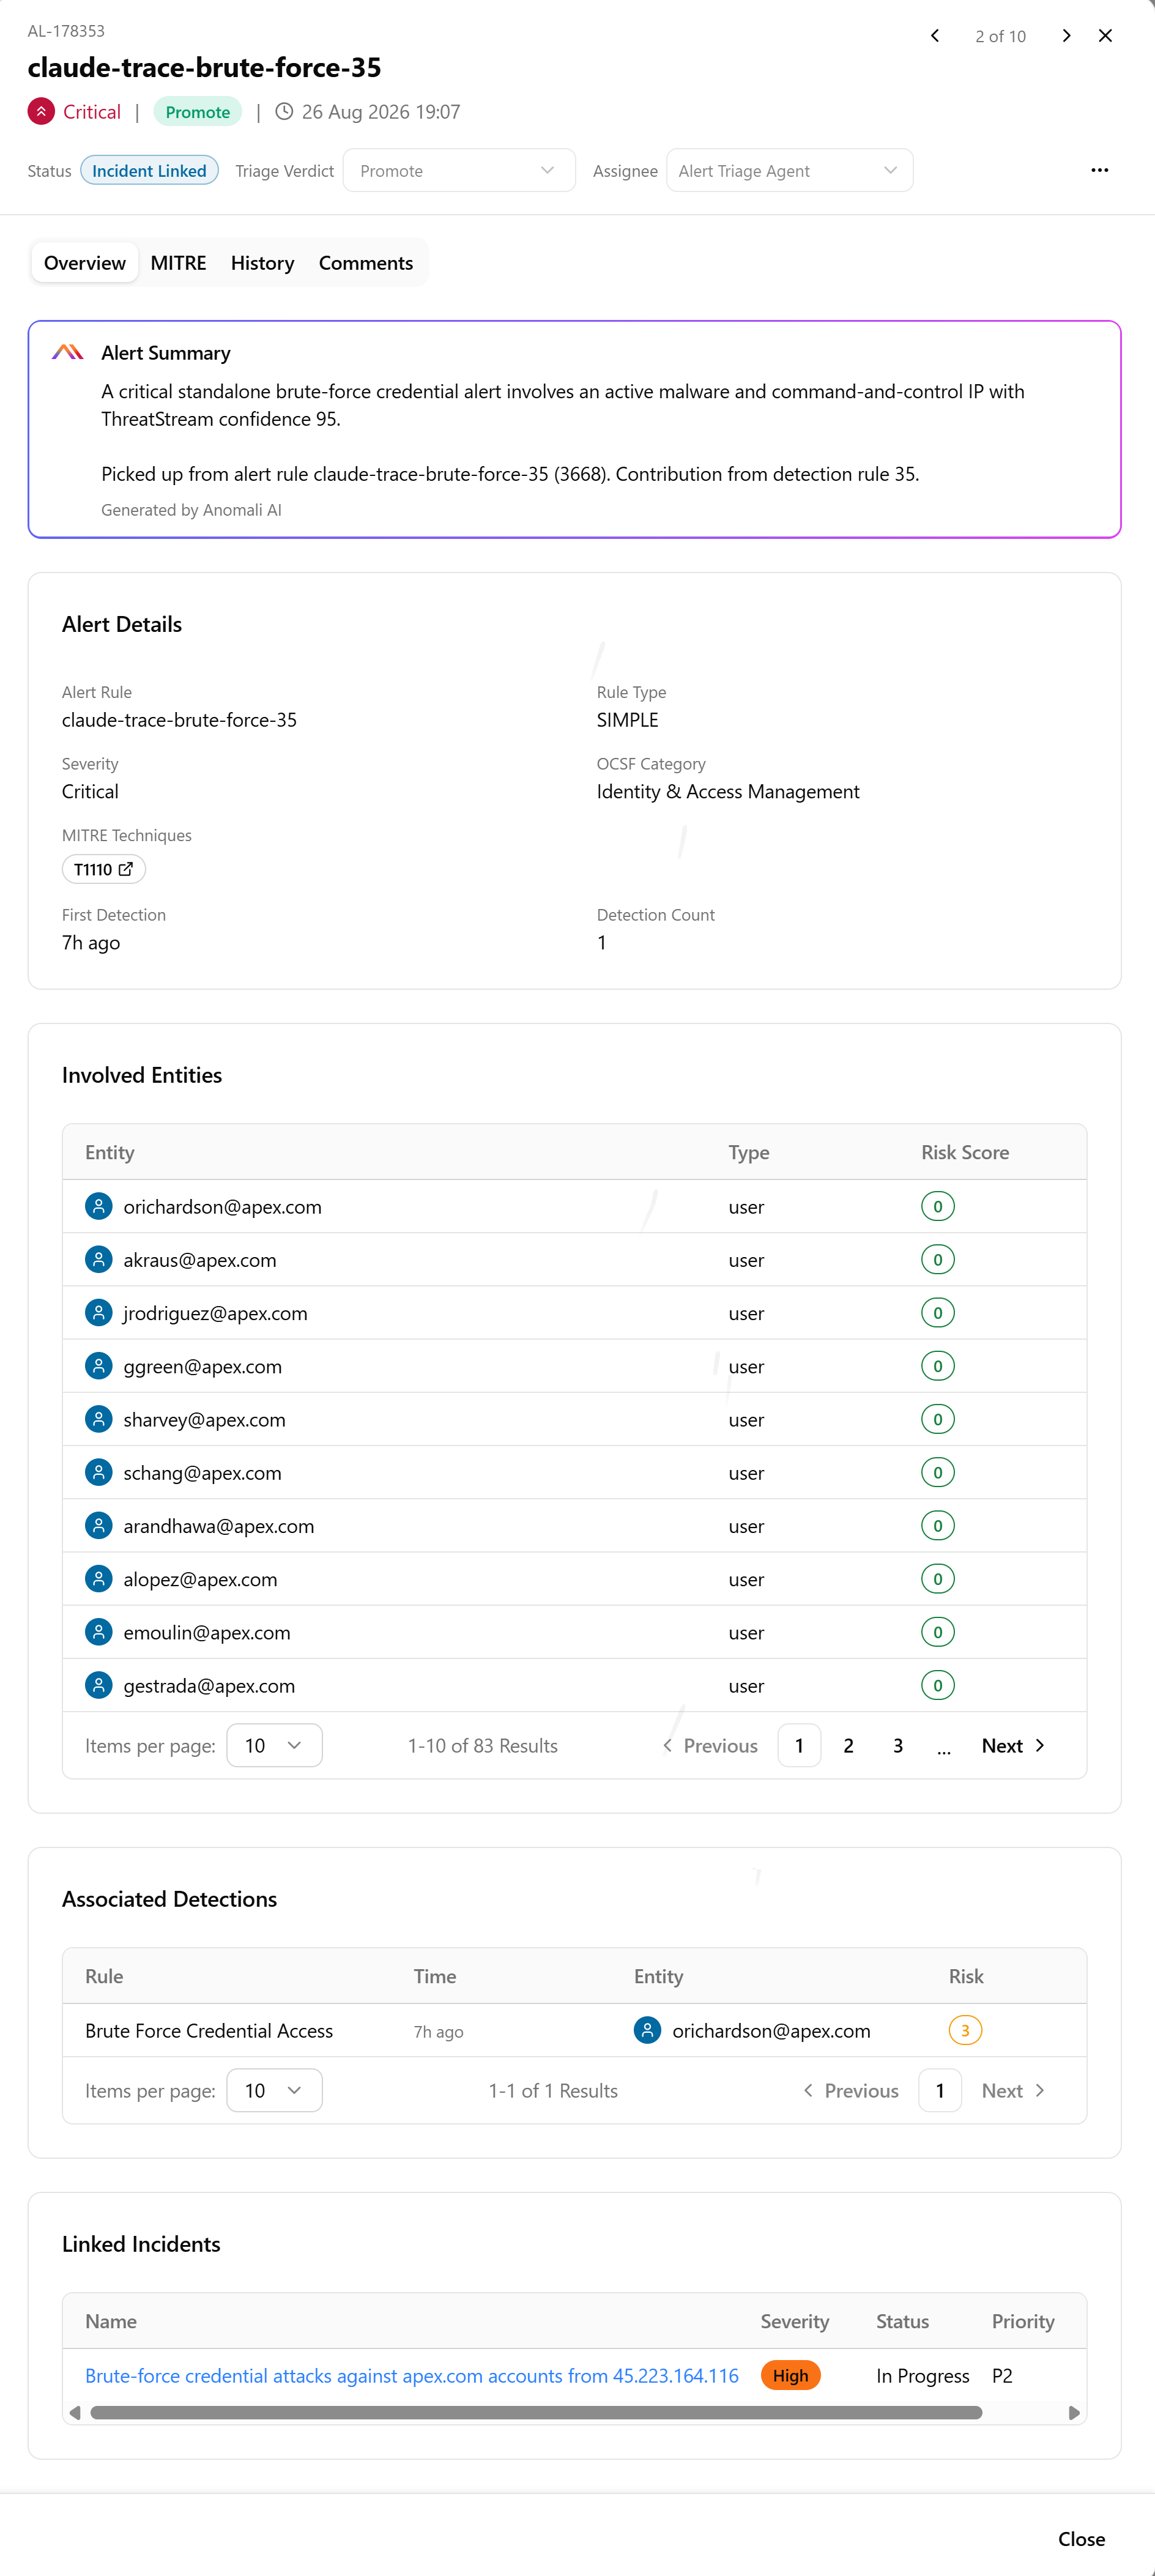
The Overview tab provides an at-a-glance summary of the alert rule, involved entities, constituent detections, and any linked incidents, supplying all the information an analyst needs to assess a match before deciding on a triage verdict.
The tab contains the following sections:
| Section Name | Description |
|---|---|
| Alert Summary | Anomali AI-generated alert summary. |
| Agent |
Alerts analyzed by Alert Triage Agent include the following fields:
|
| Enrichment |
Summary of all involved threat model entities with their risk context. |
| Alert Details |
Metadata that includes the following:
|
| Associated Detections |
A paginated table of the constituent detections that triggered this alert:
|
| Linked Incidents |
Any incidents that arise as an escalation of this alert.
|
(Click the image to enlarge it.)
 MITRE Tab
The MITRE tab shows the full ATT&CK mapping for this alert.
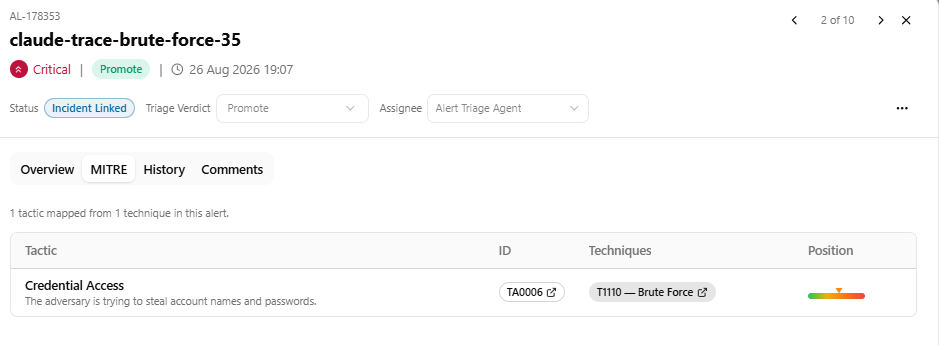
A summary line at the top states the number of tactics and techniques mapped. For example: "1 tactic mapped from 3 techniques in this alert."
The tab displays a table with the following four columns:
-
Tactic—ATT&CK tactic name and description
-
ID —tactic code with a link to the MITRE knowledge base
-
Techniques—chip badges for each technique mapped under the tactic; each chip shows the technique ID and name, with a link to the MITRE knowledge base
-
Position—color-coded bar showing the relative position of this tactic within the ATT&CK kill chain
 History Tab
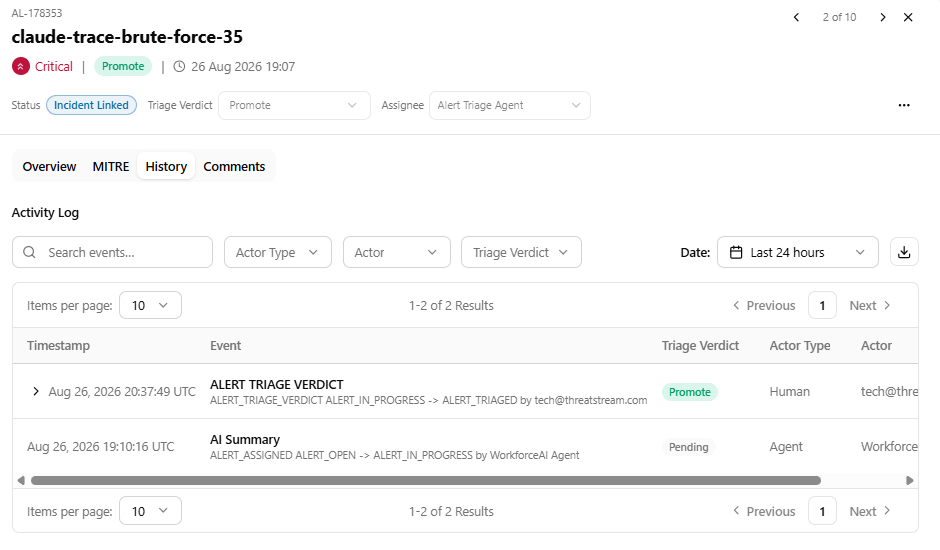
The History tab provides a chronological record of all triage verdicts recorded on this alert. Each entry shows the analyst name, the verdict applied, and the timestamp of the action. Use this tab to review how the alert has been assessed over time and to understand any changes in verdict.
 Comments Tab
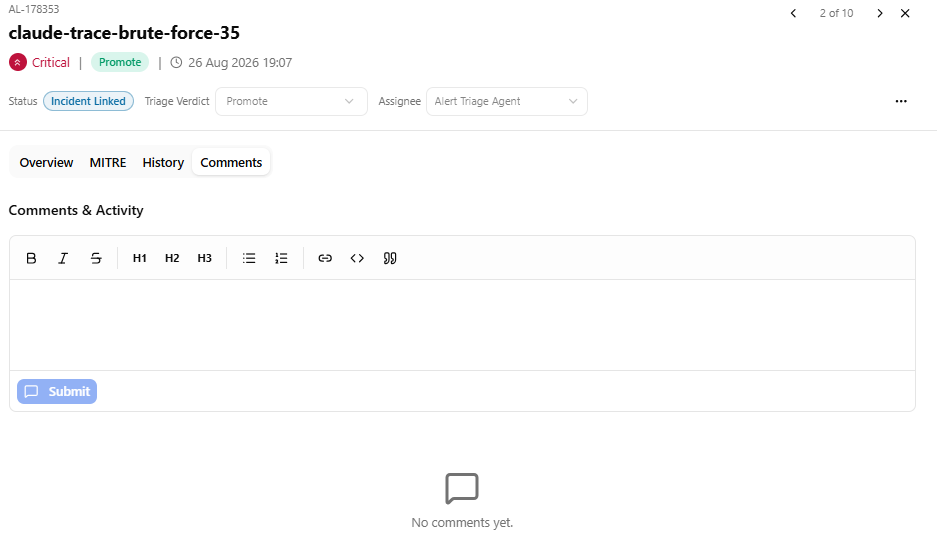
The Comments tab enables you to add notes and context to the alert record.
A rich-text composer at the top of the tab includes all the standard text formatting tools.
Click Submit to post a comment.
Each comment entry shows:
-
Author name and timestamp
-
The actual comment
-
Per-comment action icons: Reply (
 ) available on all comments and Edit (
 ) available only on your own comments.