Importing Observables
Note: For background information on importing observables into ThreatStream, see Importing Observables with Import Assistant
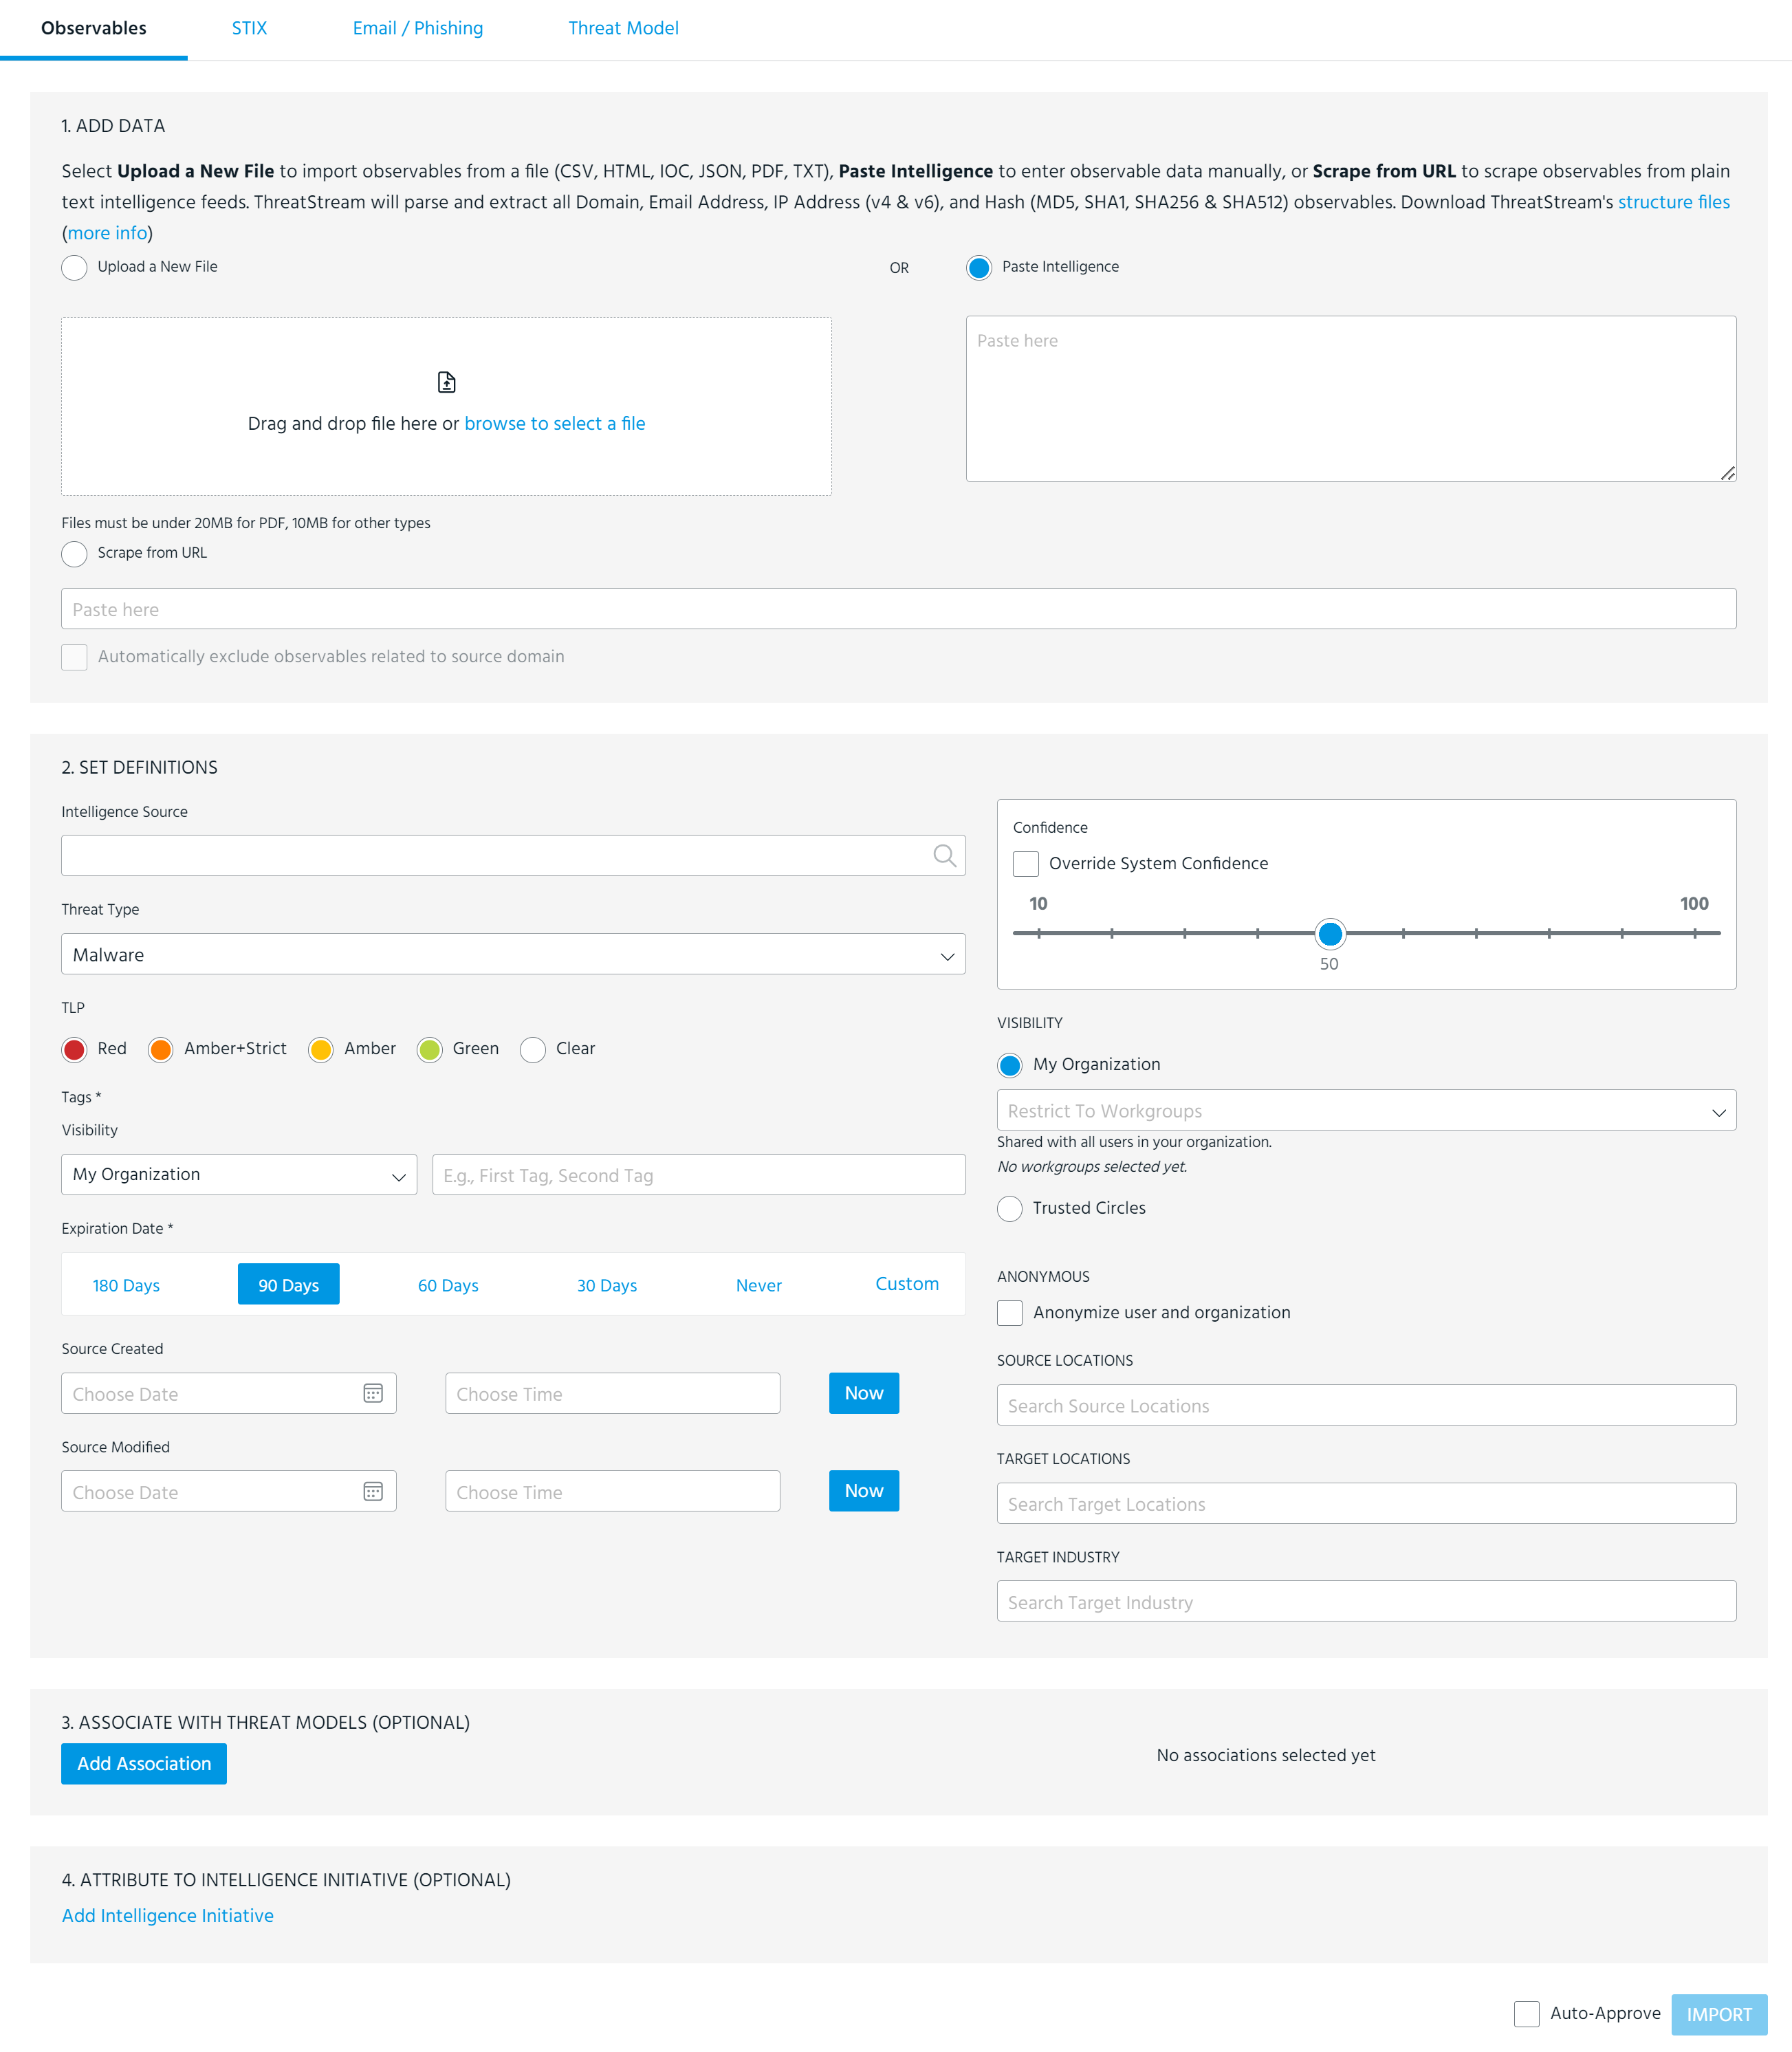
With the Import Assistant, you can import observables by using a file upload, entering data manually, or scraping observables from plain text intelligence streams.
To import observables:
-
Click the Import icon
 .
. - Click Observables.
-
Add observable data to the import session.
If you are importing observables from a file:
-
Click Upload a New File.
- If you are importing structured data, make sure the data is in the format specified in Guidelines for Structured Data.
- The maximum size supported for the file is 20 MB for PDF files and 10 MB for all other file types.
-
Drag and drop the file onto the import wizard OR click to browse and select the file.
If you are entering observable data manually:
- Click Paste Intelligence.
-
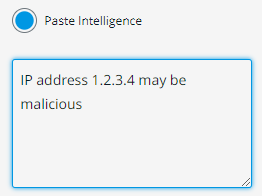
Enter the observable information in the text box.
You can enter free-form text that contains observable information or specific observables, as shown in the following example.
If you are importing observable data from a plain text intelligence stream or direct link to a file:
- Click Scrape from URL.
- Enter the URL for the intelligence stream or file.
- (Optional) Select Automatically exclude observables related source domain. When this option is selected ThreatStream will automatically exclude email, domain, or URL observables that share a domain with the URL you entered in the previous step.
-
-
In the Set Definitions section, specify data for the following parameters:
Field Definition Intelligence Source (Optional) Where the data originated.
Note: You can create advanced search filters based on Intelligence Source for observables imported by your organization using the
import_sourcefield. See Constructing Advanced Observable Search Filters for more information.Confidence Confidence value you want to assign to the imported observables.
The Confidence value is re-assessed when ThreatStream analyzes the imported data. To enforce the Confidence value you selected, check Override System Confidence.
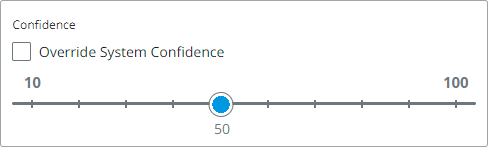
Note: For email, hash, and IPv6 observables, the Confidence value you select will be enforced in all cases.
Threat Type Threat Type for the imported observables. ThreatStream will assign extracted observables an indicator type based on the threat type you specify.
Malware is the default threat type. Imported observables will be assigned a Malware related indicator type if you do not select a different threat type.
For a list of threat types and their associated indicator types, see Threat Types in ThreatStream.
Note: Observables assigned APT indicator types are never made inactive by ThreatStream, regardless of the expiration date you set during the import process. However, you can change the status of APT type observables which you have the privilege to edit from Active to Inactive at any time. See Editing Observable Details for more information.
TLP (Optional) TLP (Traffic Light Protocol) color to the imported observables. Tags (Optional) Tags that you want to associate with imported observables. To add a tag, select a Visibility setting, enter the tag, and click Add. Tags can contain spaces.
Tags assigned the My Organization visibility setting are only visible to your organization. Tags assigned the Anomali Community visibility setting are visible to users of all organizations that have access to the observable. See Adding Private Tags to Observables for more information.
As you type the first few characters of the tag, the 20 most used tags in your organization from the previous seven days are displayed. Enable the Preferred Tags Only toggle to display and search though only the list of preferred tags. Alternatively, enter * to display preferred tags.
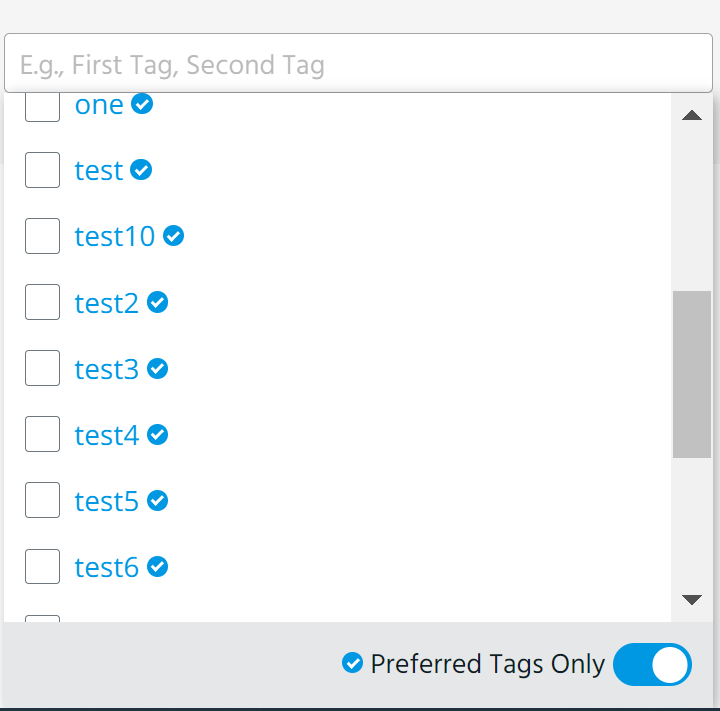
Additionally, you can associate imported observables with system imported Vulnerabilities by entering the Vulnerability title as a tag and assigning it the Anomali Community visibility setting. Only Vulnerabilities imported by ThreatStream—not those created by your organization or other organizations—can be associated with observables during import via tagging. You can associate non-system imported Vulnerabilities with observables after import, from the details page of the observable or Vulnerability.
Note:
-
Tags must be 2,000 characters or less.
-
Observables can contain up to 200 tags per organization. Tags added by other organizations do not count toward this limit.
Visibility Visibility setting for the imported observables. You can select Trusted Circles or My Organization.
Note: The Anomali Community Visibility setting, which was previously available for imported observables, is no longer supported. Effective April 14, 2023.If you select Trusted Circles, select trusted circles from the drop down menu. If you selected Override System Confidence in the previous steps, only trusted circles with Allow Members to Override System Confidence enabled are displayed. For more information, see Creating a Trusted Circle.
If you select My Organization, you can further restrict the visibility to specific workgroups in your organization. To do so, click Restrict to Workgroups and select the workgroups to which you want to give exclusive access to the observables. You can only select workgroups you are a member of during import. At least one user in the workgroups you select must have the Approve Import privilege. For more information on workgroups, see Restricting Access to Intelligence with Workgroups .
Anonymous If you want to anonymize your user and organization information, select Anonymize user and organization. Users outside of your organization with access to the observables will see "Analyst" in all fields that would otherwise display an organization or user name.
Source Locations Select source locations. ThreatStream supports 325 locations (as defined by STIX 2.1) including 27 regions, 247 countries, 50 US States, and Washington DC. Target Locations Select target locations. ThreatStream supports 325 locations (as defined by STIX 2.1) including 27 regions, 247 countries, 50 US States, and Washington DC. Target Industry Select target industries. Target industries available for selection are defined by the STIX 2.1 Industry Sector vocabulary.
Expiration Date (Optional) Select an Expiration Date on which the observables will become inactive.
By default, Expiration Date is set to 90 days from the current date, but there is no limit on how long observables can remain active. As a best practice, if you know an observable to be short lived (such as a
tor_ip), specify a closer expiration date.You can edit the expiration date of individual observables when reviewing the import session. See Approving Import Jobs for more information.
Source Created
(Optional)
Specify the date and time when the observables were created by their original source.
Click Now to use the current time.
Source Modified
(Optional)
Specify the date and time when the observables were last modified by their original source.
Click Now to use the current time.
Note: Any values you set in the Set Definition section are maintained as defaults the next time you open the Import Assistant.
-
-
(Optional) Create SROs between the new entity and other entities in the Anomali Threat Model. See Managing STIX Relationship Objects (SROs) for more information on SROs.
- Next to Associate with Threat Models, click Add Association.
- On the Association tab, select the Threat Model entities or observables with which you want to create the association. Use the Created By and Search By filters to quickly locate the required Threat Model entities.
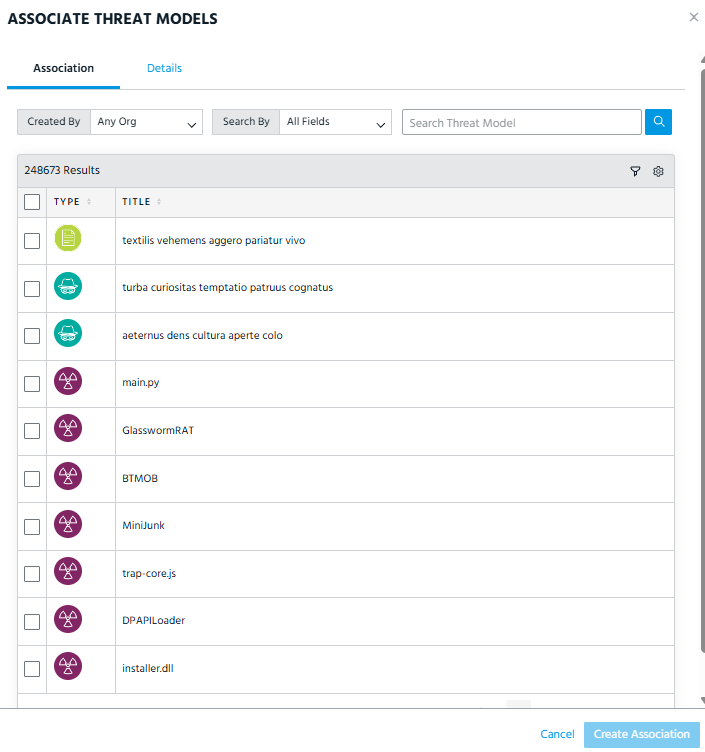
-
On the Details tab, select the SRO of interest under Type.
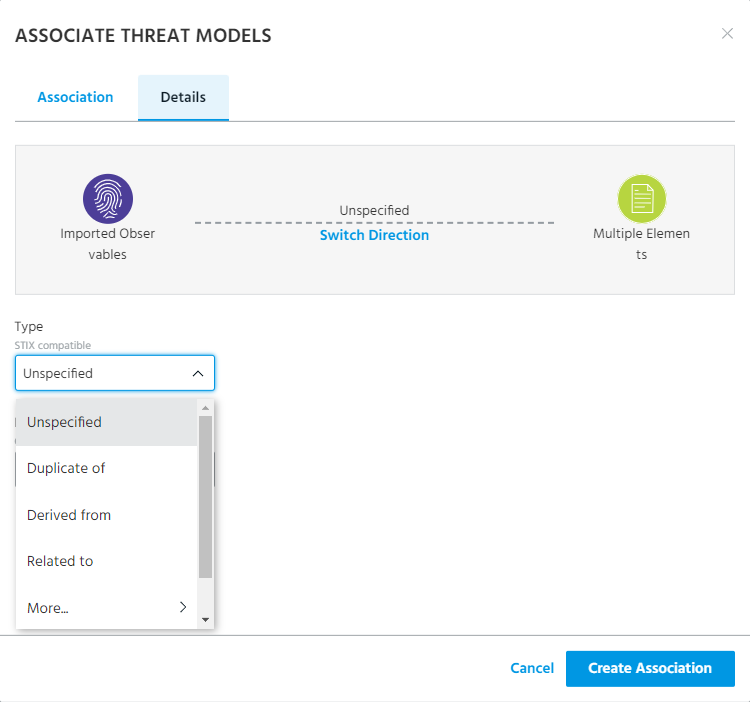
Hover over More... to view a full list of available SROs.
To add a custom SRO, click Custom and enter the custom value under Custom Type.
- Click Switch Direction to select the desired SRO direction.
- (Optional) Add a Label to the SRO to provide additional contextual information for the association.
-
Click Create Association. The SRO has been created.
-
Click Add Intelligence Initiative to associate intelligence initiatives with the observables. Select one or more intelligence initiatives, and click Add.
-
If you have Approve Import privileges, you can select Auto-Approve to automatically approve the import job upon submission.
When ThreatStream finishes processing the import job, all observables validated by ThreatStream will become active immediately.
After submission, you can access the approved import job from the Imports list view screen. See Viewing Import Jobs Associated With Your Organization for more information.
Note: If you select Auto-Approve, you will not have the opportunity to review and force-add any excluded observables.
-
Click Import.
An import job is created and assigned an ID. Unless you selected Auto-Approve, the job is in Ready to Review status and must be approved for the observables to become part of your threat intelligence on ThreatStream. See Approving Import Jobs for more information on approving import jobs. If you do not have Approve Import privileges, you can still edit the parameters of the import job you submitted. See Managing Import Jobs .
See Attributing Organizational Goals with Intelligence Initiatives for more information about intelligence intiatives.