Creating a PIR 
Note: Only Organization Administrators or users with Create PIR Configuration permission can create PIRs. See Managing Roles for details.
To create a PIR, you must define a PIR question, configure its execution schedule, select input types, define the analytical process and configure the outputs.
You can create PIRs in two ways:
-
Use a suggested PIR from the Requirement Hub and then configure all PIR workflow steps. For details, see Requirement Hub.
-
Create a PIR from scratch, as described below.
To create a PIR:
-
Navigate to ThreatStream Next Gen > Priority Intelligence Requirements.
-
Click New PIR. The Create New PIR workflow opens.
-
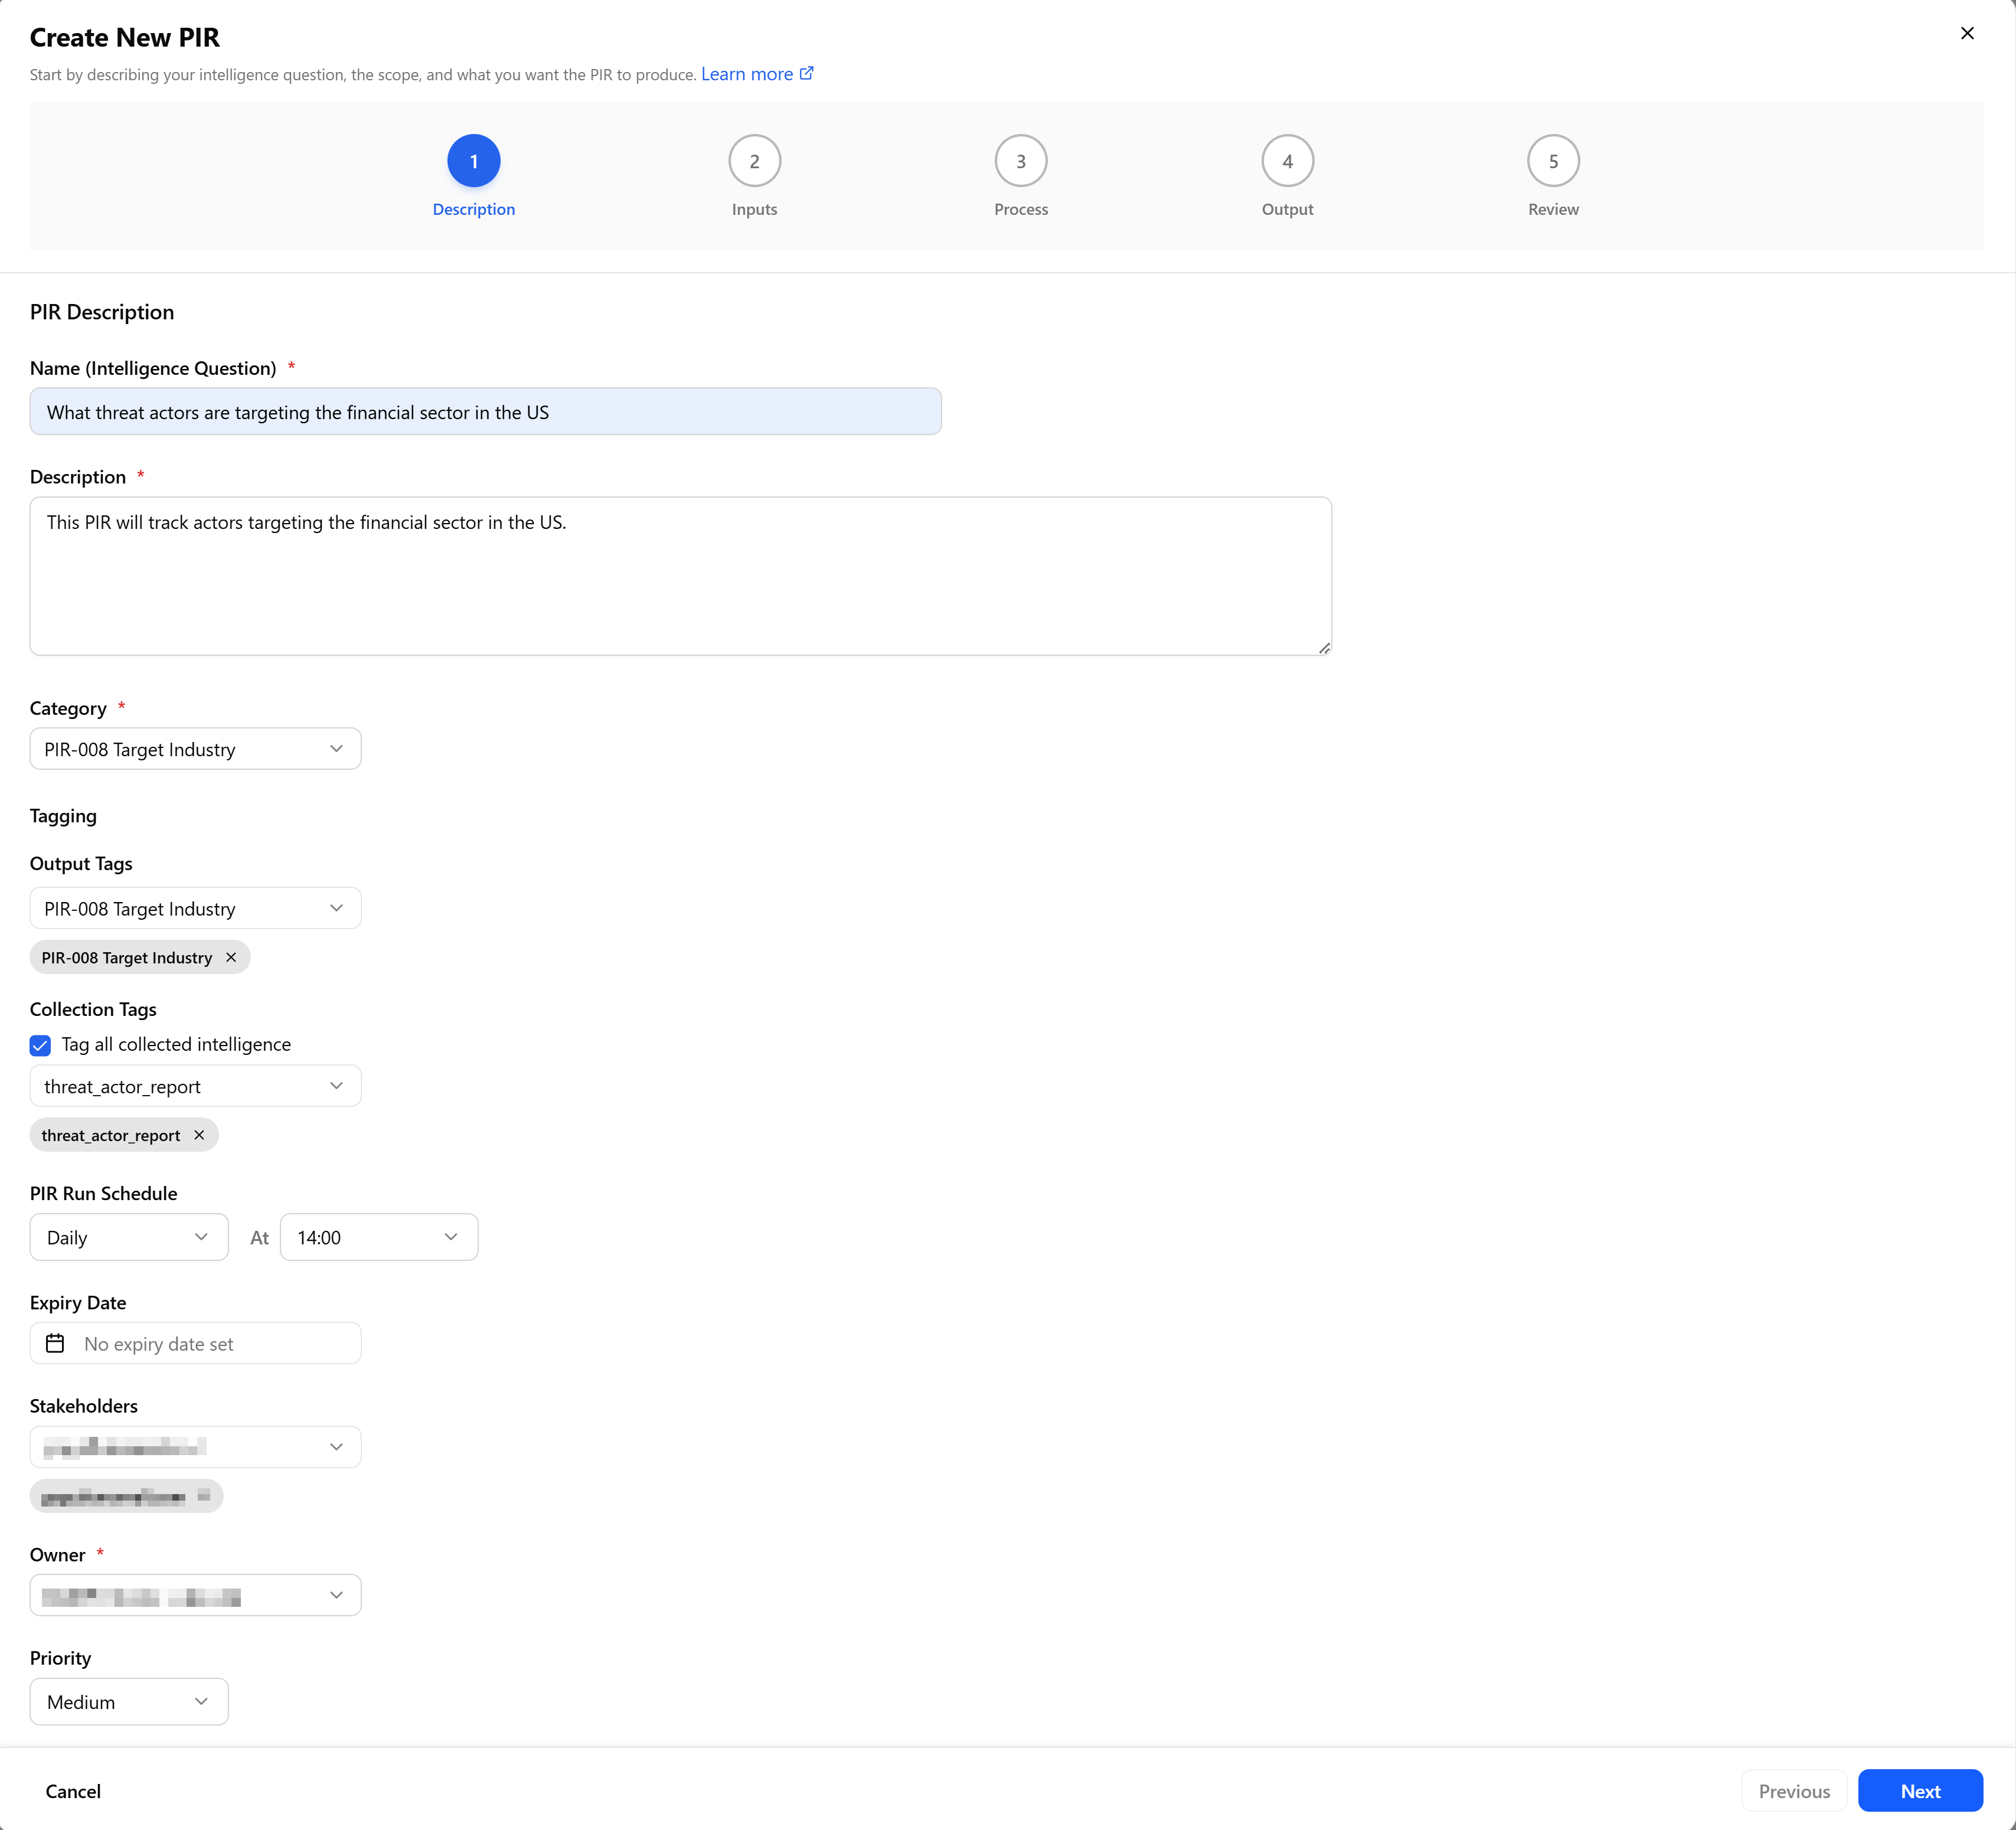
On the Description step, configure the following fields:
Field Description Name (Intelligence Question) Enter a concise title that identifies the intelligence requirement or a question that this PIR should address.
For example,Credential Phishing Campaigns Targeting Executive Accounts
Ransomware Campaigns Targeting Healthcare Sector
What phishing campaigns are targeting our organization?
What threat actors are targeting the financial sector in the US?
For more PIR examples, see Examples of Priority Intelligence Requirements.
Description Enter a description for the PIR.
When creating a description, Anomali AI reads a PIR name and description to understand the focus of your PIR and uses that context to suggest relevant process steps on the Process step. This means:-
Naming specific threat actors or malware families helps the AI recommend targeted correlation steps
-
Naming specific techniques helps the AI recommend technique-specific analysis
-
Vague language (for example, "monitor for threats") gives the AI nothing specific to work with, resulting in generic recommendations
Category Select one of the following PIR categories: PIR-001 Domain Risk, PIR-002 Infrastructure Risk, PIR-003 Tech Stack Risk, PIR-004 Emerging Threats, PIR-005 Phishing, PIR-006 Supply Chain, PIR-007 Brand Monitoring, PIR-008 Target Industry, PIR-009 Target Location, and PIR-010 Source Location.
Output Tags (Optional) Configure tags to be automatically applied to the outputs generated by the PIR.
When you select a PIR category, the corresponding category tag is automatically assigned to the PIR. To apply additional tags to the outputs generated by this PIR, select one or more tags from the available list or create custom tags. The available tags are derived from the ThreatStream Preferred Tags list. See Adding Preferred Tags to Intelligence for more information.To create a custom tag, enter the desired tag value into the search field and click +.
Collection Tags (Optional) Configure tags to be automatically applied to observables, threat models, and investigations matched during PIR execution. These tags make it easier to find, filter, and operationalize the intelligence identified by the PIR.
A tag with the PIR name is automatically assigned. To apply additional tags, select Tag all collected intelligence, and then select one or more tags from the available list or create custom tags. The available tags are derived from the ThreatStream Preferred Tags list. See Adding Preferred Tags to Intelligence for more information.
To create a custom tag, enter the desired tag value in the search field and click +.
Note: This is a limited-availability feature. Contact Anomali Customer Support for more information.
PIR Run Schedule (Optional) Define how often you want to run this PIR. Select frequency (daily, weekly, or monthly) and time. By default, you current local hour is displayed. Anomali recommends selecting a time right before you begin your work, so it would be ready before you start working. On each run, PIR checks what it has previously added to output and filters out already-reported findings.
Expiry Date (Optional) Set an expiry date for the PIR. When the expiry date is reached the PIR automatically changes its status to Paused and stops running on its schedule.
Stakeholders (Optional) Select ThreatStream users who you think is interested in this PIR.
Owner Select an owner of the PIR.
Priority Define priority of the PIR—Critical, High, Medium, or Low.
-
-
Click Next.
-
On the Inputs step, define what data needs to be analyzed:
Field Description Inputs Select the type of intelligence for the PIR to track—Observables/IOCs, Threat Models, or Investigations.
Anomali leverages AI to assist with recommended inputs. The AI icon ( ) in the platform indicates the areas where AI is at work for your PIR.
-
Use Observables when your PIR is focused on detecting or tracking specific technical threat data. When selecting Observables as an input type, you can further refine your PIR by selecting specific observable types such as IP Addresses, Domains, URLs, File Hashes, and Email Addresses.
-
Use Threat Models when your PIR is focused on understanding adversary context, behavior patterns, or campaign activity. When selecting Threat Models as an input type, you can choose from the threat model types available in your organization. You can get granular in the type of threat model that will be searched.
-
Use Observables and Threat Models when you think that your PIR can benefit from combining both input types.
-
Use Investigations when your PIR should incorporate findings from ongoing analytical work that is contained in an ongoing or past investigation.
Lookback Window Limit input data to records created or modified within a time window. Default value is 24 hours and the setting is enabled by default for newly created PIRs.
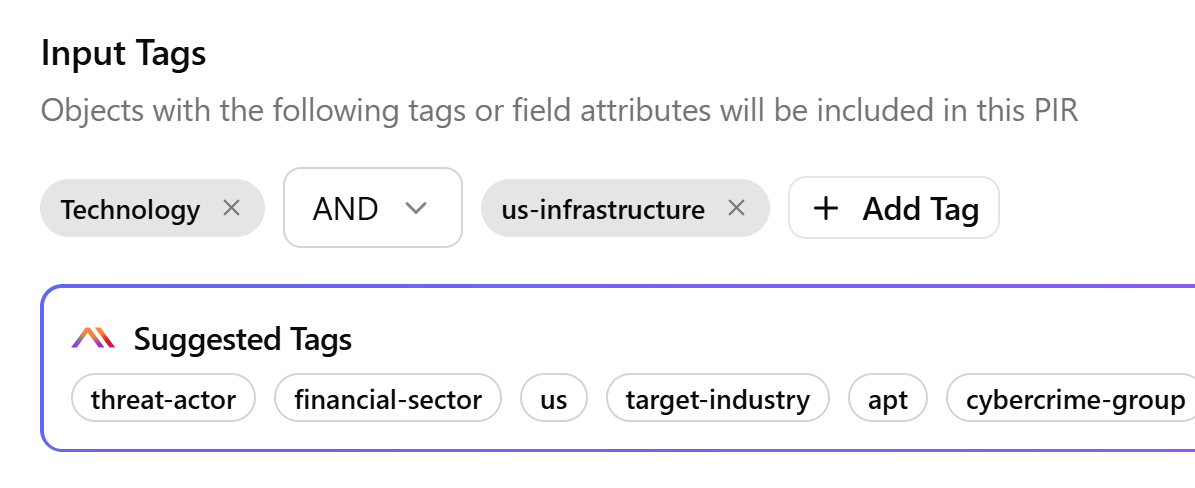
Input Tags (Optional) Select tags that are available in your ThreatStream instance by which you want to filter intelligence that will be included in the PIR.
You can add tags from the Suggested Tags section, or add your own tags by using the + Add Tag button. When you select tags, only observables, threat models and investigations that carry those tags will be included in the PIR results.Additionally, within the Selected Tags section, you can choose which tags must be included (AND operator) and which tags are optional (OR operator). These tags will be used to match observables and threat models with the specified tags.
For example, when all observables and threat model types are selected as inputs and two tags are combined using the AND operator, the PIR includes only observables and threat models that contain both tags. If the OR operator is used, the PIR includes observables and threat models that contain either tag. If neither tag is found in the observables or threat models, the PIR returns no results.
Included Keywords (Optional) Enter comma-separated keywords by which you want to filter intelligence that will be included in the PIR. Note that keywords are only applied to selected threat models and investigations. Keywords are disregarded for observables. When you enter keywords, the PIR uses them to search threat model content and to identify which investigations are included in results.
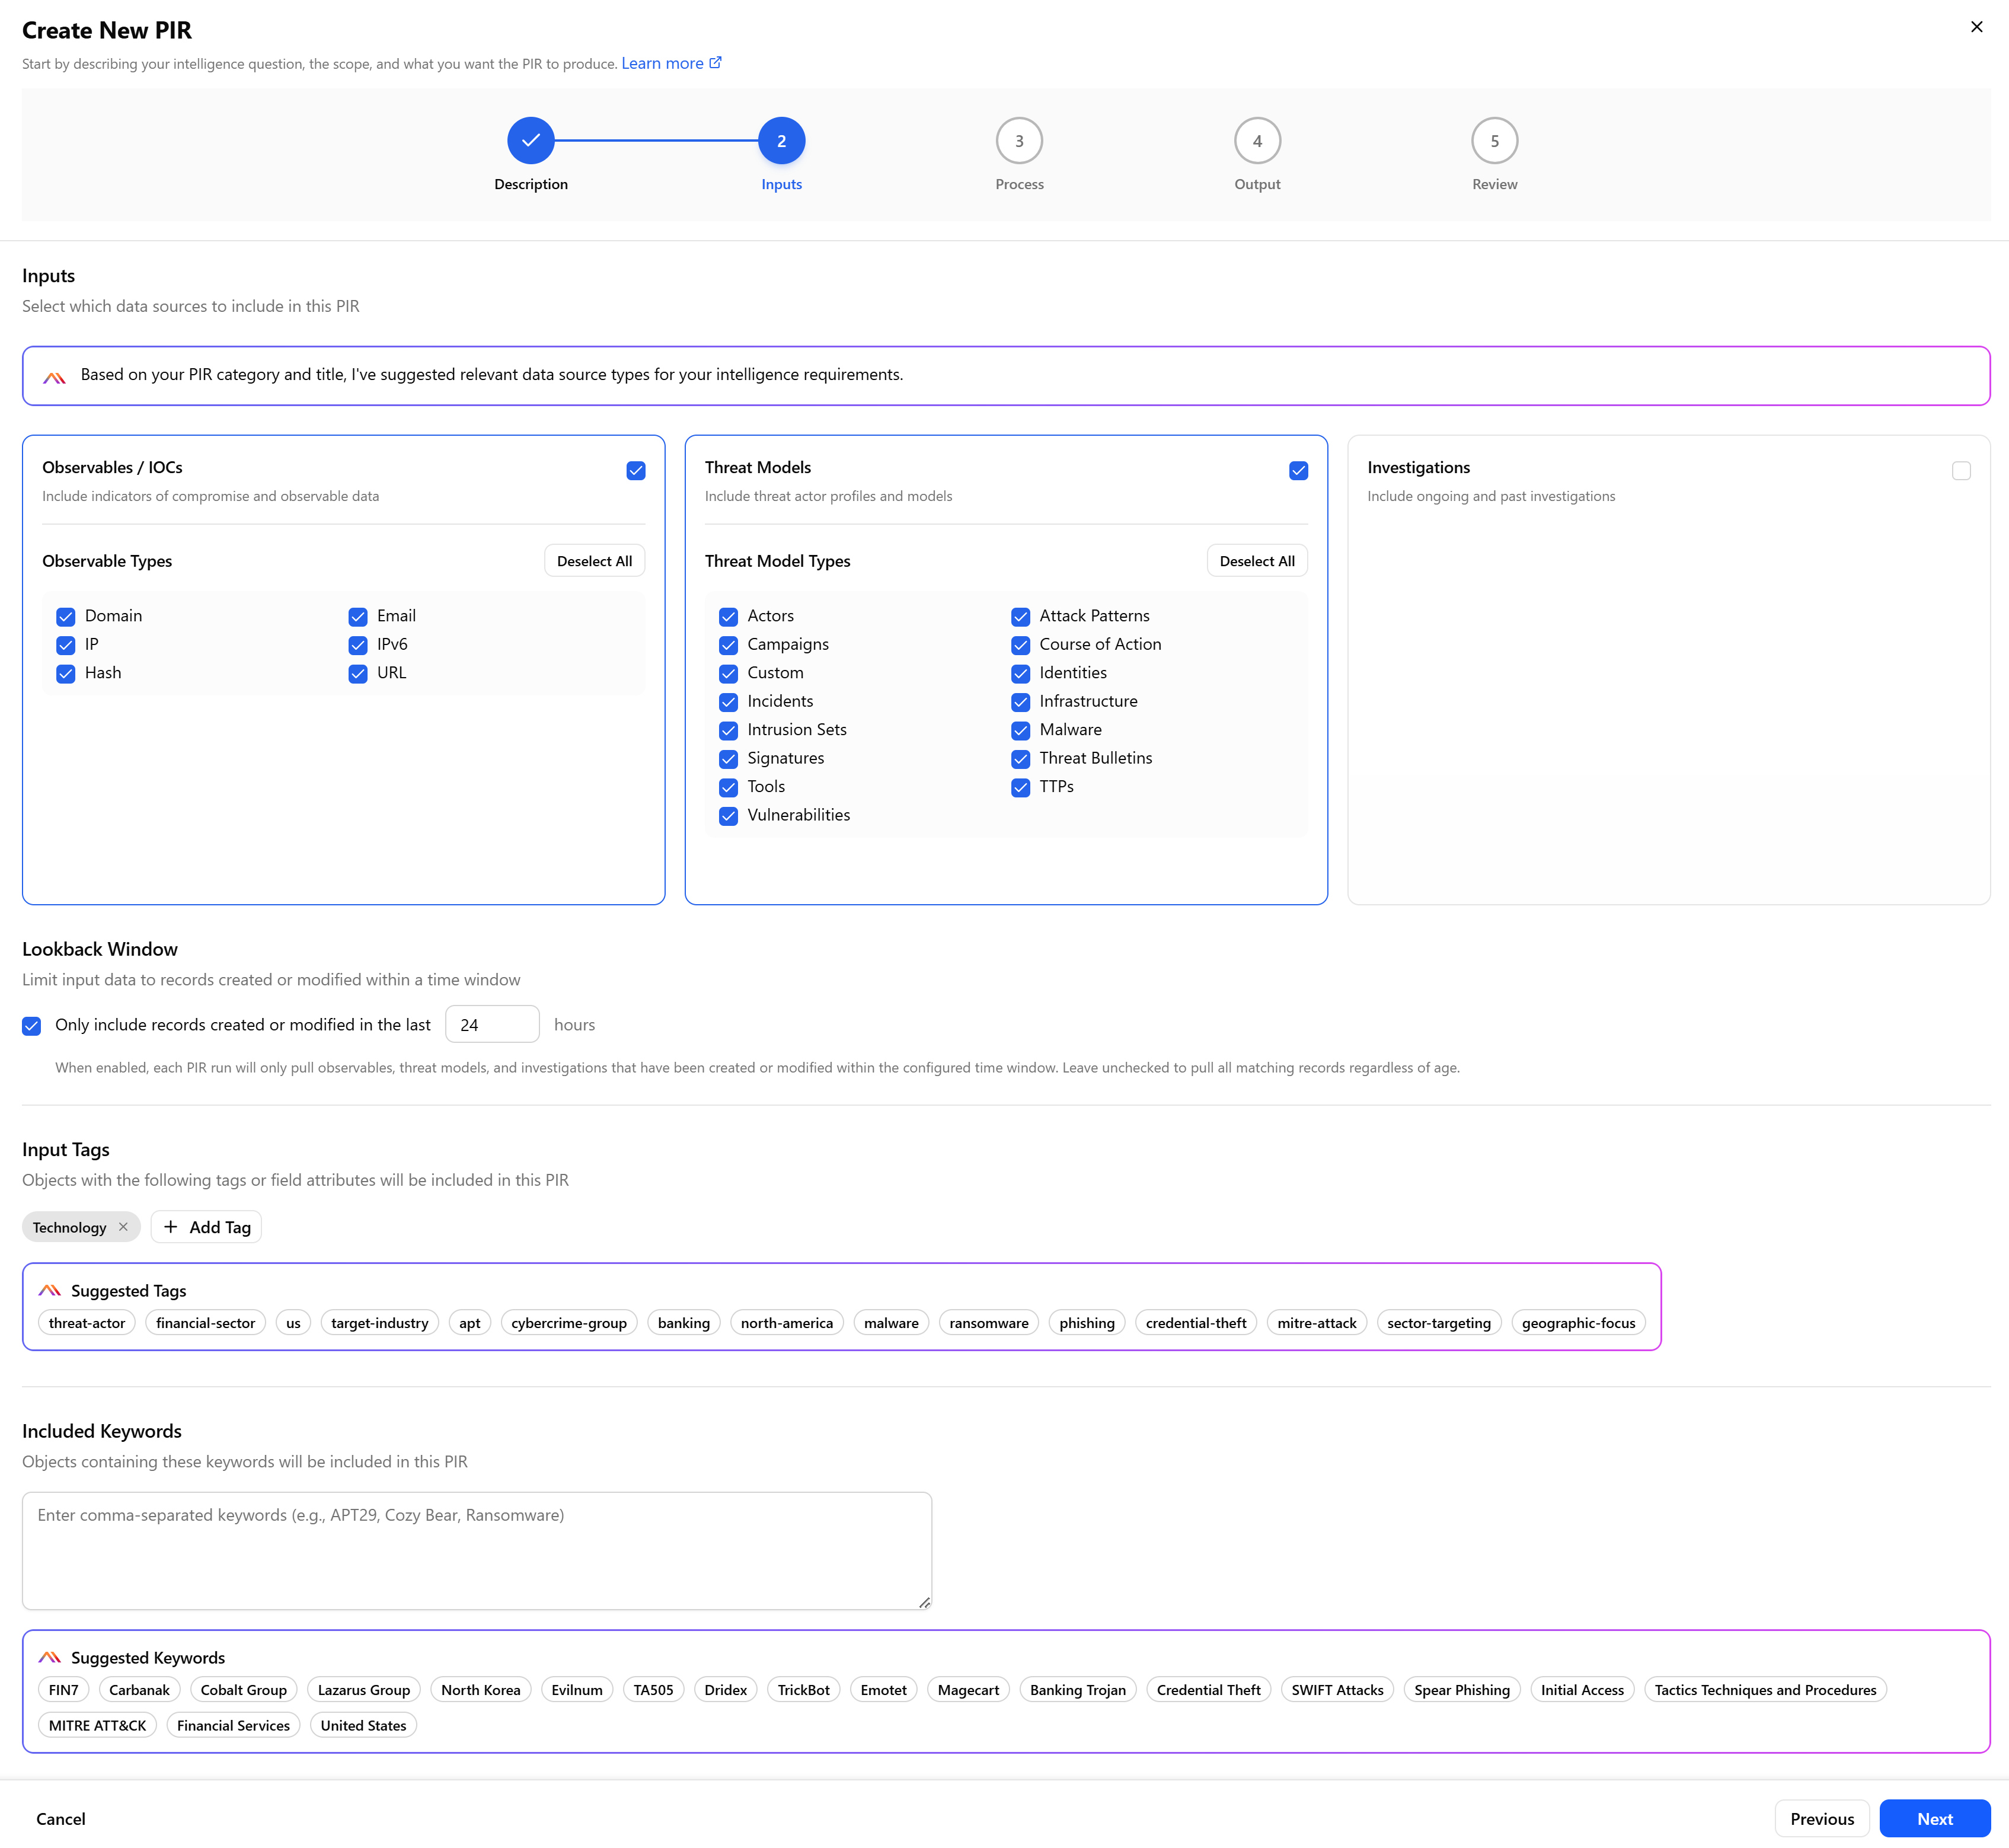
When a threat model is selected as an input along with a tag and a keyword, the system applies an OR operator between the tags and keywords. For example, a threat model is selected as an input. A single tag labeled financial-sector is selected on the Inputs page. The following keywords are also included: initial access broker, BlackCat, ALPHV, LockBit, double extortion, RaaS, credential harvesting, financial services.
-
-
Click Next.
-
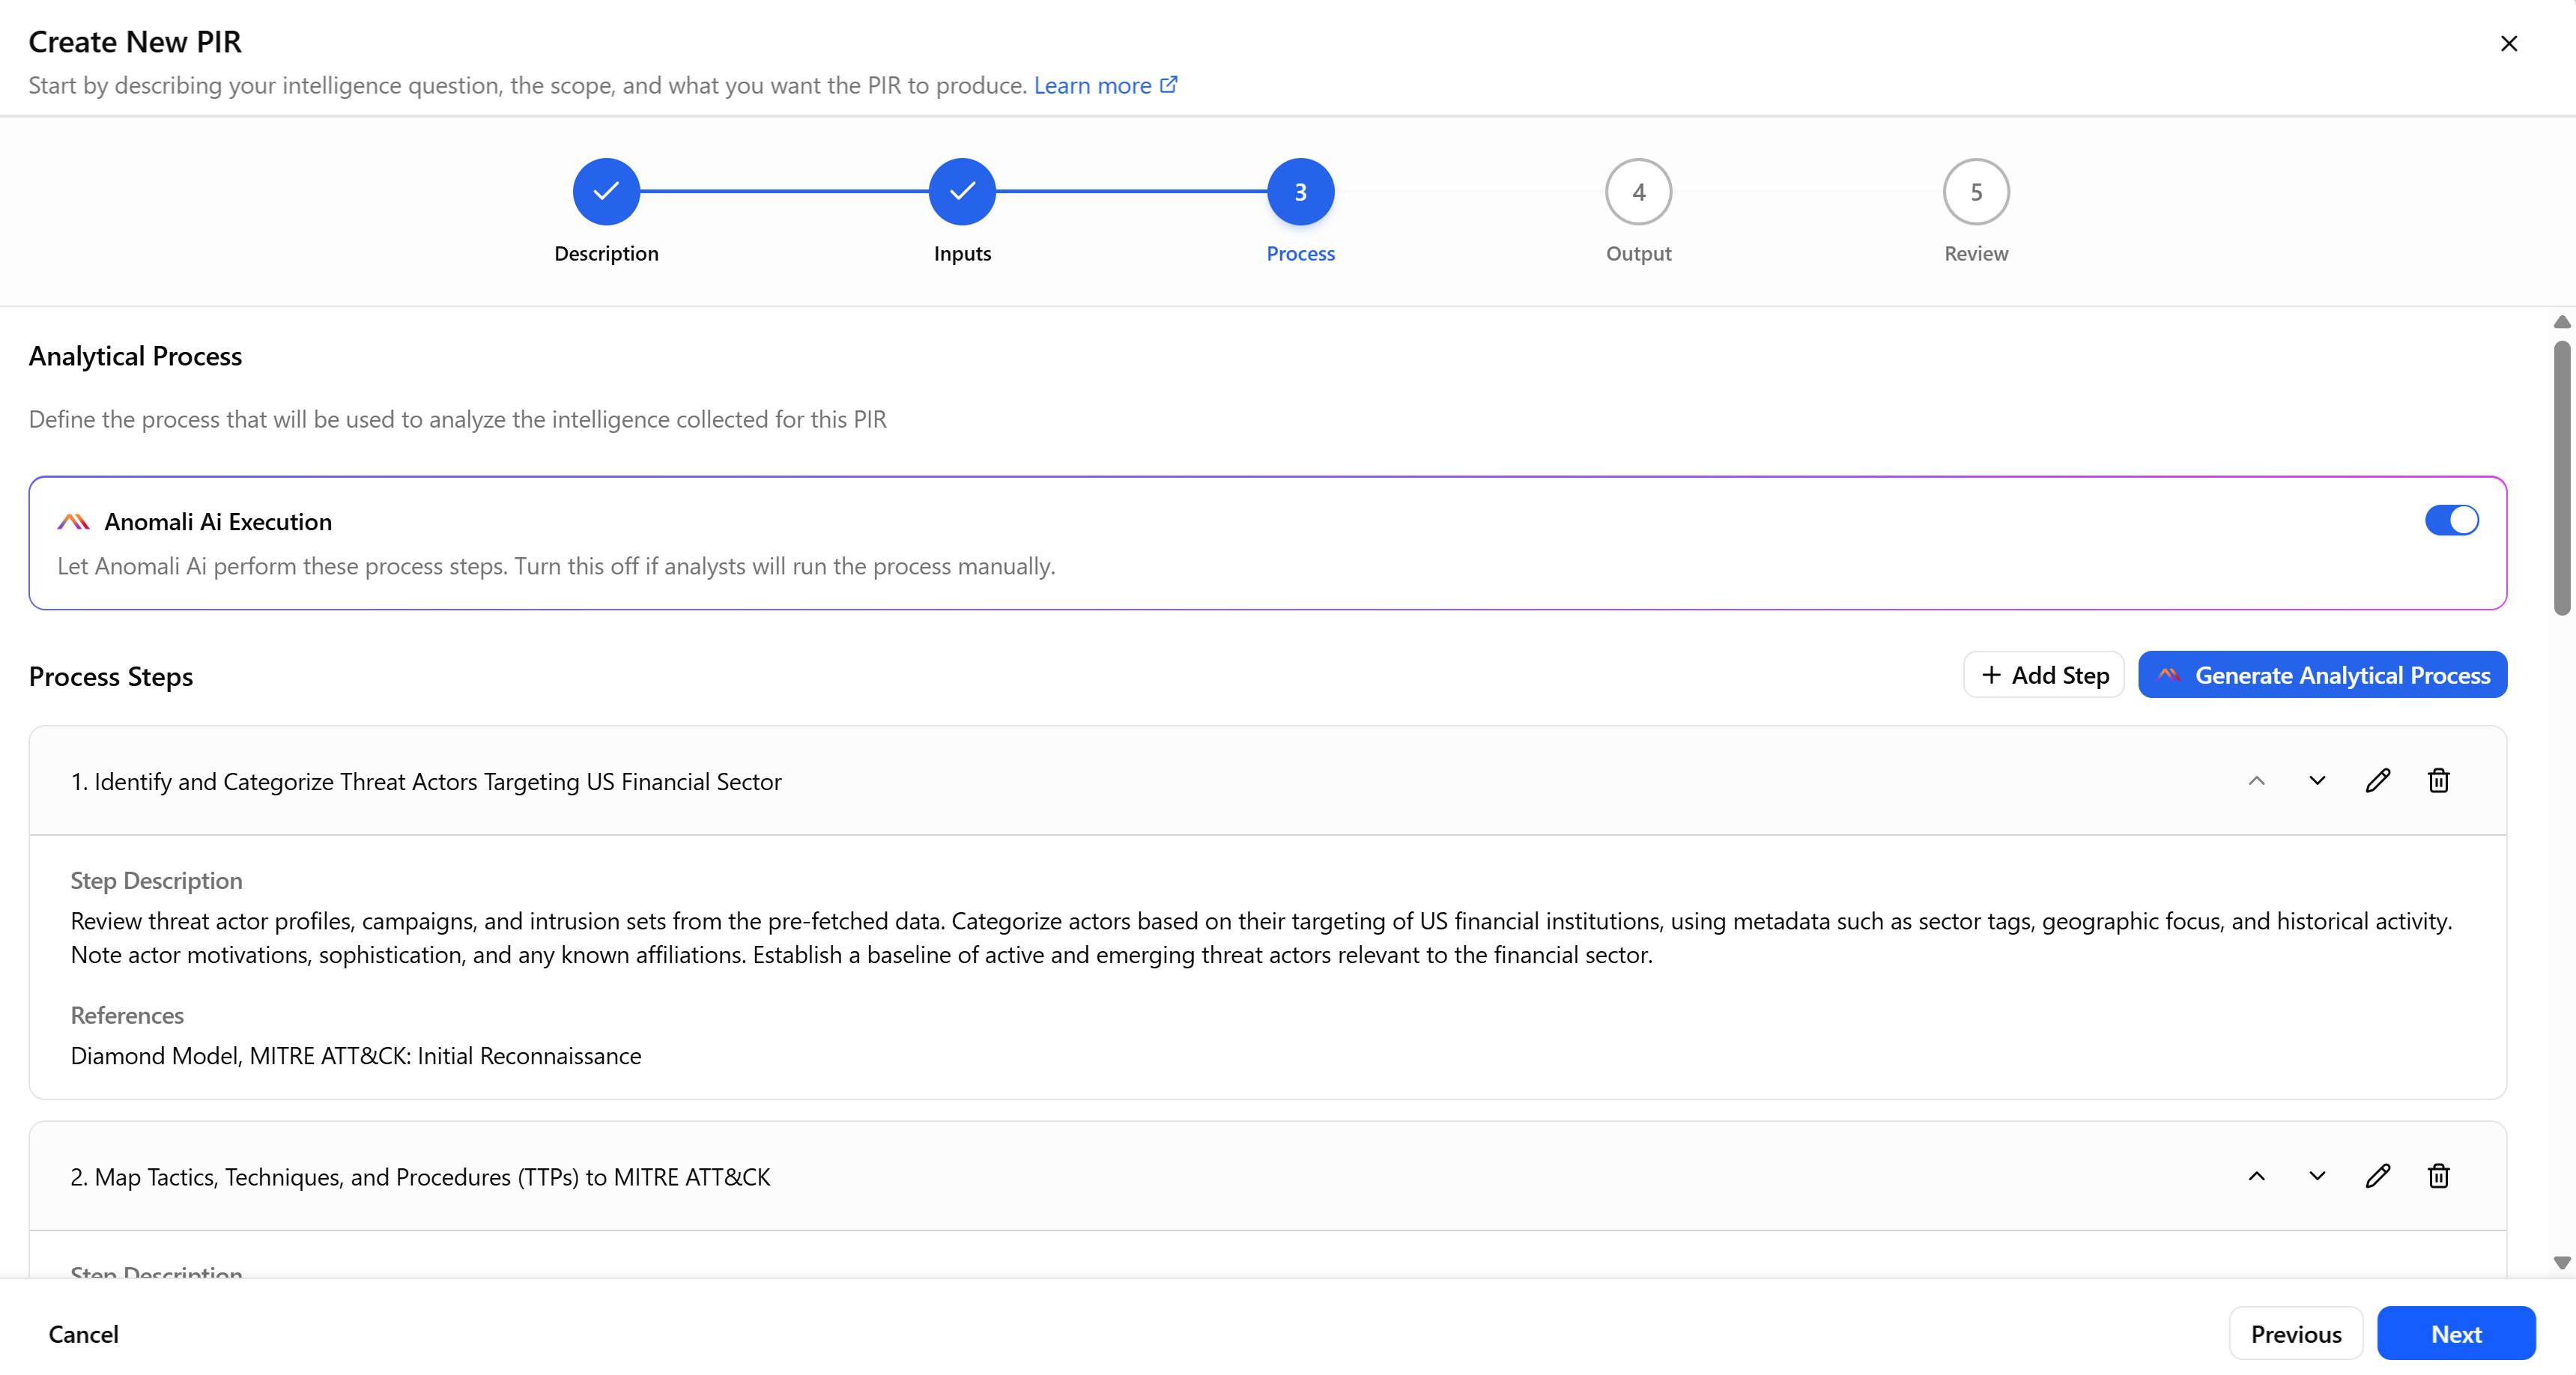
On the Process step, define the process to be used to analyze the intelligence collected for this PIR.
Select one of the following options:-
Anomali Ai Execution: (Recommended) Analytical process generated with Anomali AI based on the input provided on the previous steps.
To generate the proposed process, click Generate Analytical Process.If necessary, customize the steps of the generated prompt using the following action buttons:
-
Move one step up (
 )
) -
Move one step down (
 )
) -
Edit (
 )
) -
Delete (
 )
)
-
-
Manual Process: Manually defined steps of an analytical process. A manual process step is a text-based instruction that an analyst will follow when the PIR executes and surfaces results.
To learn more about the usage of AI-generated and manual processes, refer to AI-Generated vs. Manual PIR Process.
To define a manual process:
-
Click Add Step.
-
Enter a step title, description, and links to external resources.
-
Click Add Step.
-
Repeat steps A-D as many times as you need.
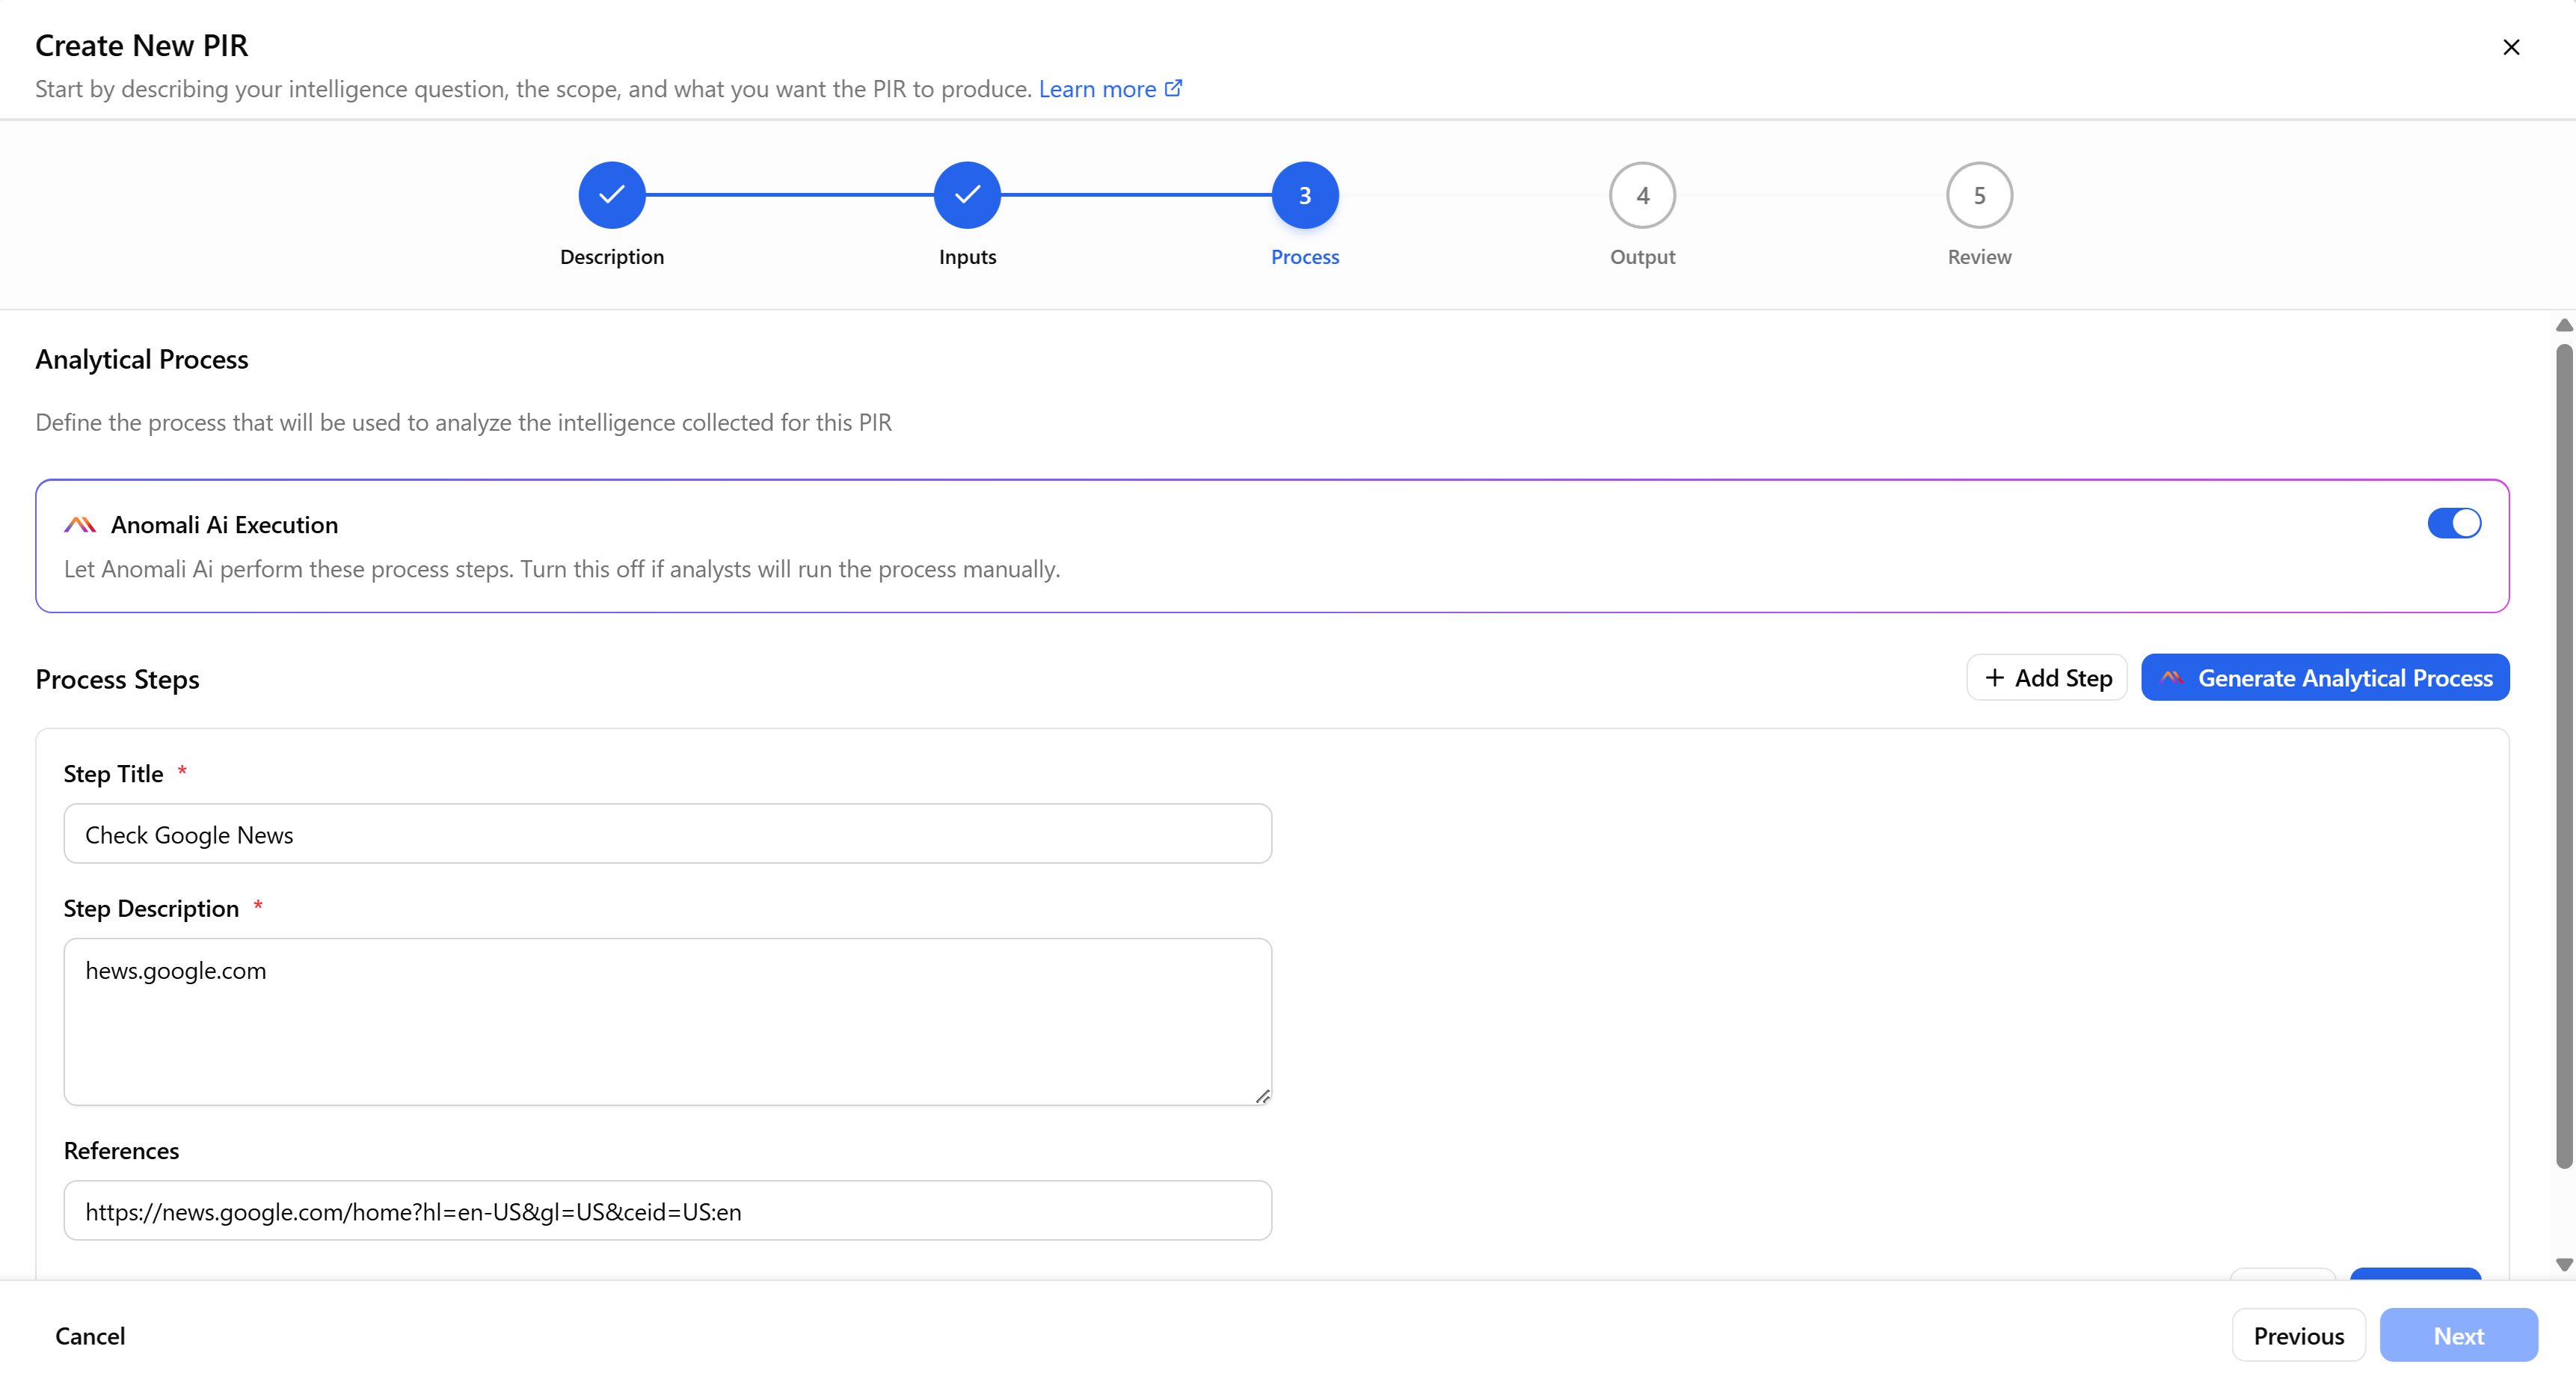
Note: If you add any time references to your analytical step descriptions (for example, "analyze last 7 days"), they will be ignored during data fetching because time range filtering is determined by the PIR Run Schedule and Lookback Window settings only. To match your intended time range, configure the Lookback Window setting either on the Inputs step or on the PIR details page after completing the PIR creation. For details, see Step 2: Inputs and Editing PIRs. -
-
- Click Next.
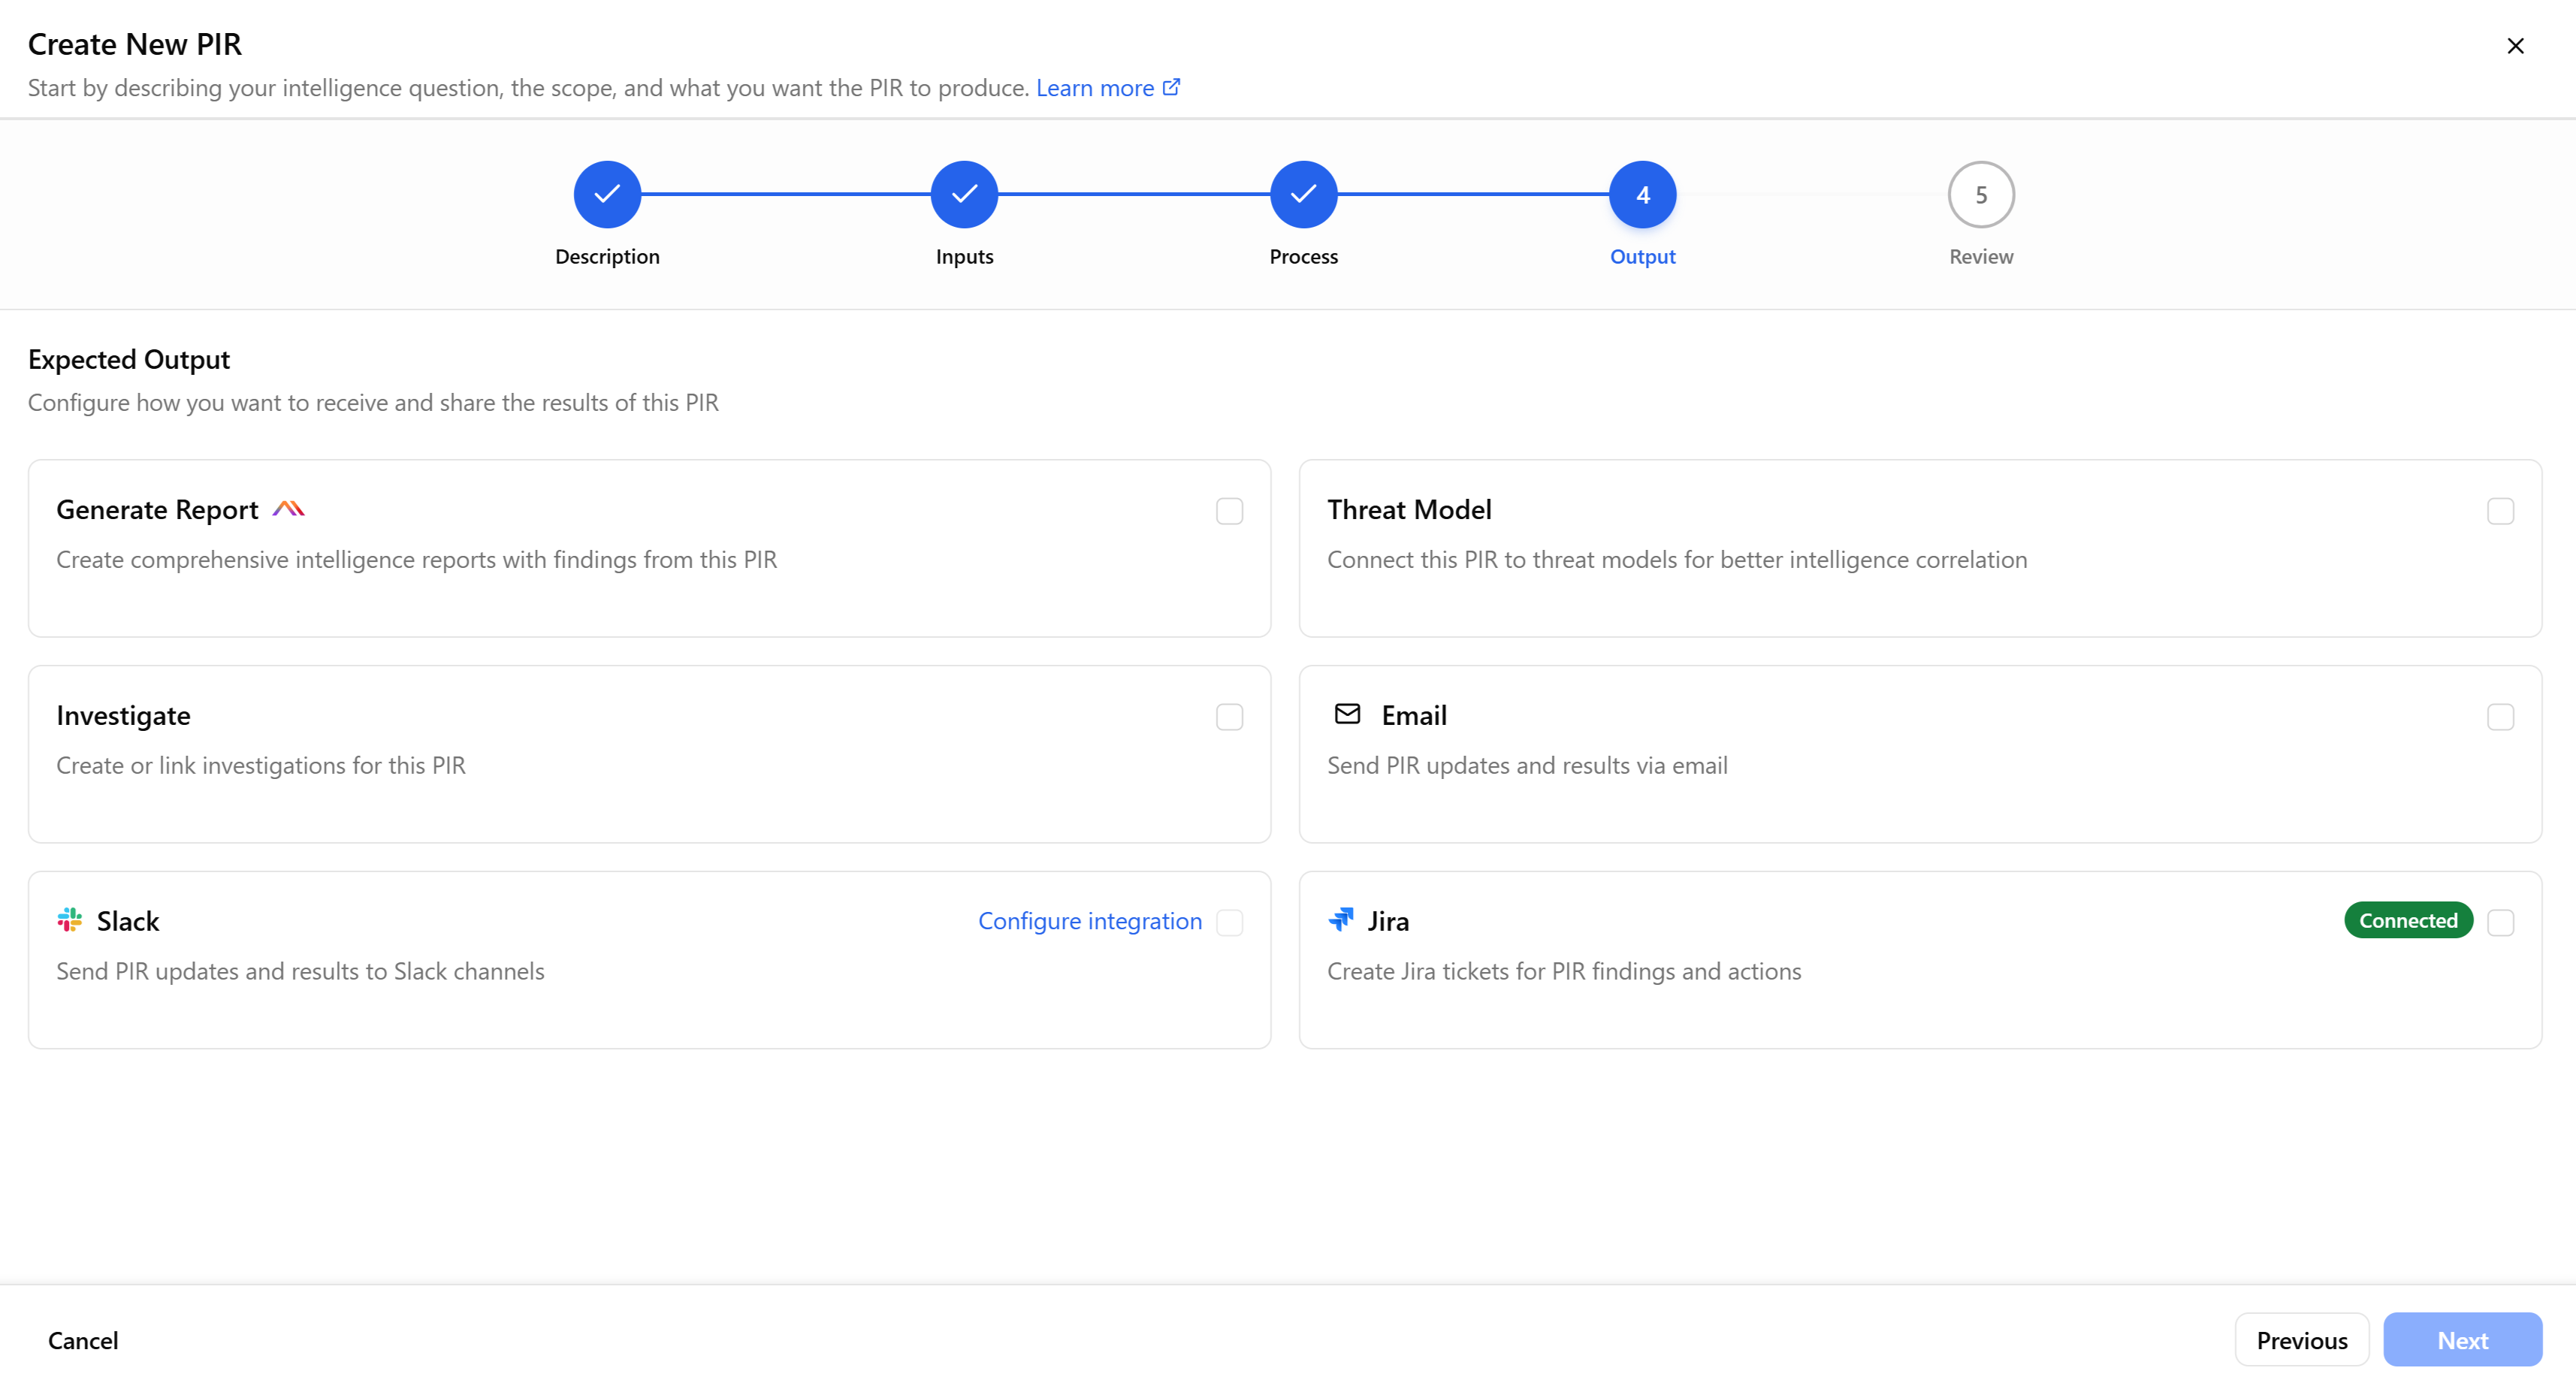
- On the Output step, configure how you want to receive and share the results of the PIR. The right combination depends on who needs the results and what they need to do with them.
You can select the following options:- Generate Report: Creates a shareable, Anomali AI-generated summary that can be used for briefings or shared with stakeholders.
When you select a report as an output, the embedded AI suggests a report template based on your PIR category and inputs. You can use the drop-down menu to select a different report template or use the template that Anomali AI recommends. Report templates are managed in the Reporting section of ThreatStream Next Gen. See Using Report Templates for details.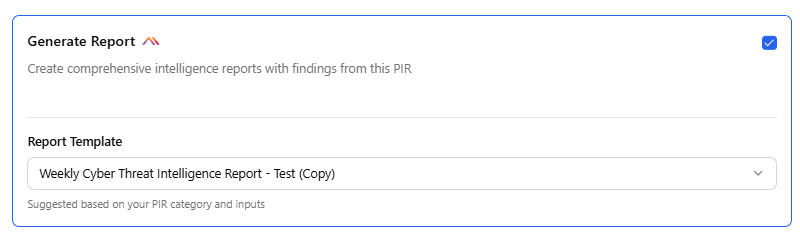
- Threat Model: Select one of the following actions:
- Add Threat Model—if you want to add a new threat model to your ThreatStream environment after each PIR run. Then select the threat model type, enter a name, and specify whether to associate collected observables with the threat model generated by this PIR.
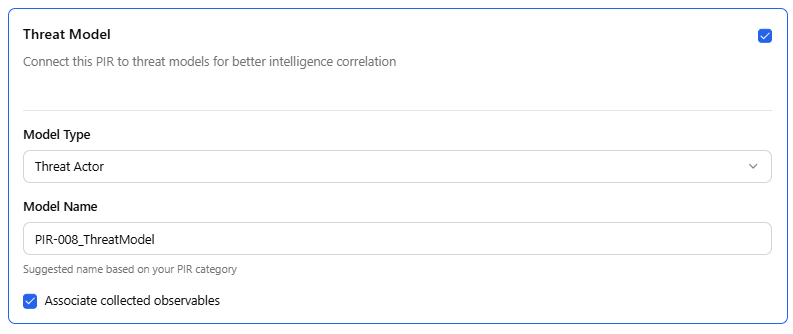
- Existing/Append—if you want to update an existing threat model in your ThreatStream environment with PIR findings after each PIR run. Then select the threat model type, choose the threat model to update, and specify whether to associate collected observables with it. Each PIR run updates the selected threat model with the latest analysis and adds new associations while preserving existing ones.
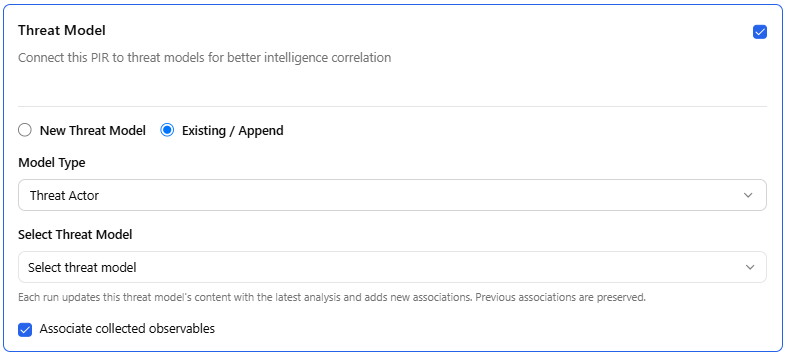
Note: Associate collected observables is a limited-availability feature. Contact Anomali Customer Support for more information.
- Add Threat Model—if you want to add a new threat model to your ThreatStream environment after each PIR run. Then select the threat model type, enter a name, and specify whether to associate collected observables with the threat model generated by this PIR.
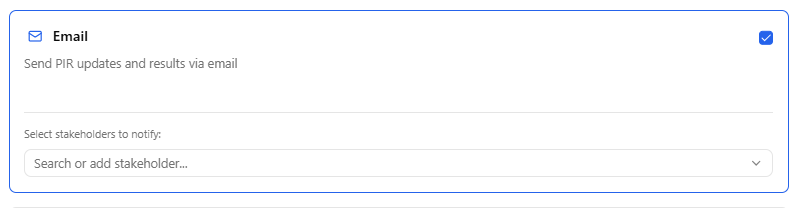
- Email: Sends automatic PIR updates to the specified users outside the platform, who need visibility into PIR findings.
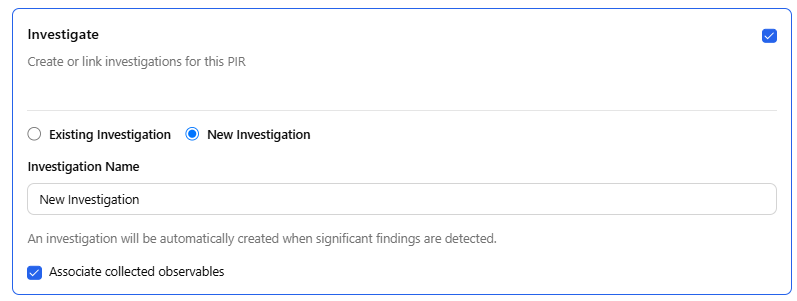
- Investigate: Creates a new investigation or links this PIR to an existing investigation in ThreatStream. Additionally, you can define whether you want to associate collected observables with the investigations triggered by this PIR.
- Slack: Sends PIR updates and results to Slack users and public channels of your organization. See Configuring Slack Output for details.
- Jira: Creates Jira tickets for PIR findings and actions. See Configuring Jira Output for details.
- Generate Report: Creates a shareable, Anomali AI-generated summary that can be used for briefings or shared with stakeholders.
- Click Next.
- On the Review step, review all PIR details.
If you need to edit a section, click Edit and make the necessary changes.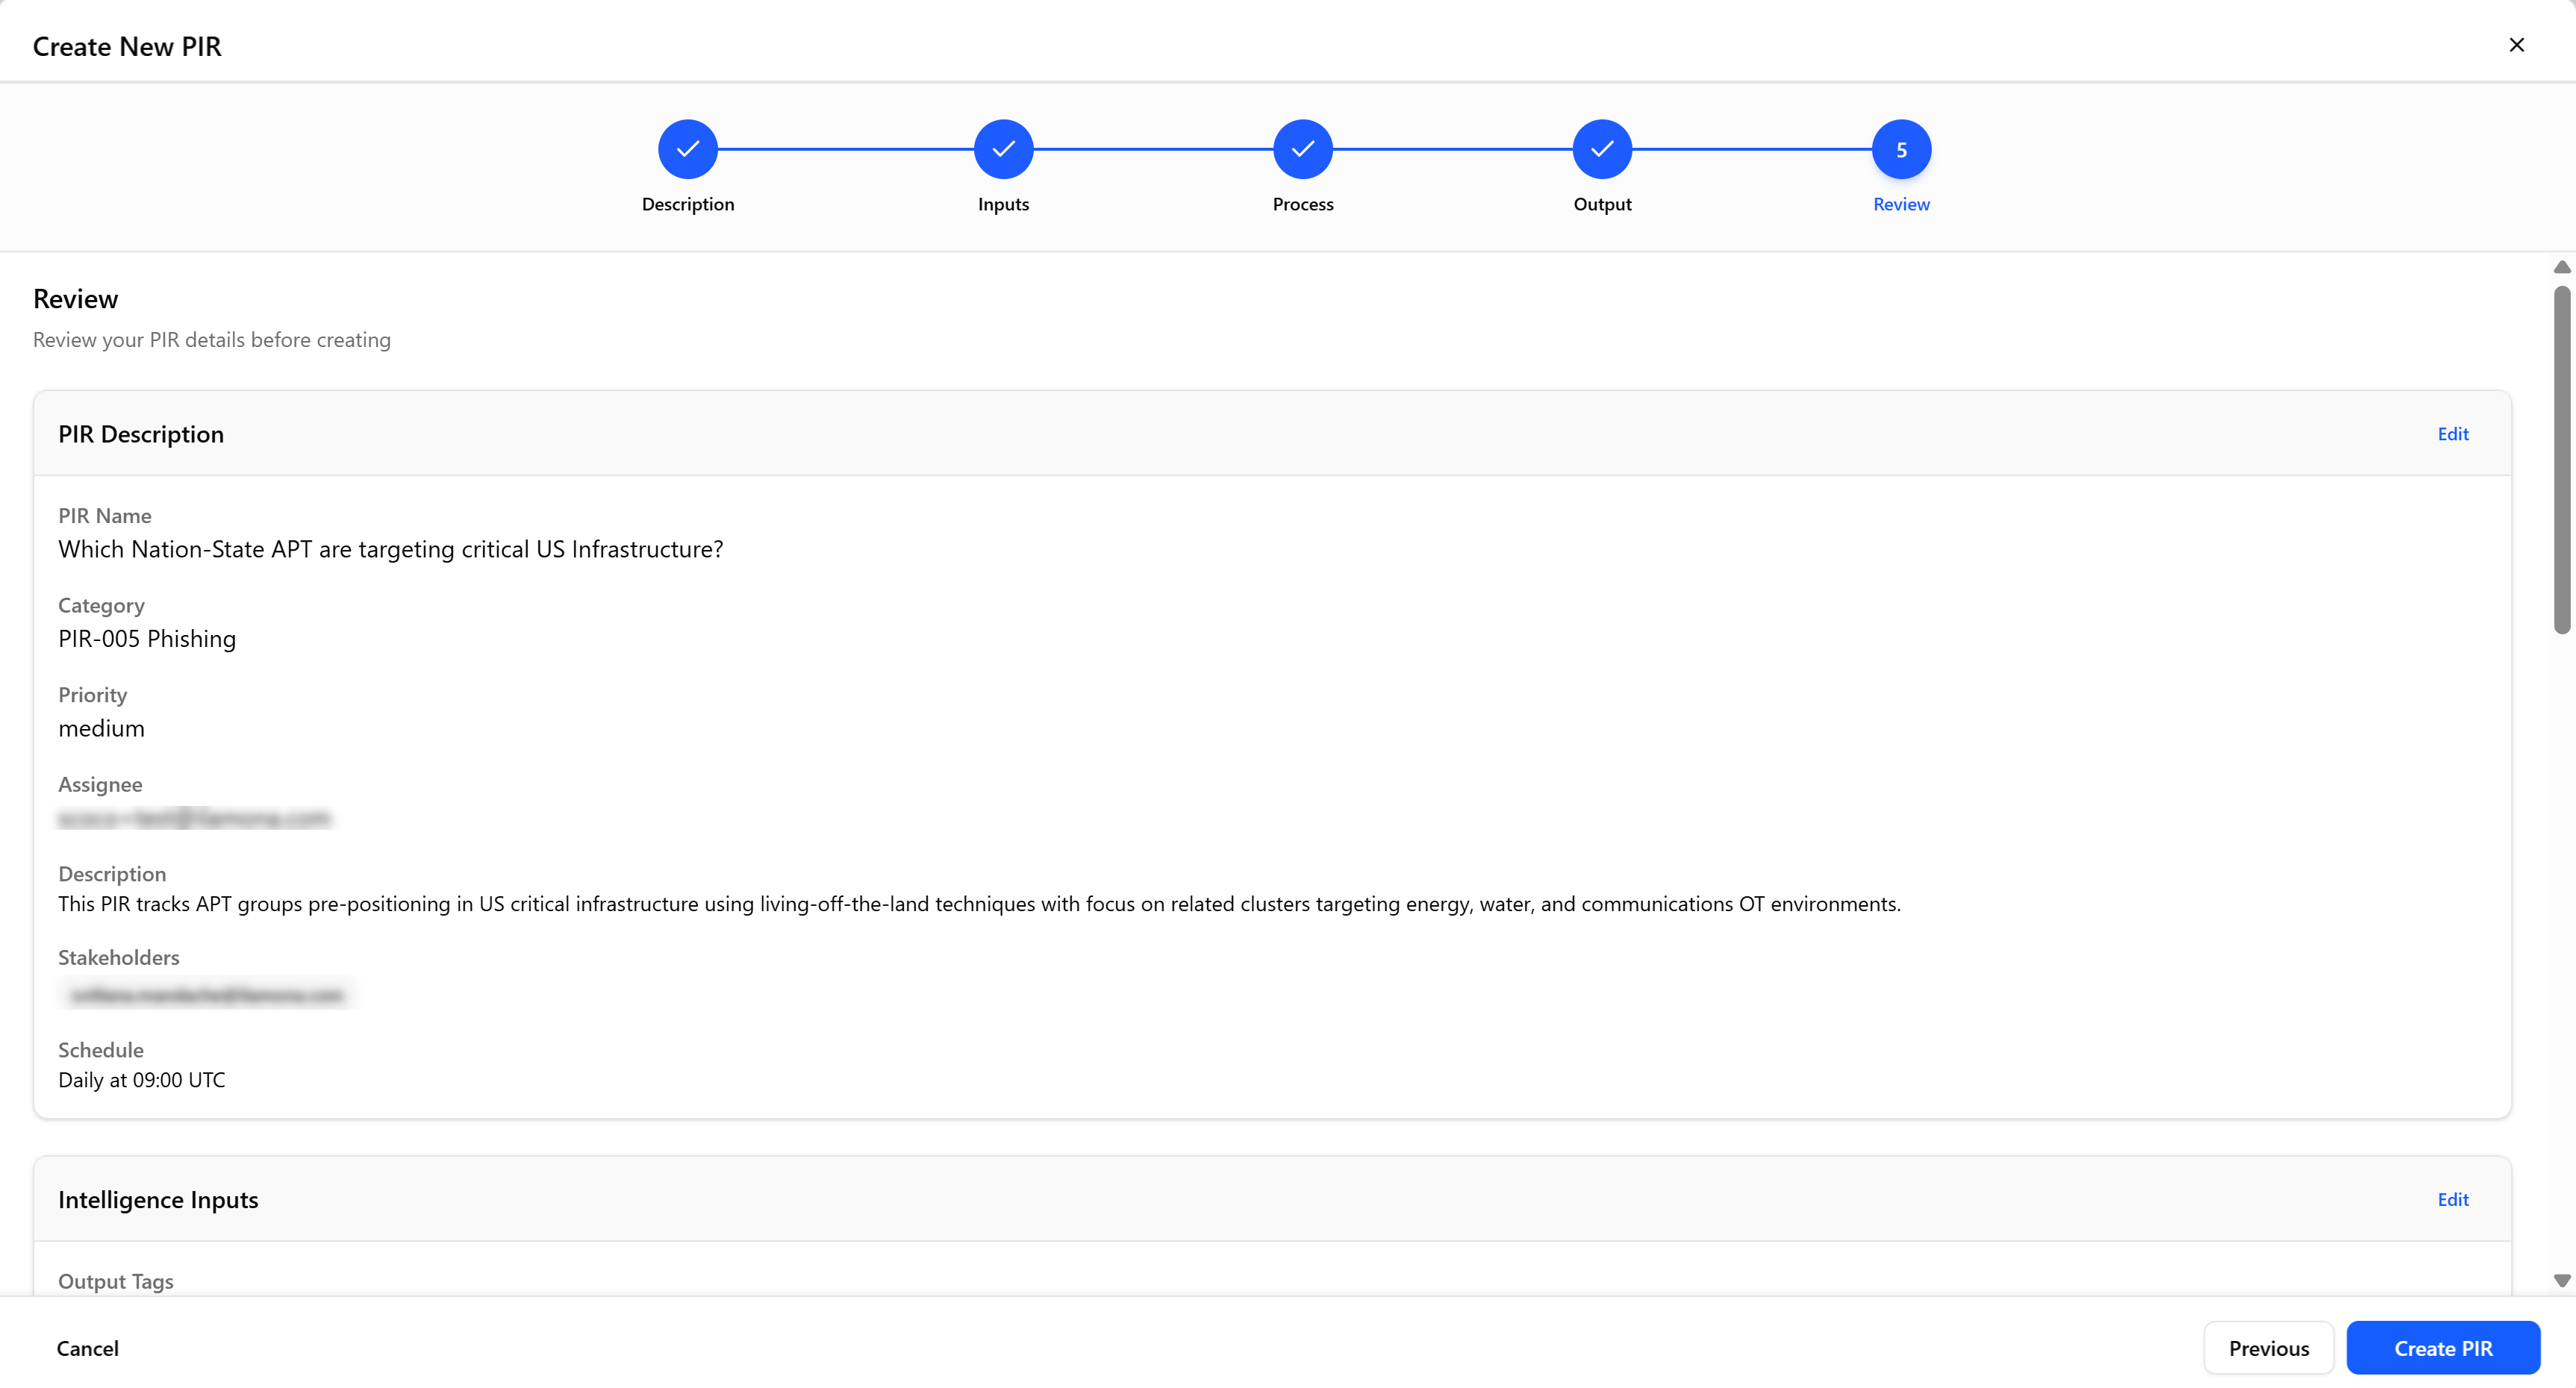
- Click Create PIR.
The PIR is created and added to the list of PIRs of your organization on the Priority Intelligence Requirements page.