On this page:
Related topics:
-
Managing Access to Incidents
Managing Incidents
You can take several actions on the incidents in your environment. You can assign an incident to an analyst, move it through its lifecycle as work progresses, link it to a case, or close it when the investigation is complete.
Incidents handled by the Incident & Investigation Agent only require you to approve escalation or closing of incidents in the Approval Queue. See Using Approval Queue for details.
Assigning Incidents
You can assign an incident to an analyst for investigation in one of the following ways:
-
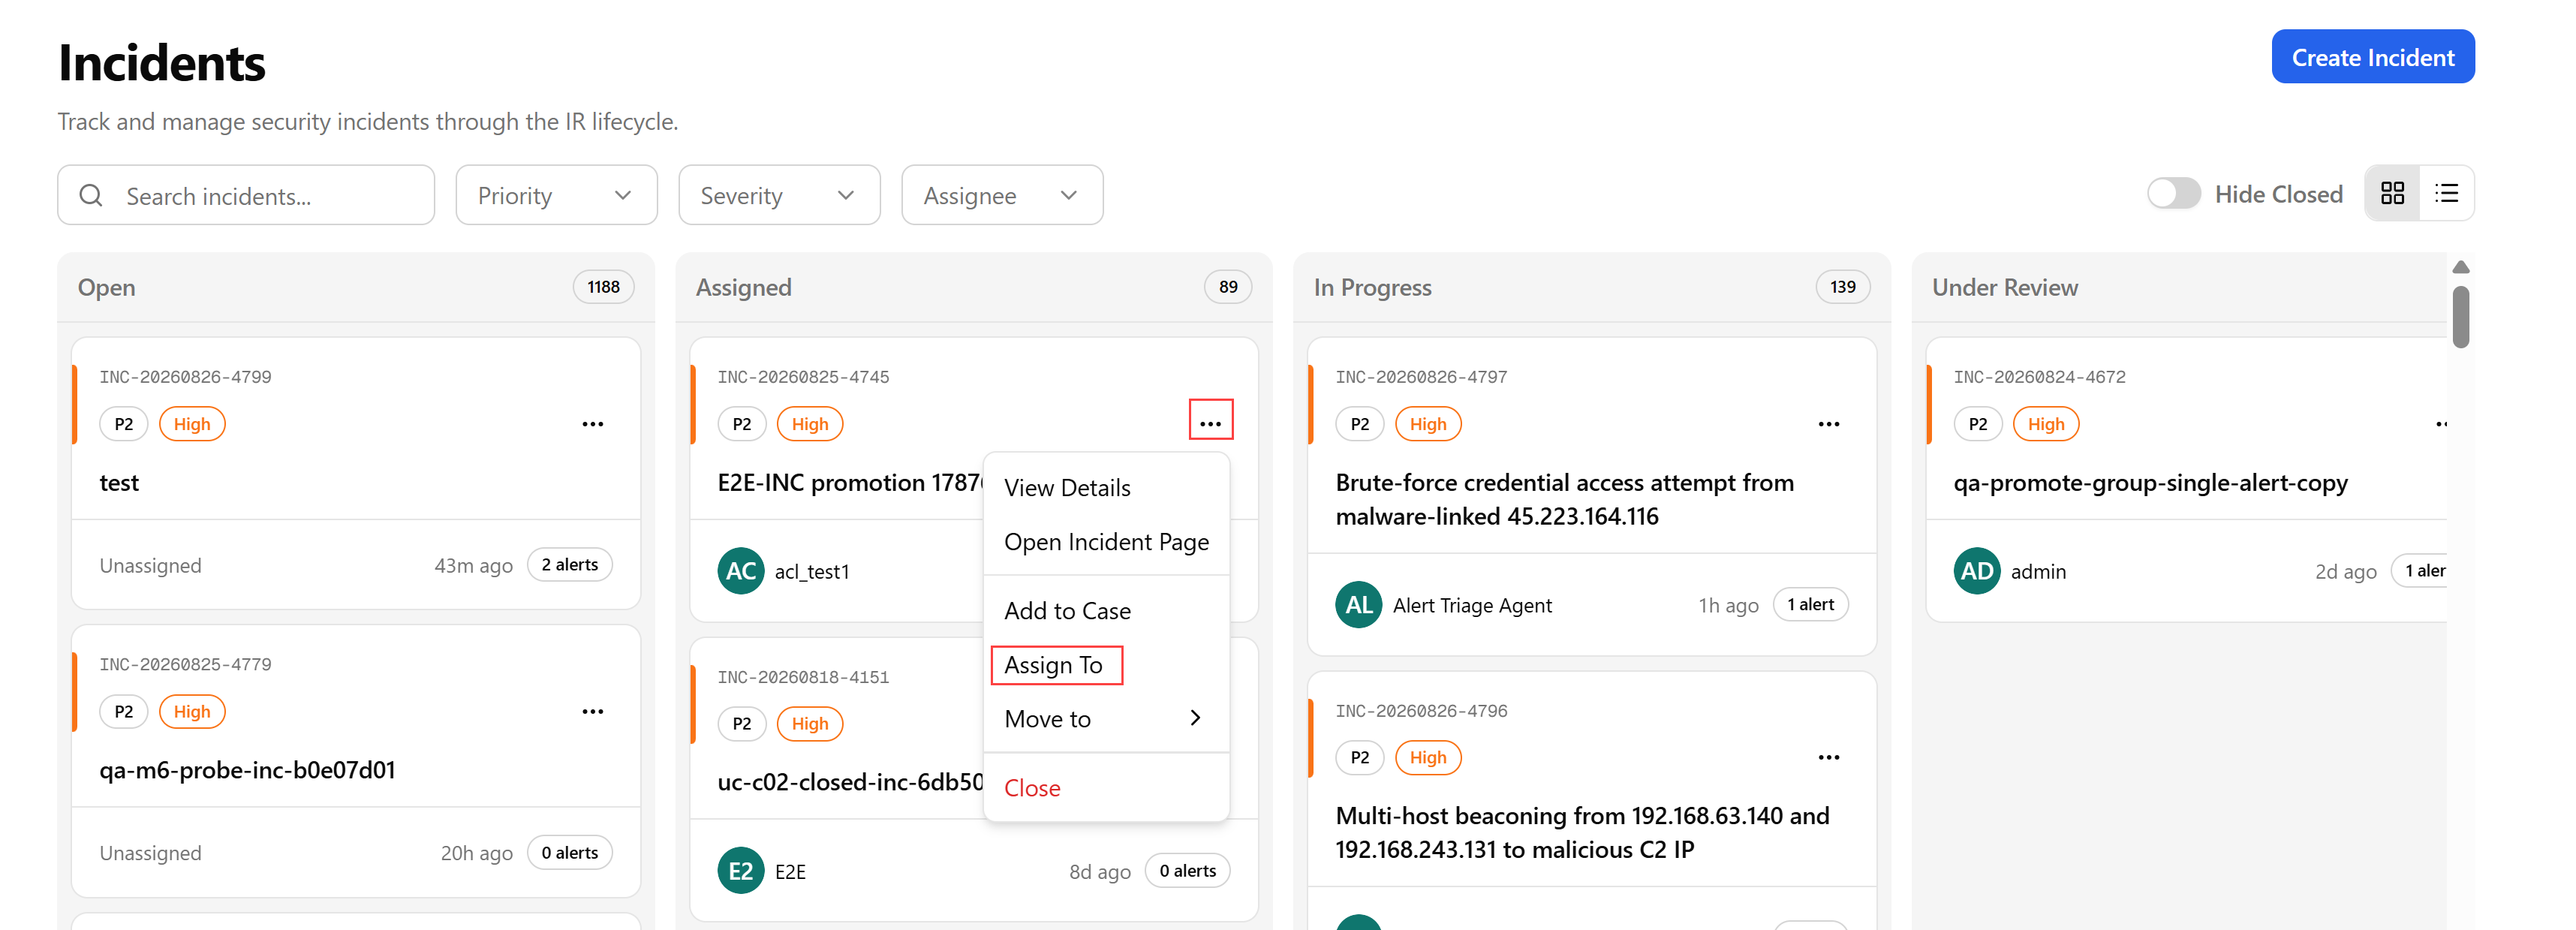
From the incident tile on the Incidents page (tile view):
-
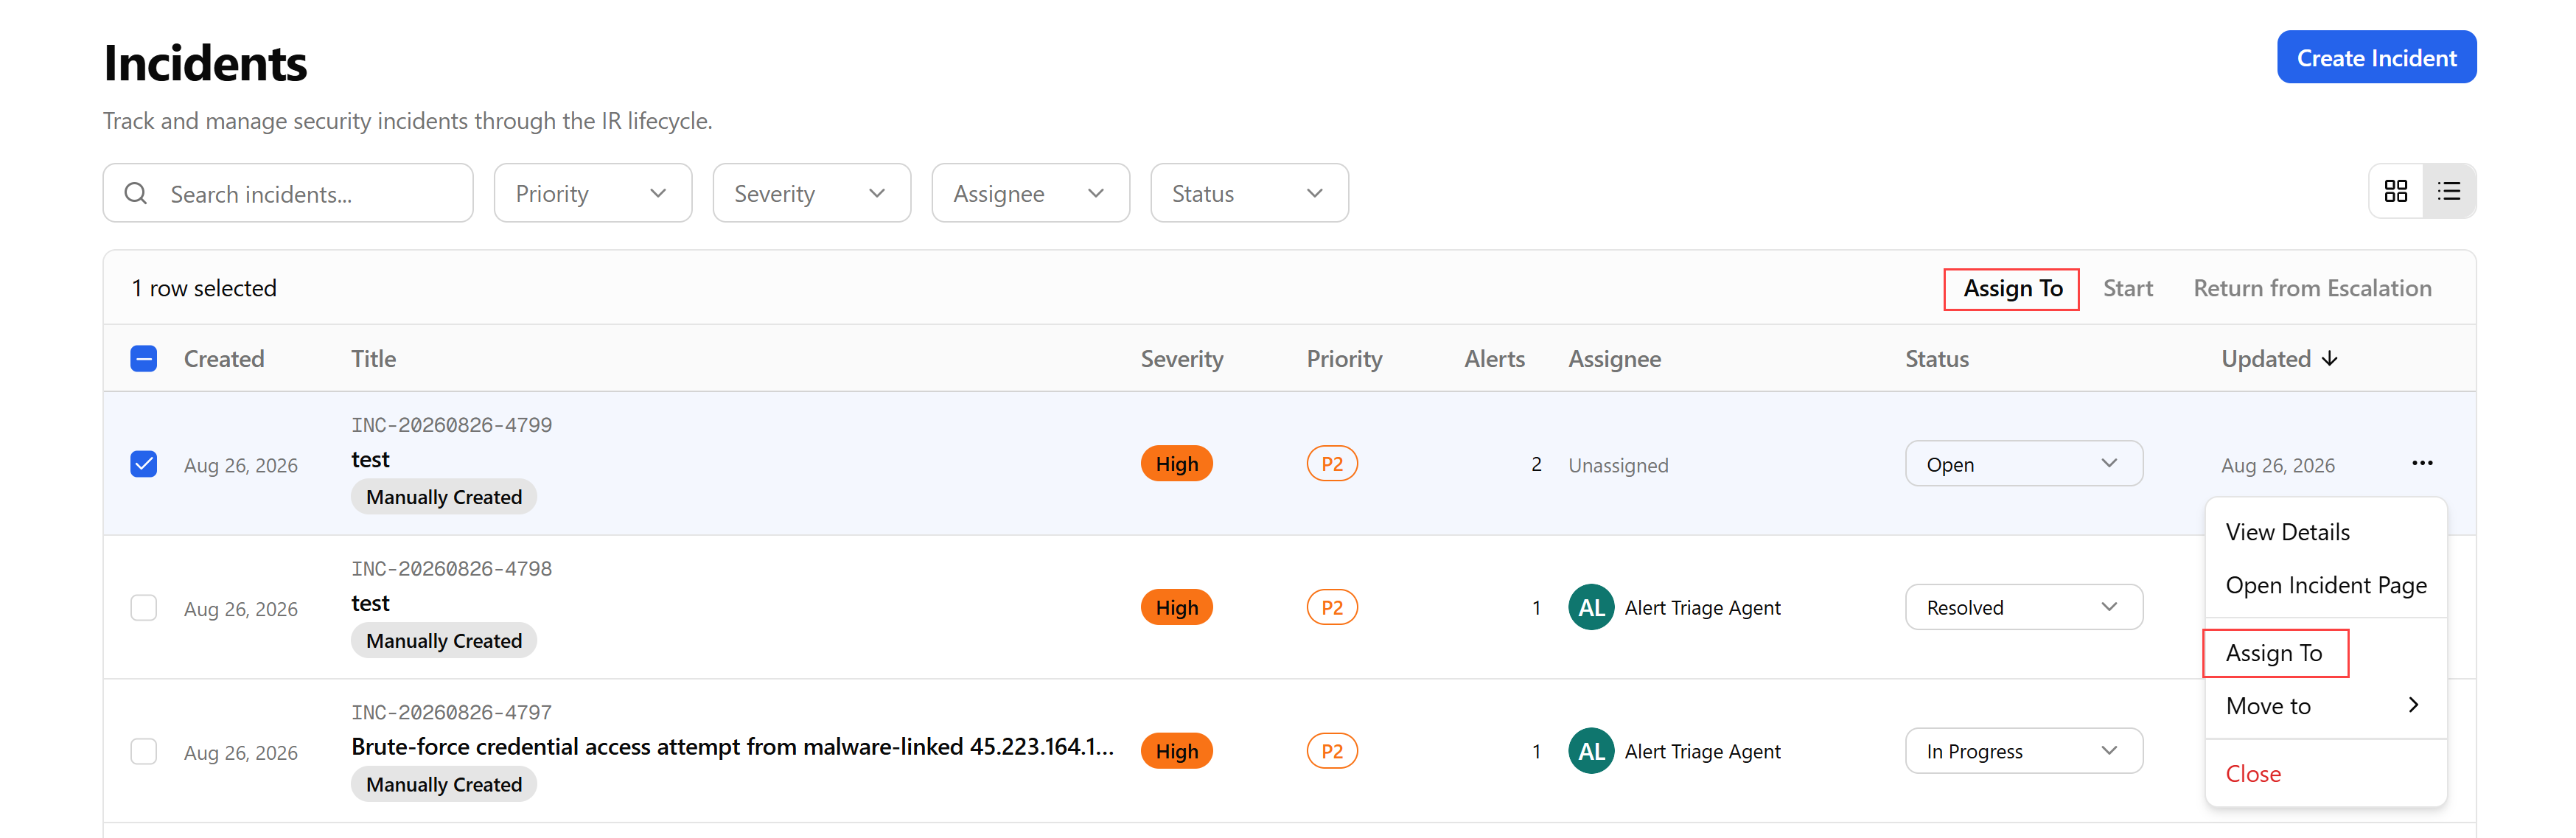
From the Incidents page (list view)
-
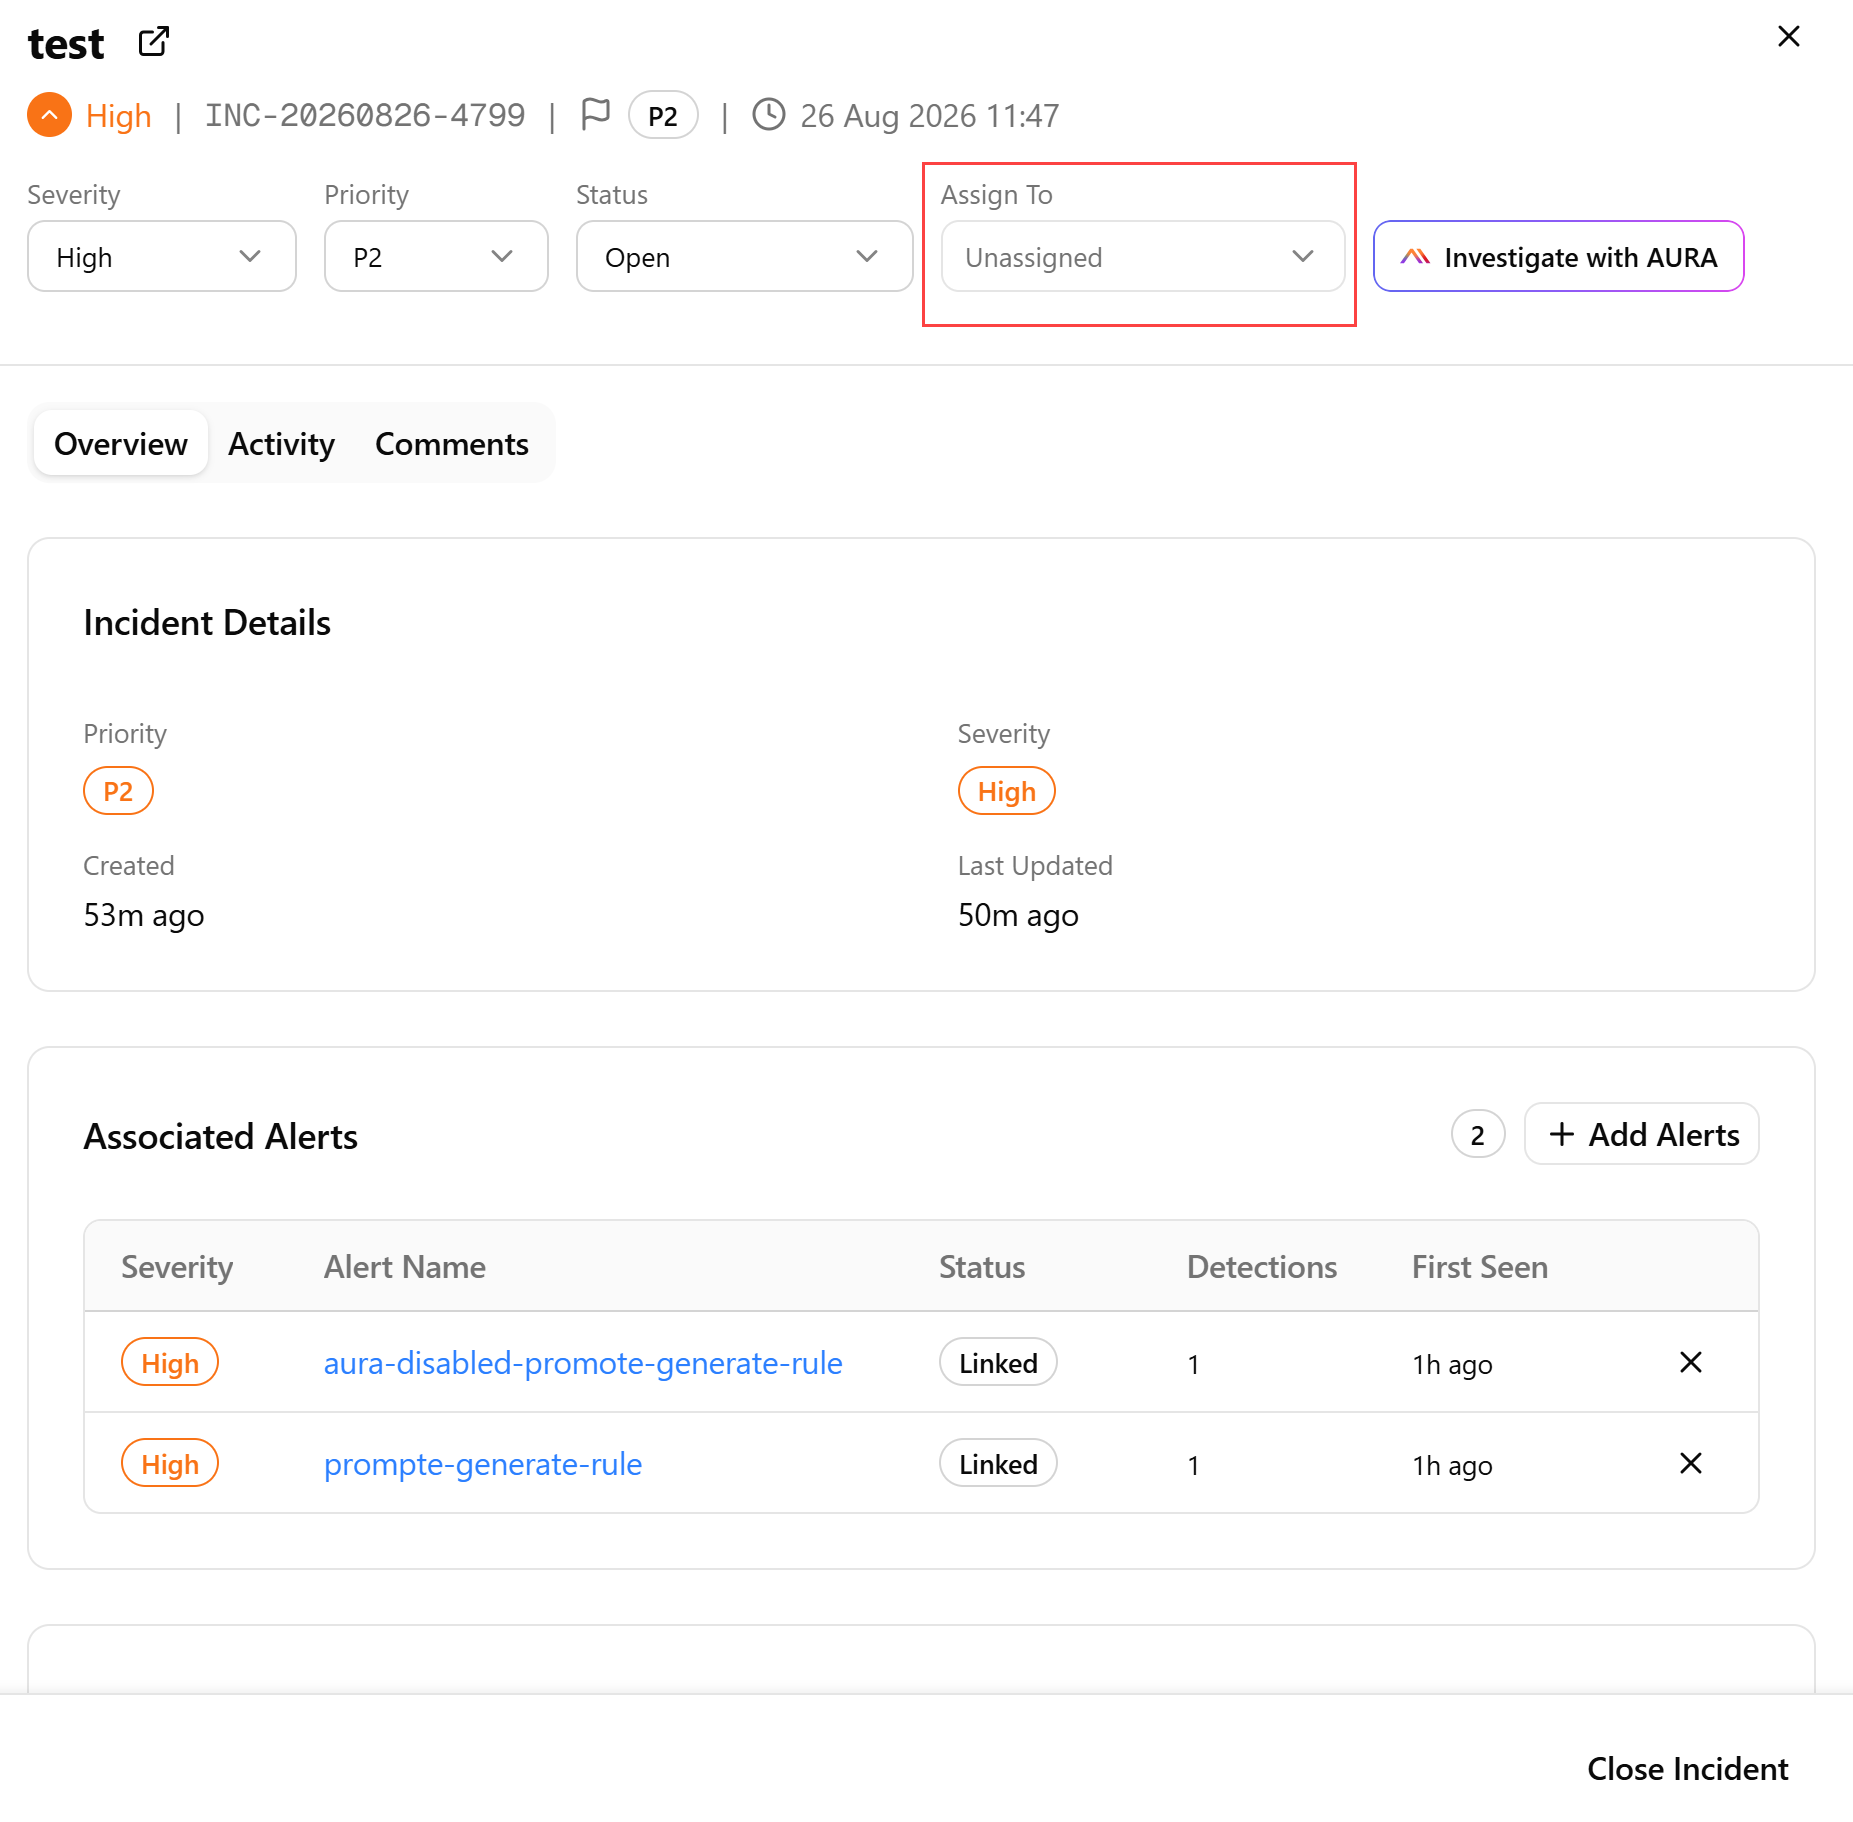
From the Incident Details panel/page
To assign an incident from the Incidents page:
-
Navigate to ThreatStream Next Gen > Security Operations > Incidents.
-
Locate the incident of your interest and click the corresponding more options menu (...).
-
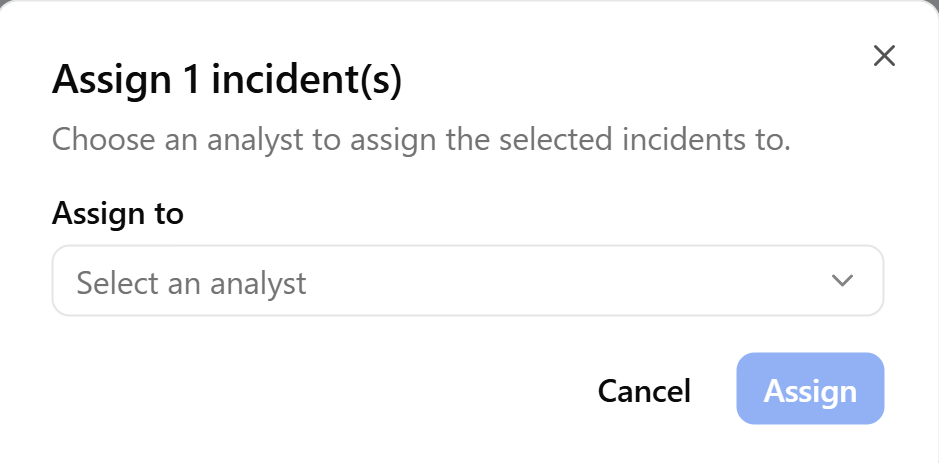
Click Assign To and choose an analyst from the Assign to drop-down list.
-
Click Assign.
The incident analyst is assigned.
To assign an incident from the Incident Details page:
-
Navigate to ThreatStream Next Gen > Security Operations > Incidents.
-
Locate the incident of your interest, click the corresponding more options menu (...), and then click View Details.
-
Select an analyst from the Assign To drop-down list.
The incident analyst is assigned.
Changing Incident Status
An incident moves through the following lifecycle as work progresses:
-
Open—incident has been created but investigation has not yet started.
-
Assigned—incident has been created and assigned to an analyst or the Incident & Investigation Agent for investigation.
-
In Progress—incident is actively being investigated or worked on by an analyst or agent.
-
Under Review—investigation is complete or awaiting a decision, and the findings or recommended next action are being reviewed.
-
Escalated—incident requires further response or coordination and has been escalated to a case.
-
Resolved—incident has been investigated and handled. No further investigation or escalation to a case is required.
-
Closed—incident is in a terminal state and no further action is required.
You can change an incident status from the Incidents page or from the Incident Details panel.
To change an incident status from the Incidents page:
-
Navigate to ThreatStream Next Gen > Security Operations > Incidents.
-
On the Incidents board, drag the incident card to a different column, or open its more options menu (...) and select Move to, then select the next available lifecycle state—in Progress, Under Review, Escalated, Resolved, or Closed.
Note: Resolving or closing an incident requires the Resolve Incidents permission. See Managing Rolesfor details.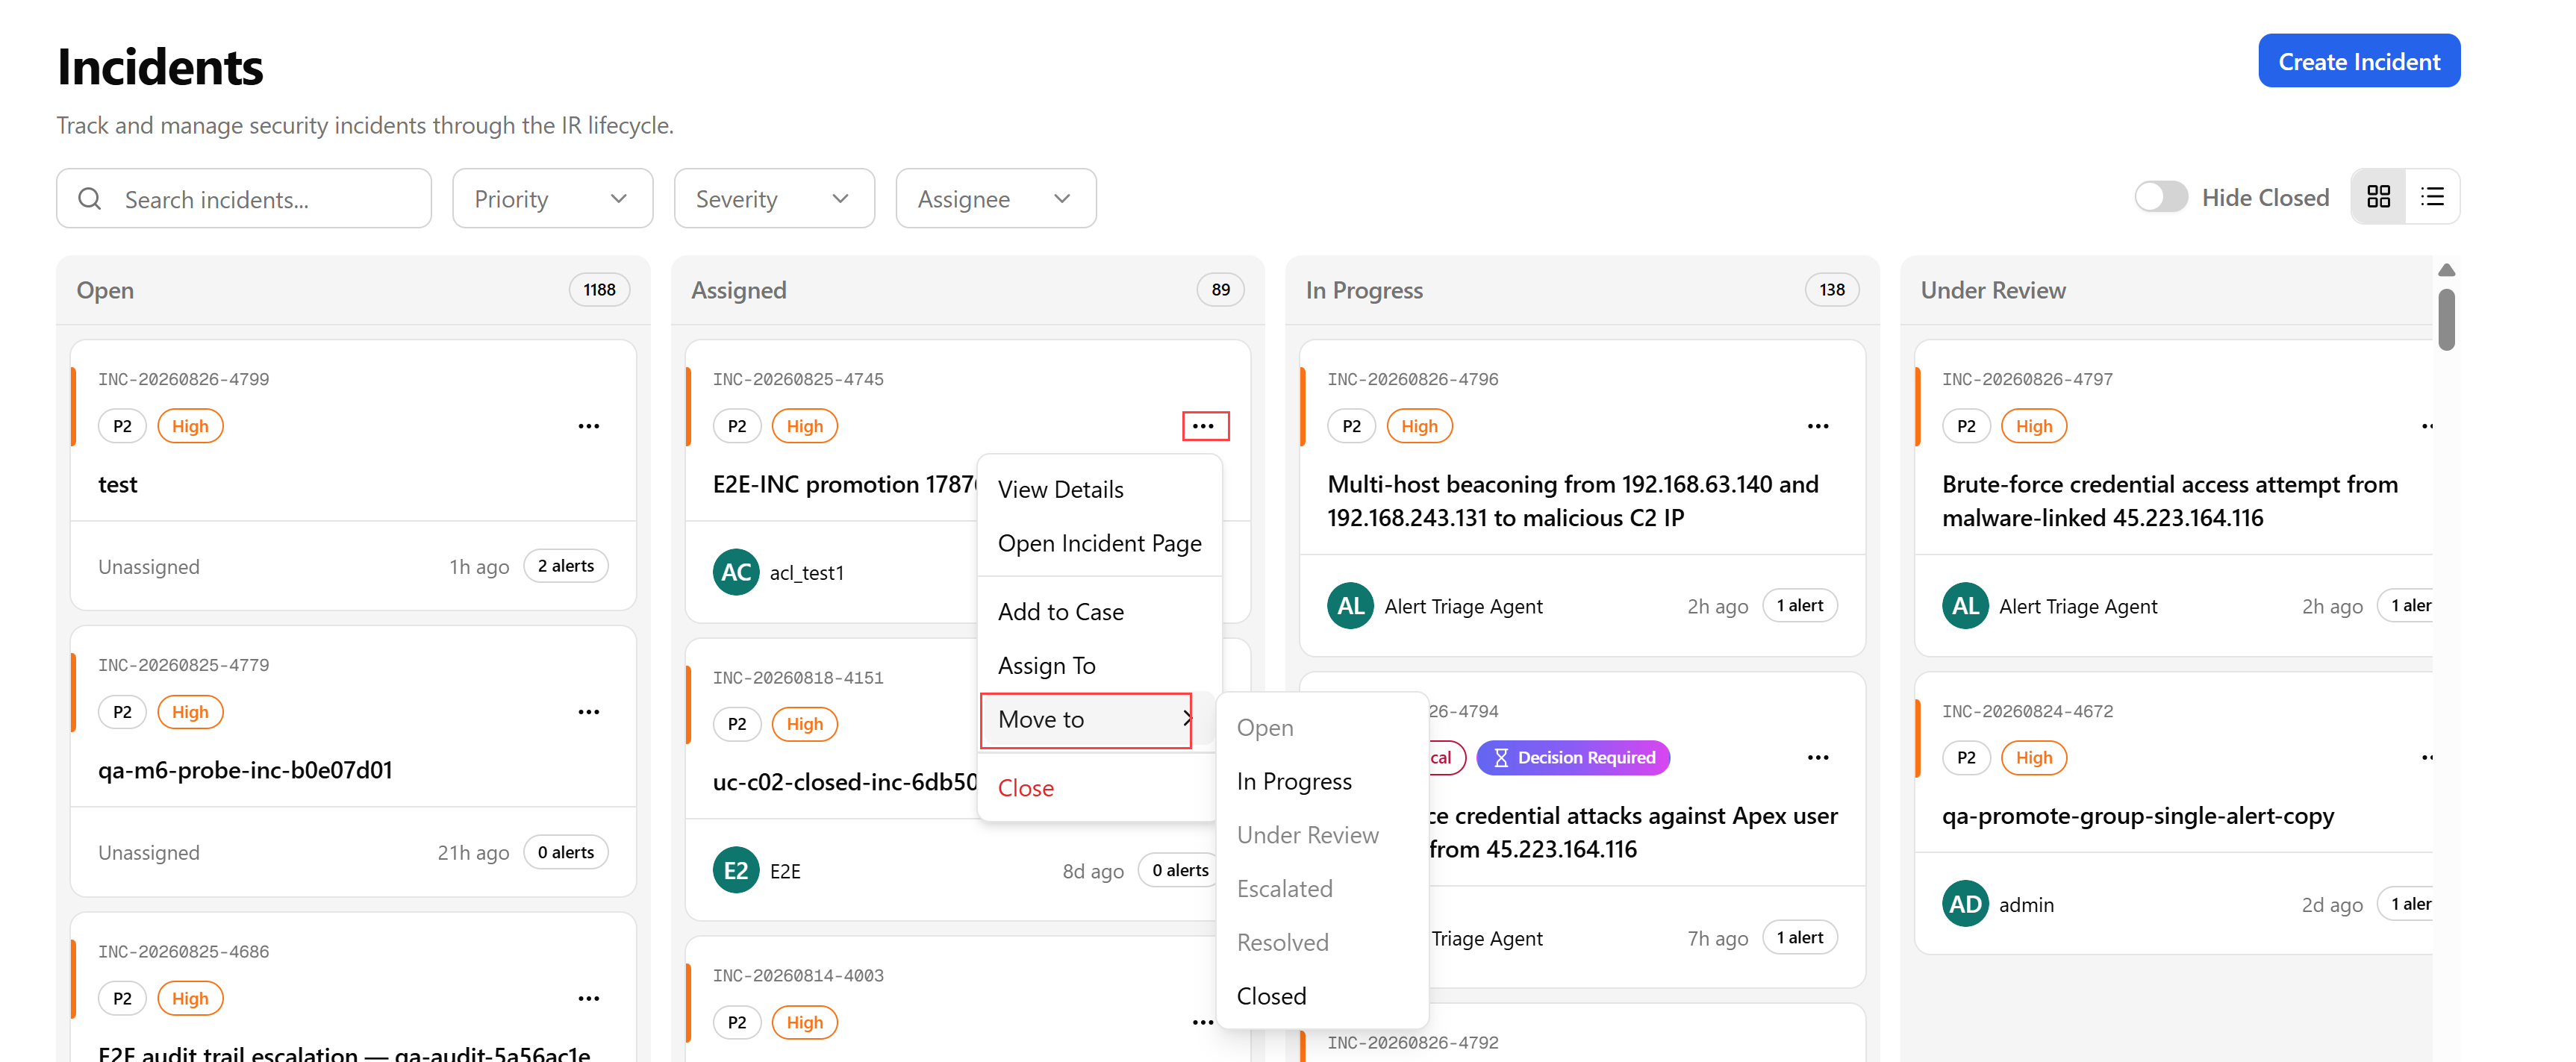
Alternatively, in the Incidents list view, use the inline Status drop-down on the incident row or the more options menu to change an incident status.
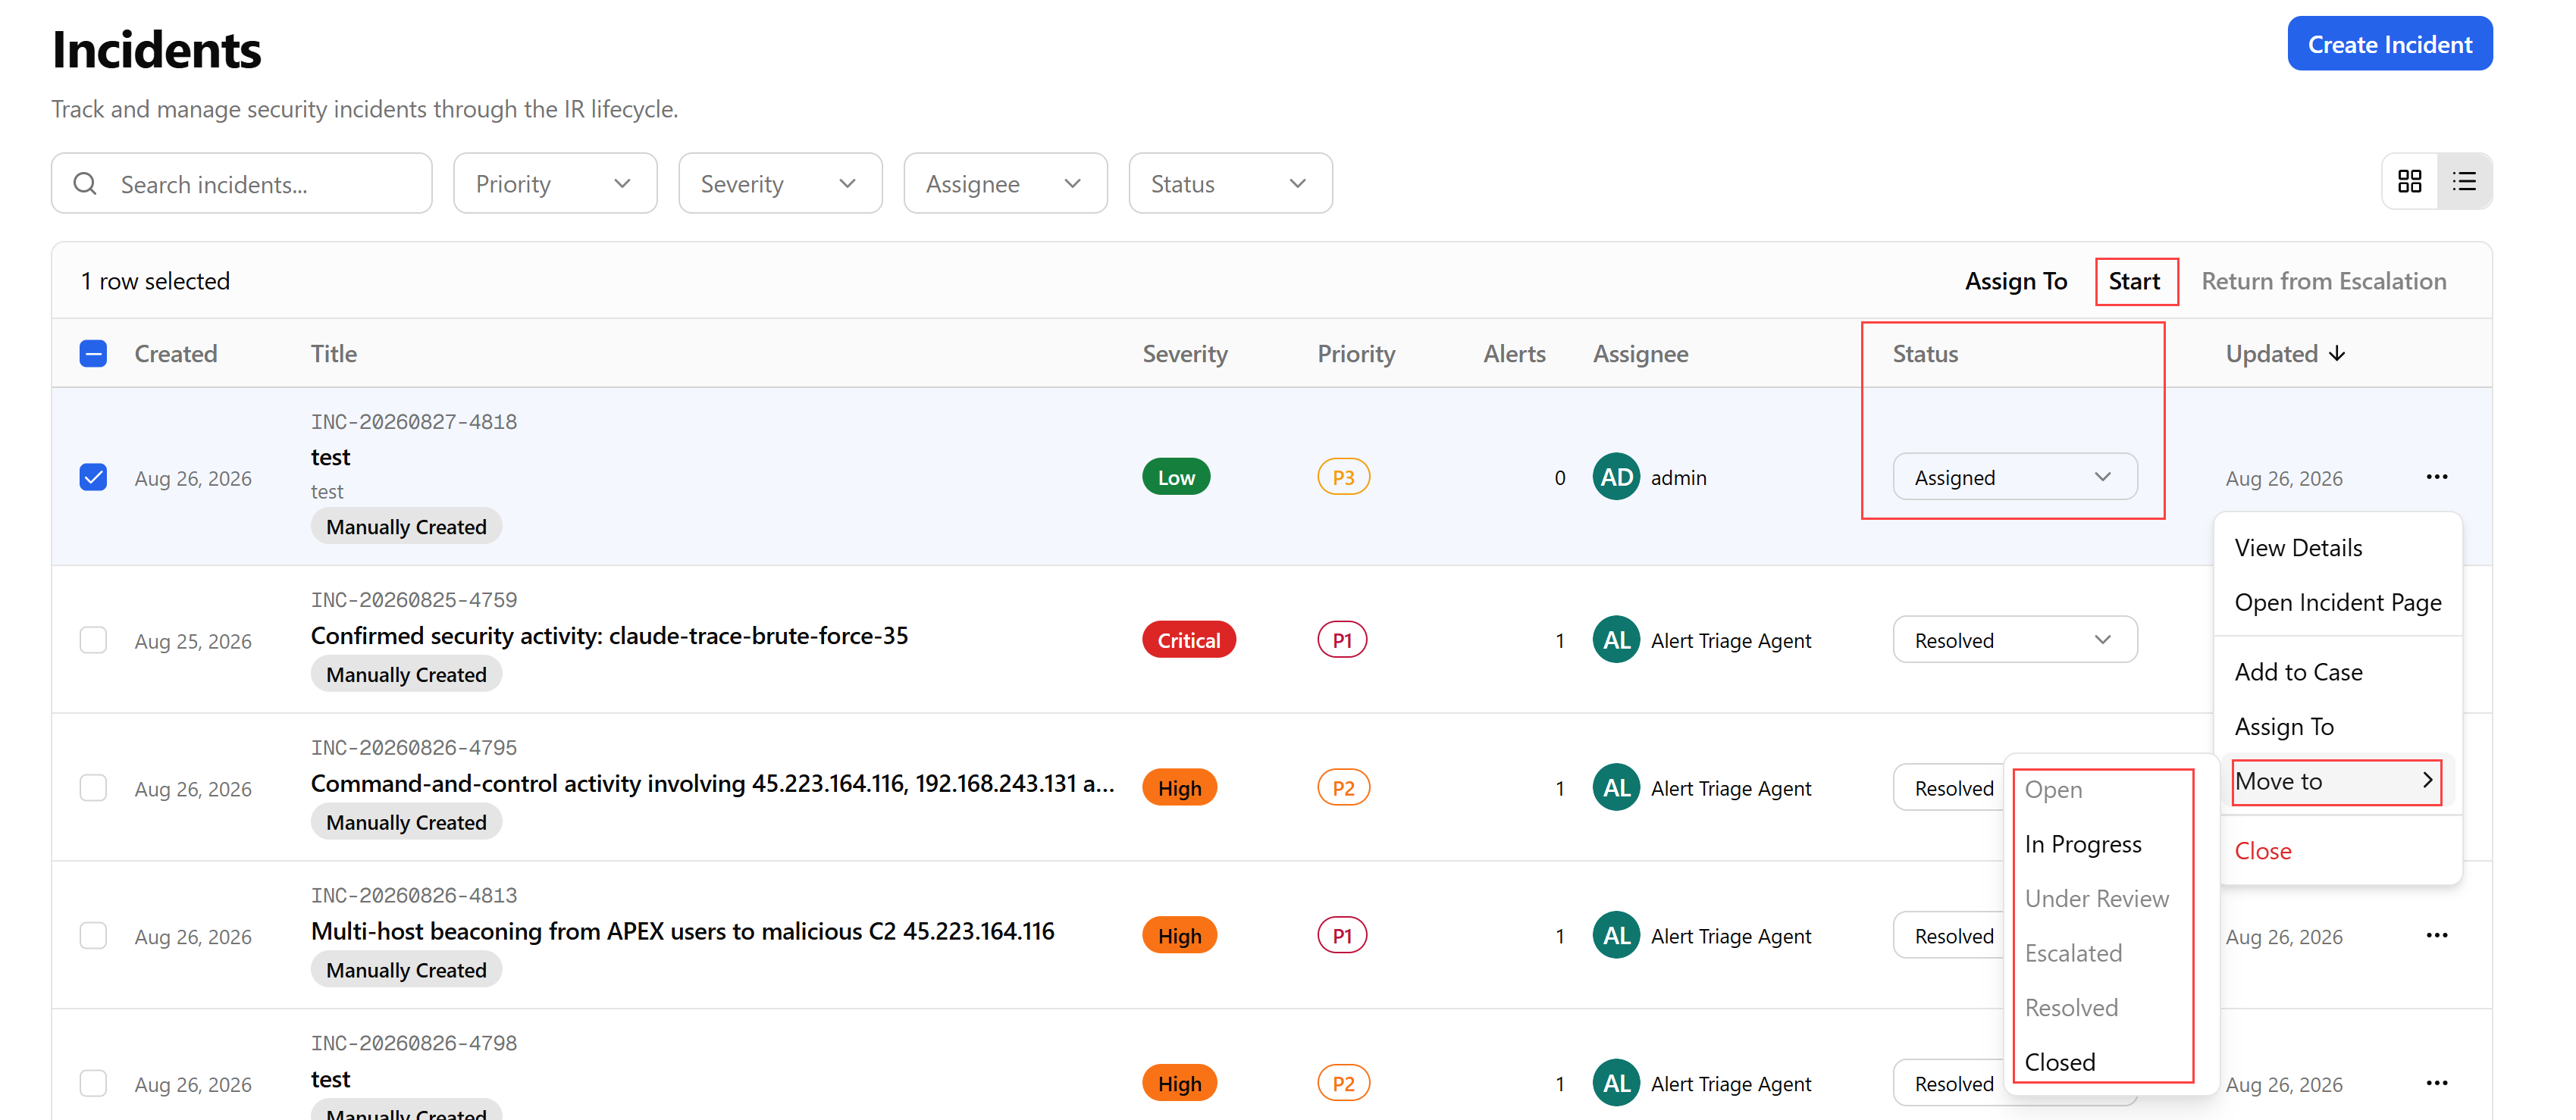 Note: You can also move an assigned incident to the In Progress status by starting incident investigation. To start an investigation, on the Incidents list view page, select the incident of your interest and click Start. The incident changes status to In Progress.
The incident status is updated.
To change an incident status from the Incident Details panel:
-
Navigate to ThreatStream Next Gen > Security Operations > Incidents.
-
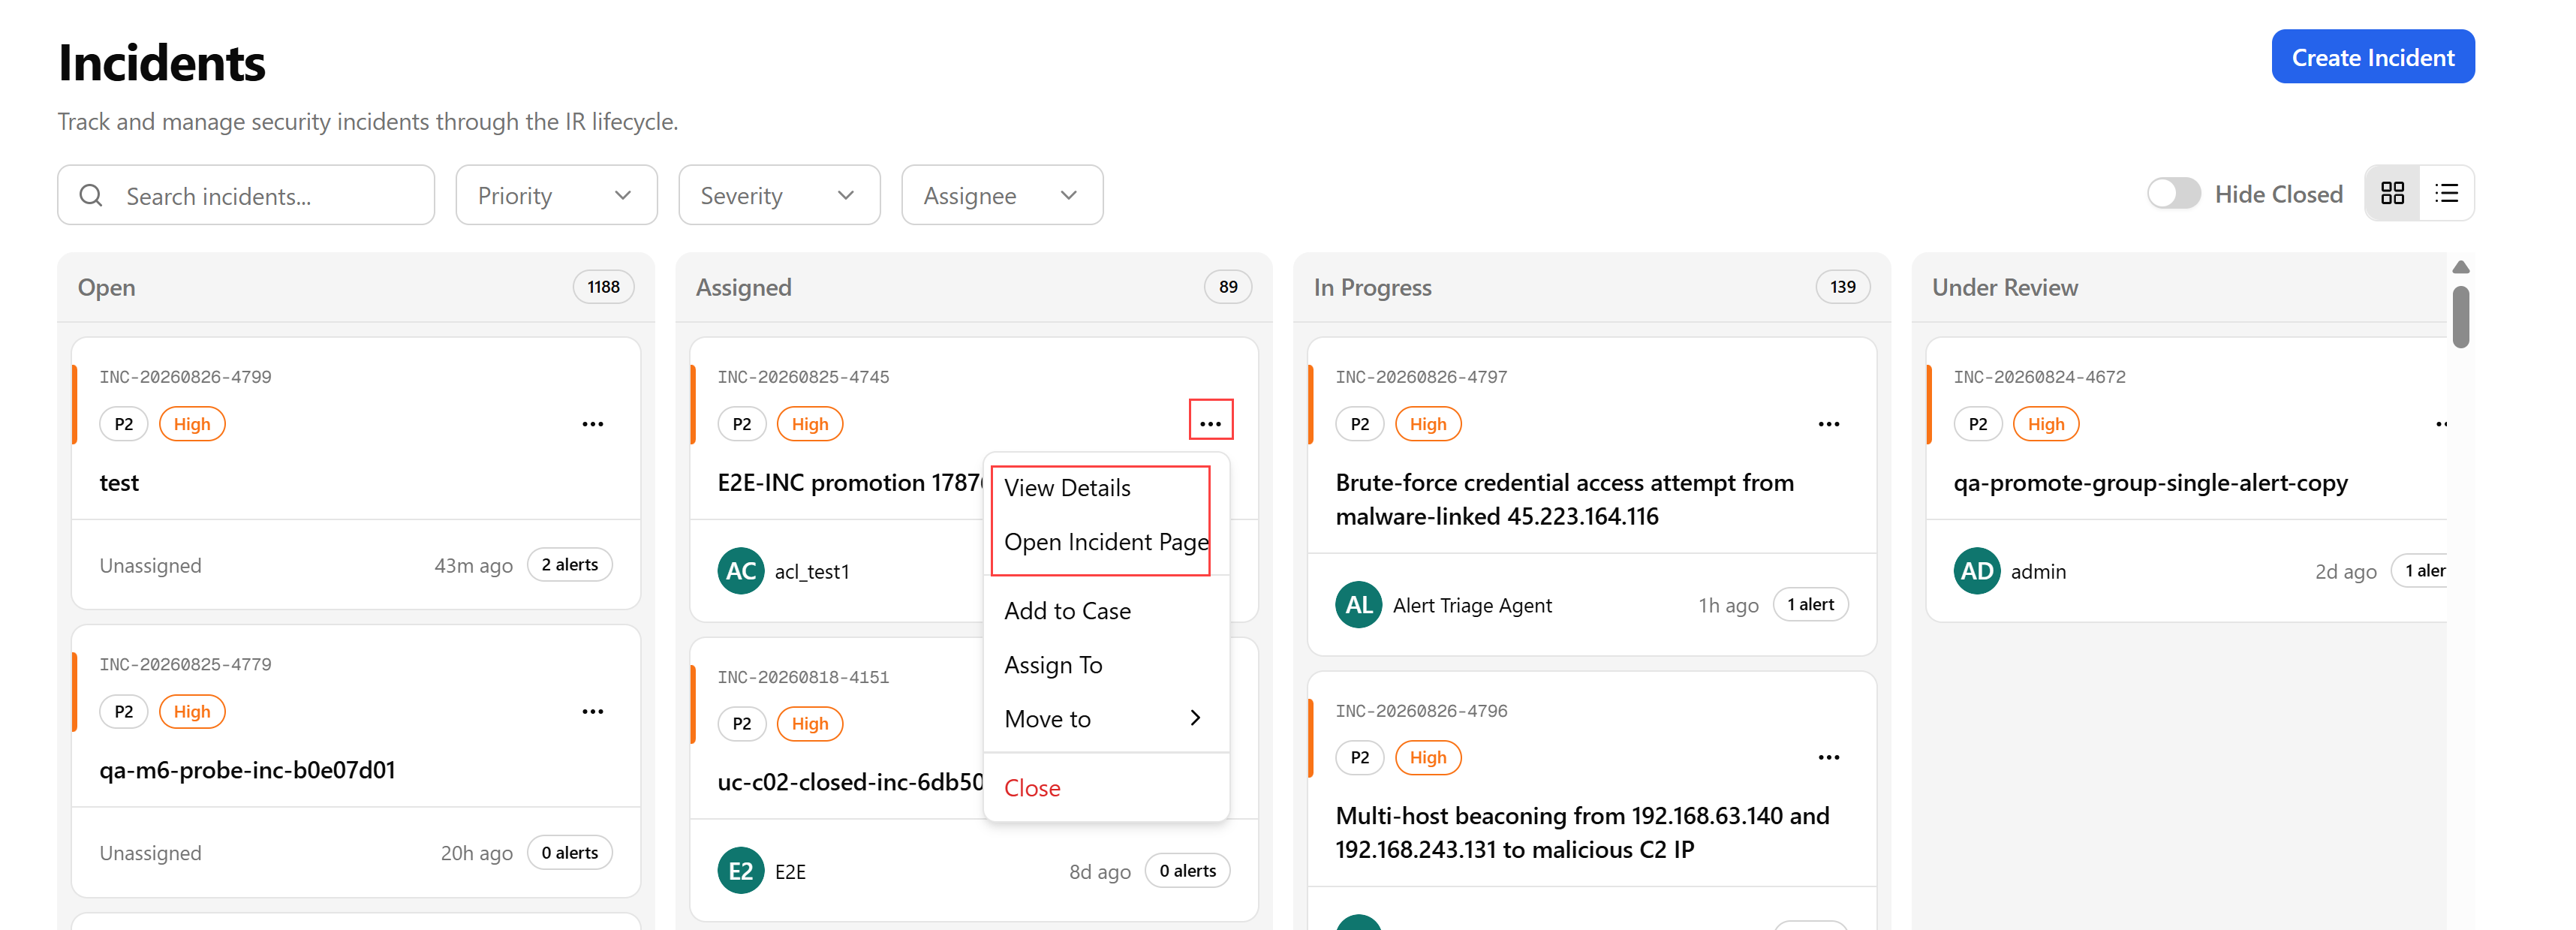
On the Incidents board, locate the incident of your interest and click View Details or Open Incident Page to view incident details.
-
Select a required status.
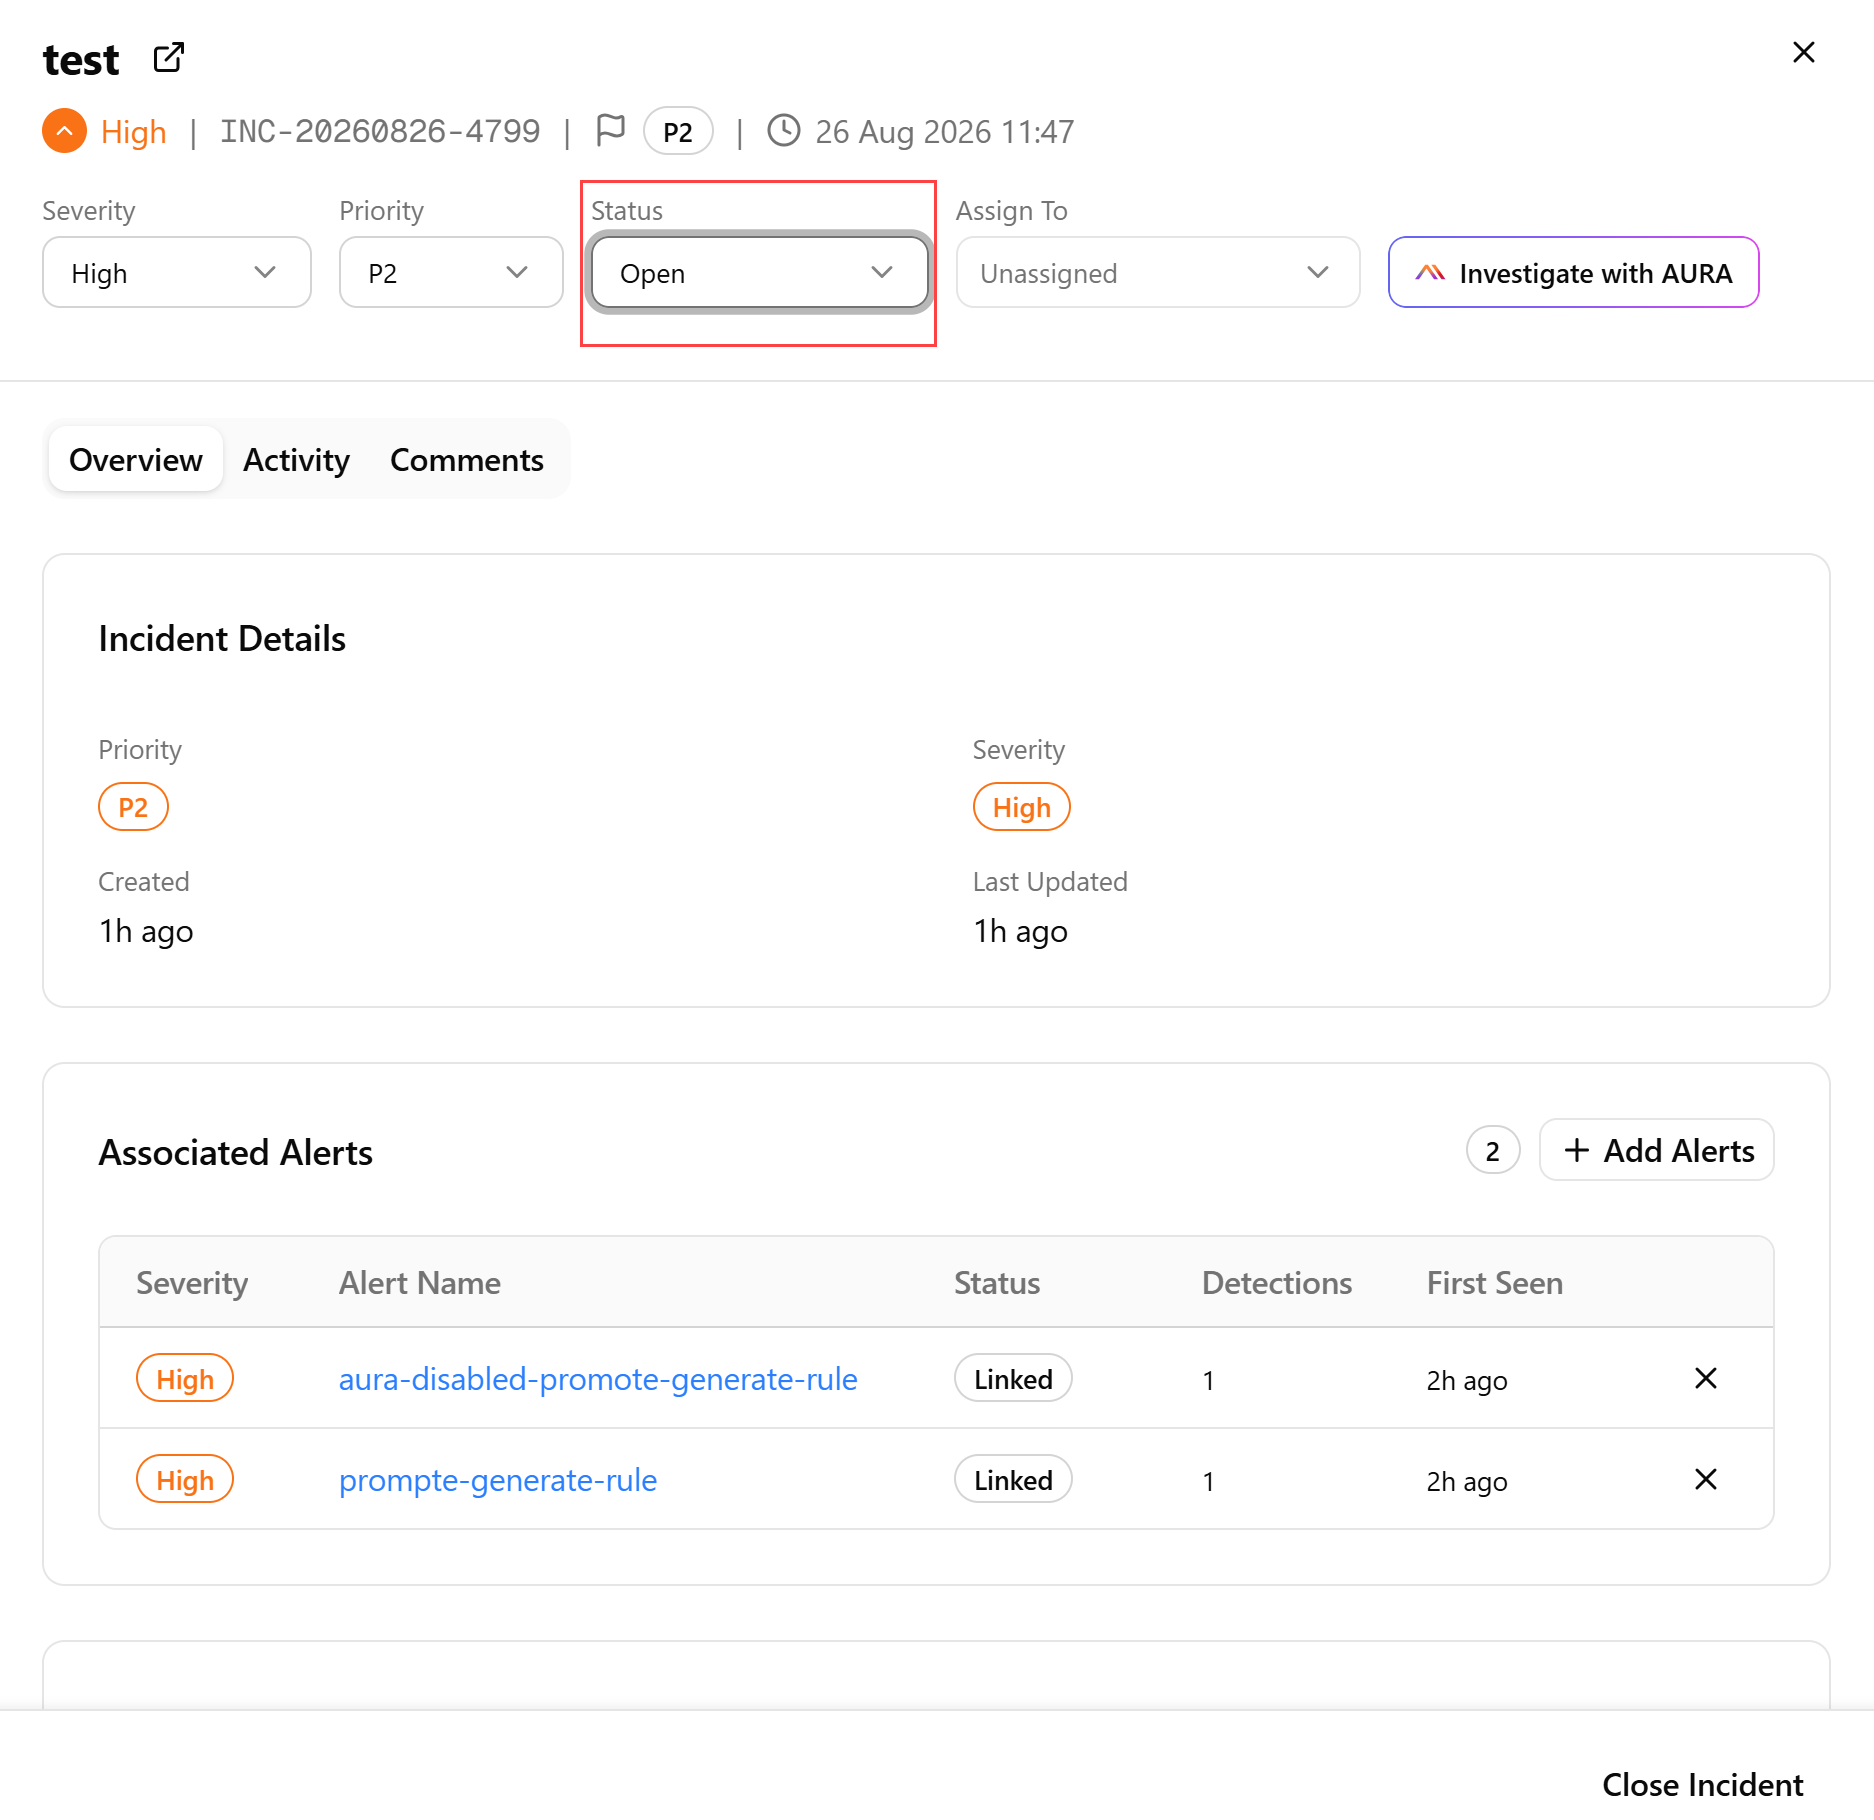
The incident status is updated.
Returning Incidents From Escalation
If an incident no longer needs to sit with the escalated tier, you can return it to active work. This transitions the incident from Escalated back to In Progress, so it continues moving toward resolution instead of remaining flagged for higher-tier attention.
This is useful in cases when, for example, a senior analyst has completed the portion of the investigation that required their involvement and the incident can go back to the original analyst or team, when an incident was escalated in error, or when the reason for escalation no longer applies.
To return an incident from escalation:
-
Navigate to ThreatStream Next Gen > Security Operations > Incidents.
-
Locate the incident which you want to return from escalation, click the corresponding more options menu (...), and then click In Progress.
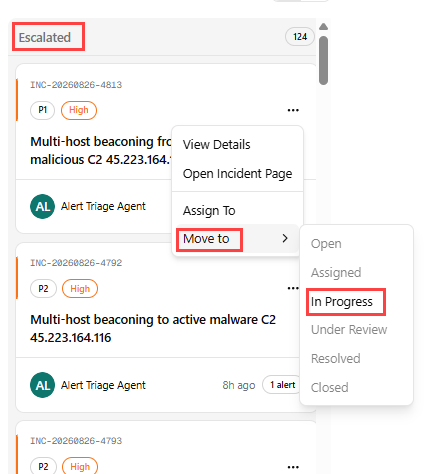
Alternatively, select one or more incidents on the Incidents list view page and click Return from Escalation. You can also use the more options menu (...) to move an individual escalated incident to the in Progress status.
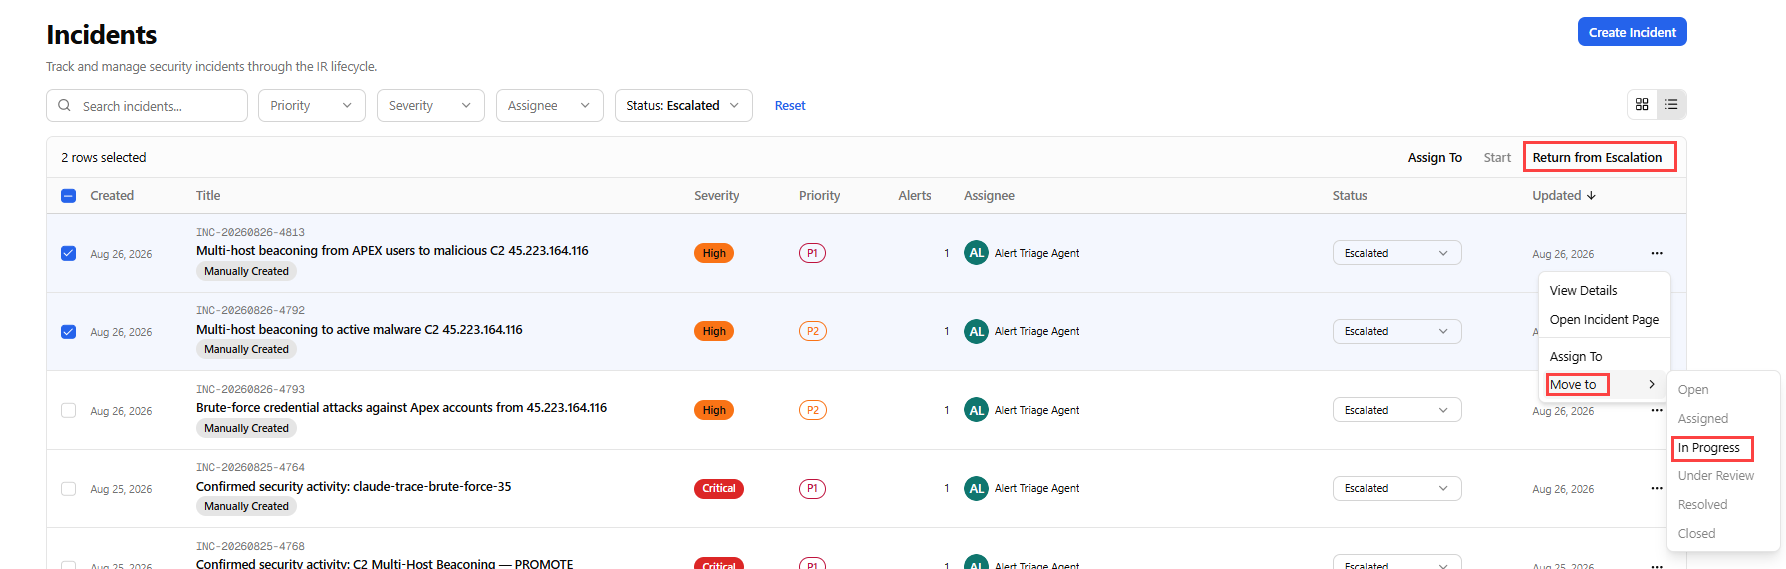
The incident is returned to the in Progress status.
Adding an Incident to a Case
You can add an incident to a case from the Incidents page or from the Incident Details page.
Creating a New Case
-
Navigate to ThreatStream Next Gen > Security Operations > Incidents.
-
Locate the incident for which you want to create a case, click the corresponding more options menu (...), and then click Add to Case.
Note: An incident can only be linked to one case. Incidents that are already linked to a case do not display the Add to Case option. -
In the Add to Case dialog box, click Create new Case.
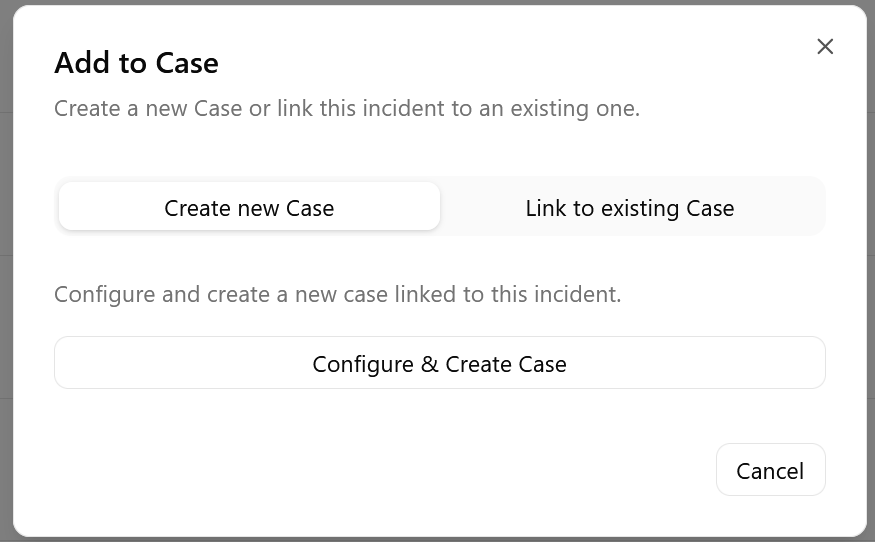
-
Click Configure & Create Case to open the New Case dialog box.
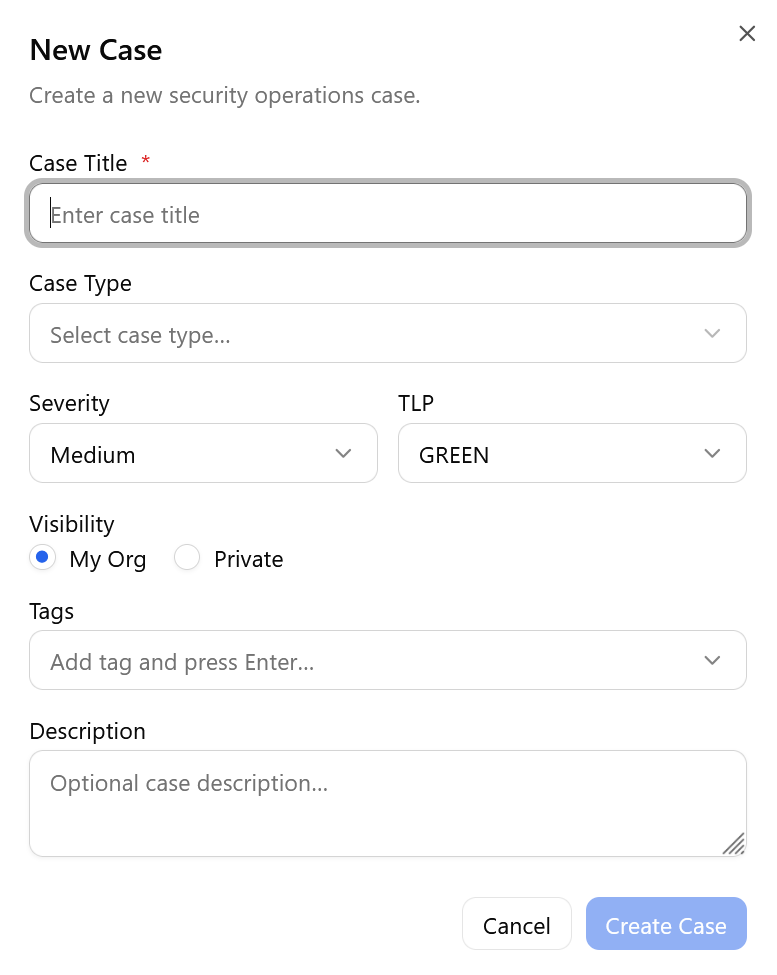
Complete the following fields:
-
Case Title (required) — a descriptive name for the case
-
Case Type (optional) — select from the available case type categories
-
Severity — pre-populated from the incident severity; adjustable
-
TLP — Traffic Light Protocol designation for the case (for example, GREEN)
-
Visibility — My Org (visible to your organization) or Private
-
Tags (optional) — analyst-applied tags for the case
-
Description (optional) — a summary of the case context
-
-
Click Create Case.
The incident is linked to the new case immediately.
Linking to an Existing Case
-
Navigate to ThreatStream Next Gen > Security Operations > Incidents.
-
Locate the incident which you want to add to an existing case, click the corresponding more options menu (...), and then click Add to Case.
Note: An incident can only be linked to one case. Incidents that are already linked to a case do not display the Add to Case option. -
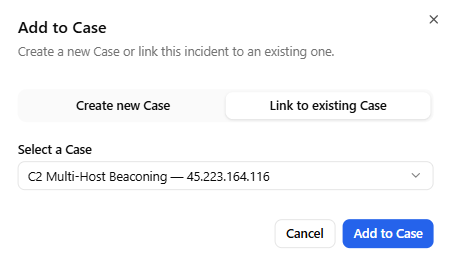
In the Add to Case dialog box, select Link to existing Case.
-
Select an existing case from the Select a Case drop-down list. Each result shows the case name and the number of incidents already linked to it.
When another incident is linked to an existing case, the Case Management Agent re-runs its review so the case summary, evidence, correlations, and recommendations reflect the newly added information.
-
Click Add to Case.
The incident is linked to the existing case.
Viewing Incident Details
See Viewing Incident Details for details on the Incident Details panel and its tabs.