Managing Investigation Entities
You can manage entities contained within the investigation under Entities. There are two views associated with entity management: Explore ( ) and the table view (
 ).
).
You can add up to 1000 entities to a single investigation using the Explore tool and the table view. However, when investigations exceed 1000 entities, the Explore chart is hidden on the investigation and only the table view is available.
When investigations exceed 3000 entities, only the most recently added 3000 entities are displayed.
Using Explore In Investigations
Investigations contain an on-board version of the Explore pivoting tool. When data is added to the Explore chart, it is also added to the investigation and available on the entity table view.
(Click the image to enlarge it.)
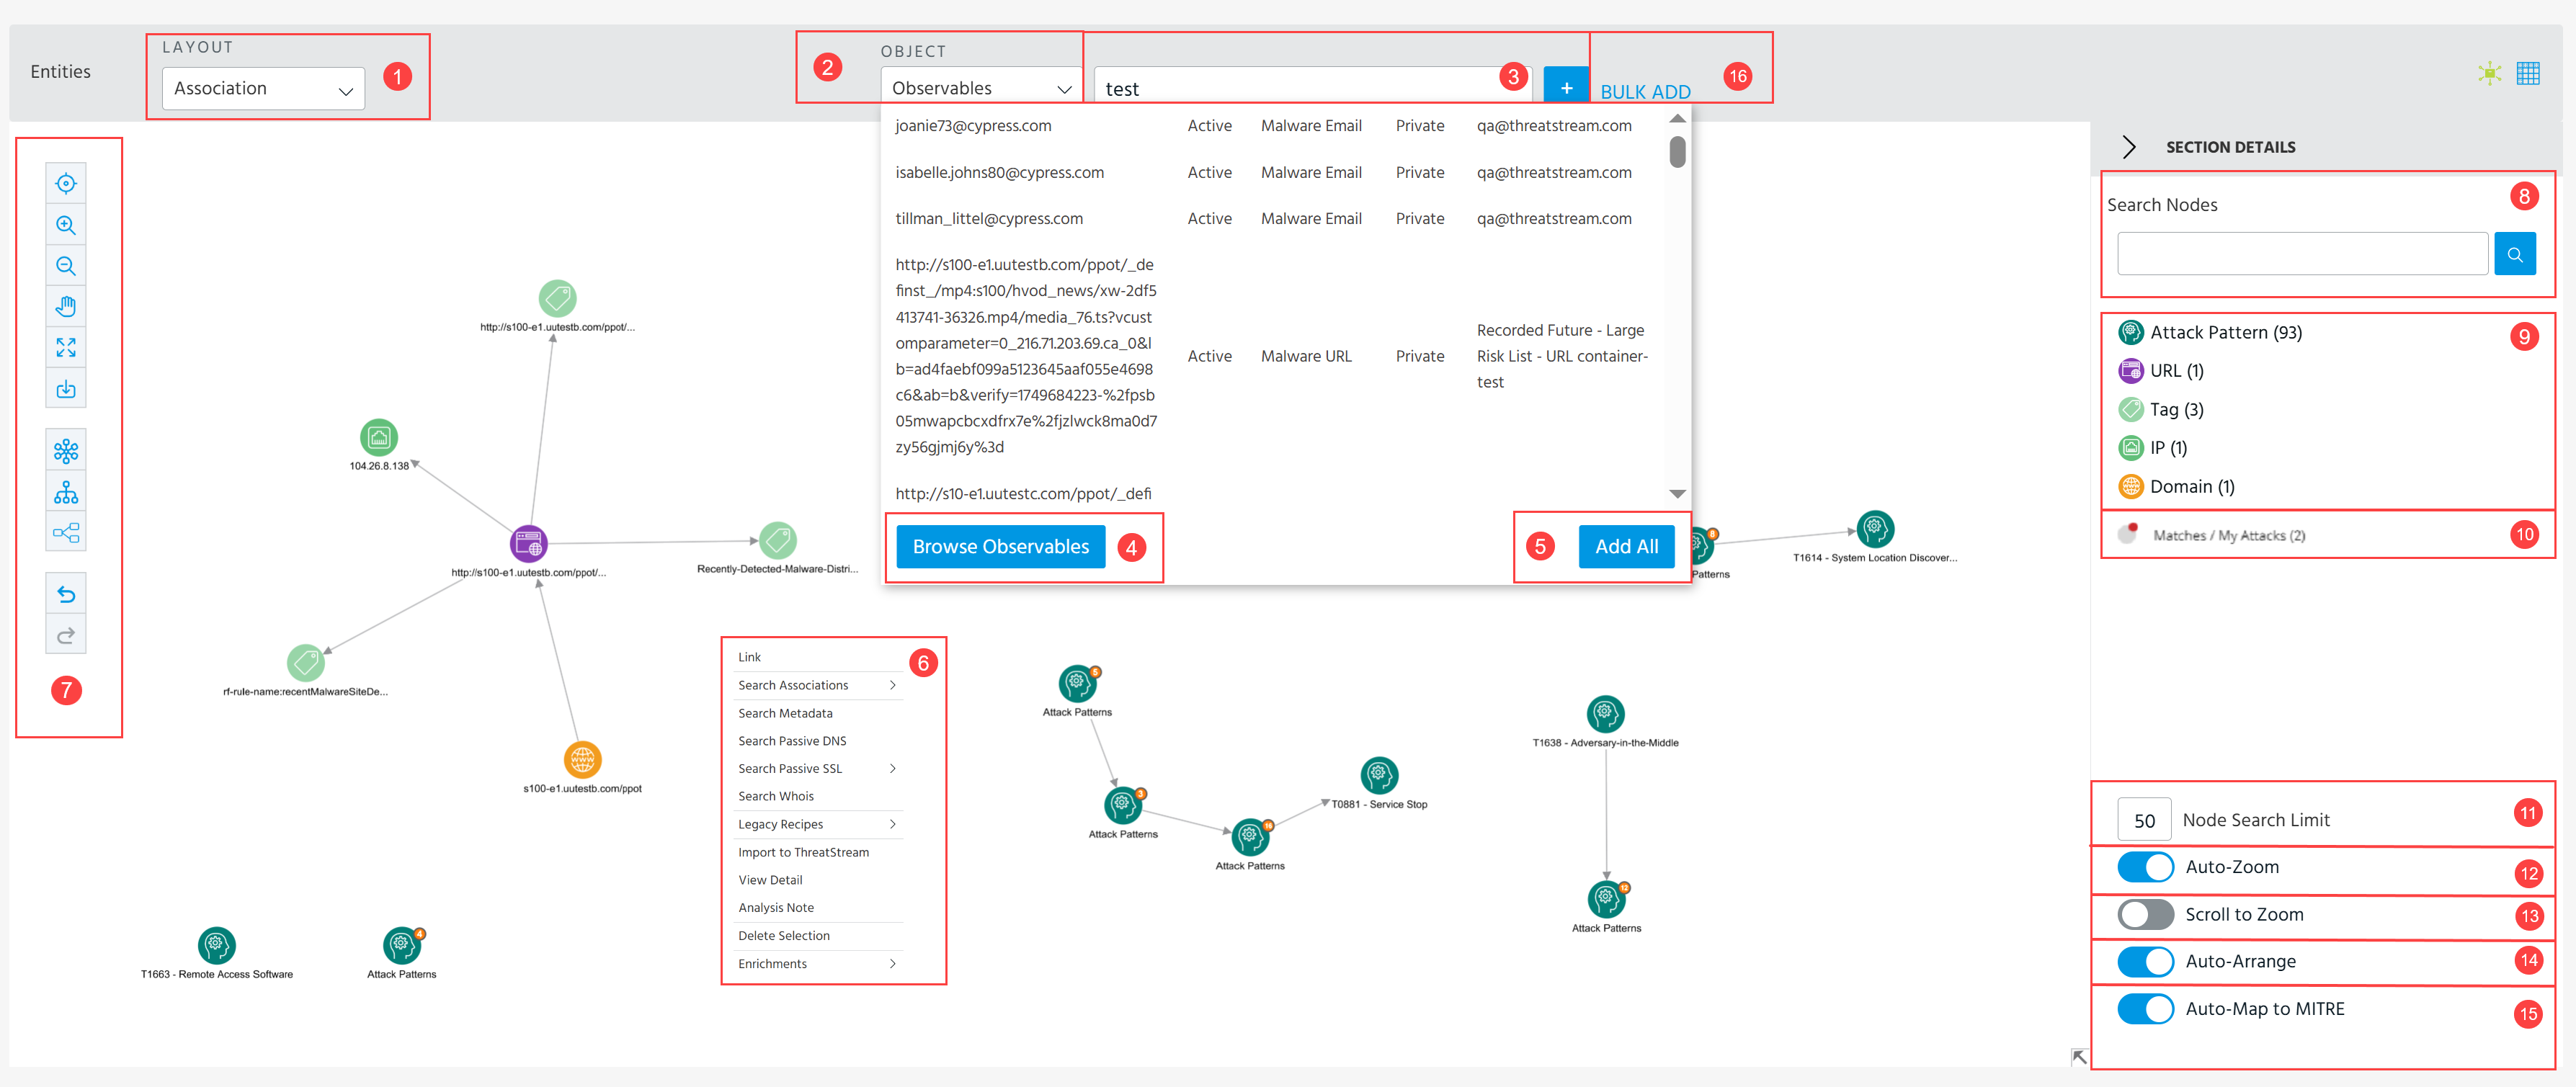
 Layout: Select a layout:
-
Associations: Displays associations related to the selected object added to the investigation. See
 to learn how to add objects to the investigation.
 -
Attack Flow (LA): Displays a sequence of offensive techniques and relationships between them in attack flows added to the investigation. You can select an existing attack flow from the Attack Flow drop-down list, add new items to it, or create a new attack flow if necessary. However, you must either be an attack flow owner or have Org Admin privileges to be able to add new items to the attack flow.
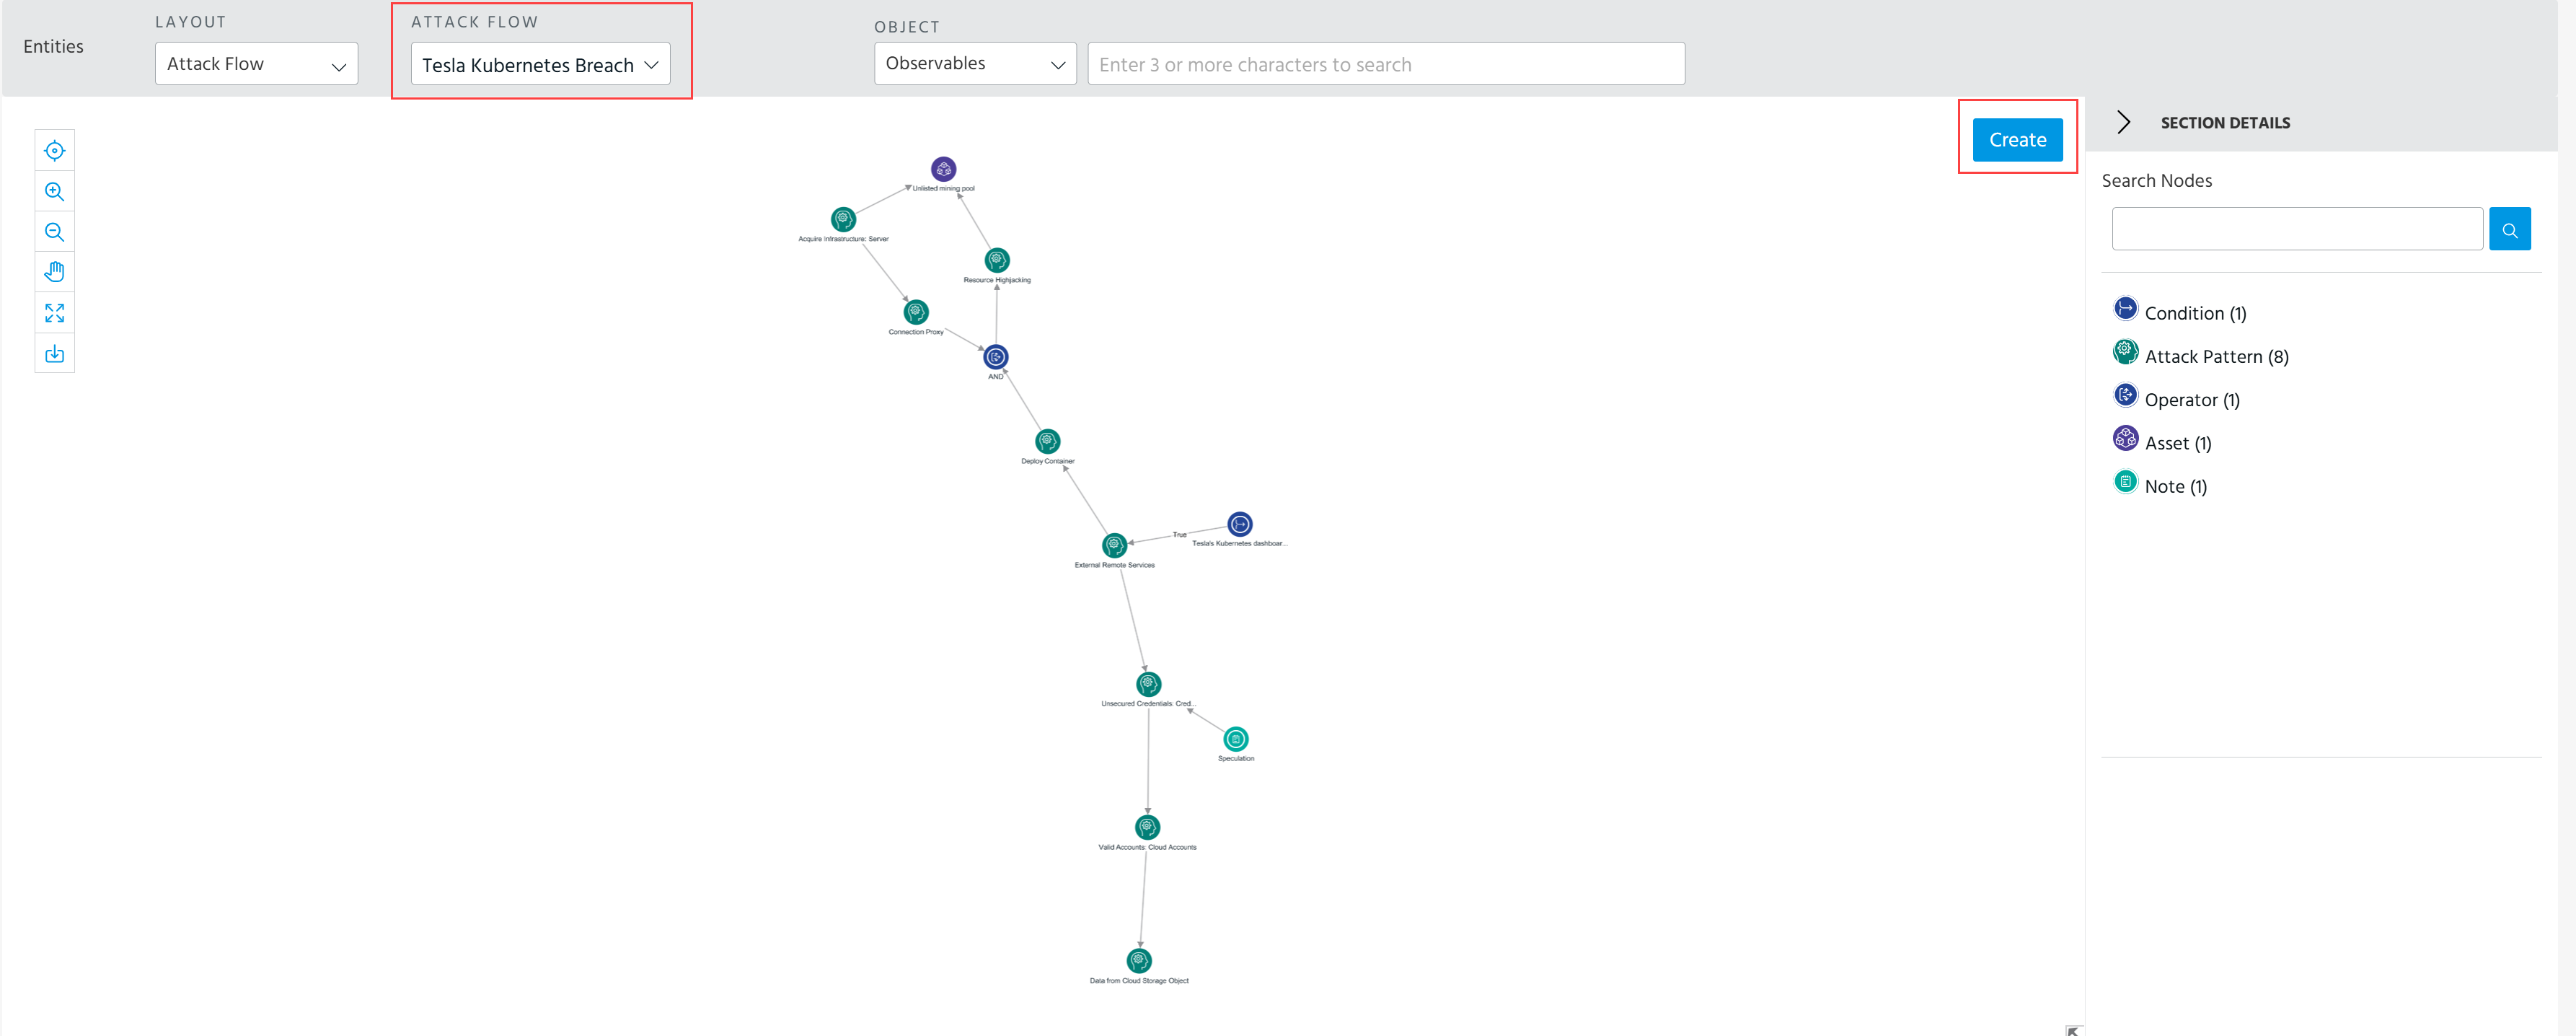
To add a new item to the Attack Flow layout:
-
In the Entities section of the investigation, select Attack Flow from the Layout drop-down list.
-
Click Create.
-
Select an item of your interest. You can add observables and operators to an existing attack flow or create a new attack flow.
-
Create links between newly added items. To create a link, right-click a node, select Link, and then click the node to which you want to connect it to.
Items added to an existing attack flow made within an investigation are also reflected on the details page of the attack flow after the investigation updates are saved.
If you created a new attack flow within an investigation, you can add it to the attack flow library. See Exporting Attack Flows from Investigations for details.
Notes:-
Links created or deleted on the Attack Flow layout are not reflected on the Associations layout. Each layout maintains its own set of links independently.
-
Some nodes on the Attack Flow layout may not be displayed because they are not supported by Attack Flow.
-
Object: Add observables, threat model entities or MITRE ATT&CK attack patterns to the investigation based on a keyword search.
 Quick Add: Add Not Imported observables to the investigation. To do this, enter an observable value and click +.
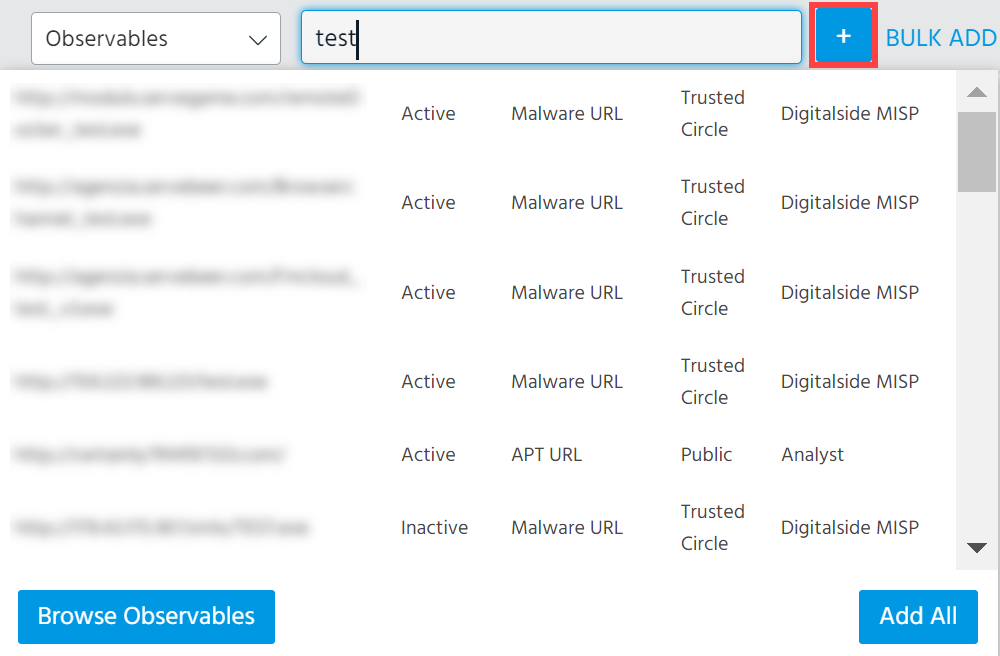
In some cases, multiple instances of the same observable value are listed in the search results. In these cases, different instances of the same observable are available to you from multiple sources. Observable sources are listed in the search results, thus enabling you to select an instance of the observable based on the source of your choosing.
See Not Yet Imported Observables in Investigations for more information.
 Browse: Add observables, threat model entities, and MITRE ATT&CK attack patterns to the investigation using comprehensive search functionality.
 Add All: Add all entities displayed in the search results to the investigation.
 Actions for selected nodes:
-
Link: Create a link between the selected node or group and another node or group on the chart. To create a link, select a node or group, click Link, and select the node or group with which you want to link the initial node or group.
When you add a link between a node or group with a group, links are created with each node contained within the group. Thus, if you ungroup nodes in a group, the original link is maintained with each ungrouped node.
Links can be removed by clicking the link and then pressing the Delete (for Windows) or FN+Delete (for Mac) keys on your keyboard.
Note: Creating a link is a visual connection only and does not create an association between entities.
- Rename: Rename the selected group. Only groups—and not individual nodes—can be renamed. Group names can be no more than 80 characters.
- Search Associations: Search Observables and Threat Model entities that are associated with the selected entity in ThreatStream. Related entities are added to the chart.
- Search Metadata: Add any ASNs, tags, or other metadata associated with the selected entity to the chart.
- Search Passive DNS: Search Passive DNS threat intelligence data for observables related to the selected nodes. Related observables are added to the chart.
- Search Passive SSL: Search Passive SSL data for certificate information. The following Passive SSL searches are available:
Search Related Certificates: Search for related certificate based on certificate text strings. When you run Search Related Certificates, you must select the certificate text of interest. If no Related Certificates are found, the "No data found" message is displayed in the top right corner of the interface.
- Certificate to IP: Search IP addresses associated with selected certificates.
Certificate to Domain: Search domains associated with selected certificates.
- Search Whois: Search Whois threat intelligence data for observables related to the selected nodes.
- Legacy Recipes: Run a sequence of searches developed by the Anomali Threat Research team for specific research scenarios.
-
Automated Tasks: Run a sequence of enrichments on a node for automated investigations. You can run automated tasks on Domain, Email, IP, Hash, and URL nodes. You can run an automated task on one or several selected nodes of the same type.
For more information on automated tasks, see Automating Investigation Tasks in ThreatStream.
For more information on how to run automated tasks, see Using Automated Tasks in Investigations.
- Import to ThreatStream: Import selected observables into ThreatStream. Clicking this action will take you to the Import page.
- Group/Ungroup: Group together selected nodes. You can also ungroup grouped nodes by selecting them and clicking Ungroup.
- View Detail: Drill down on the details page in ThreatStream for the selected node.
- Delete Selection: Delete the selected node from the chart.
-
Enrichments: Pivot on the node using enrichments which you have activated on ThreatStream.
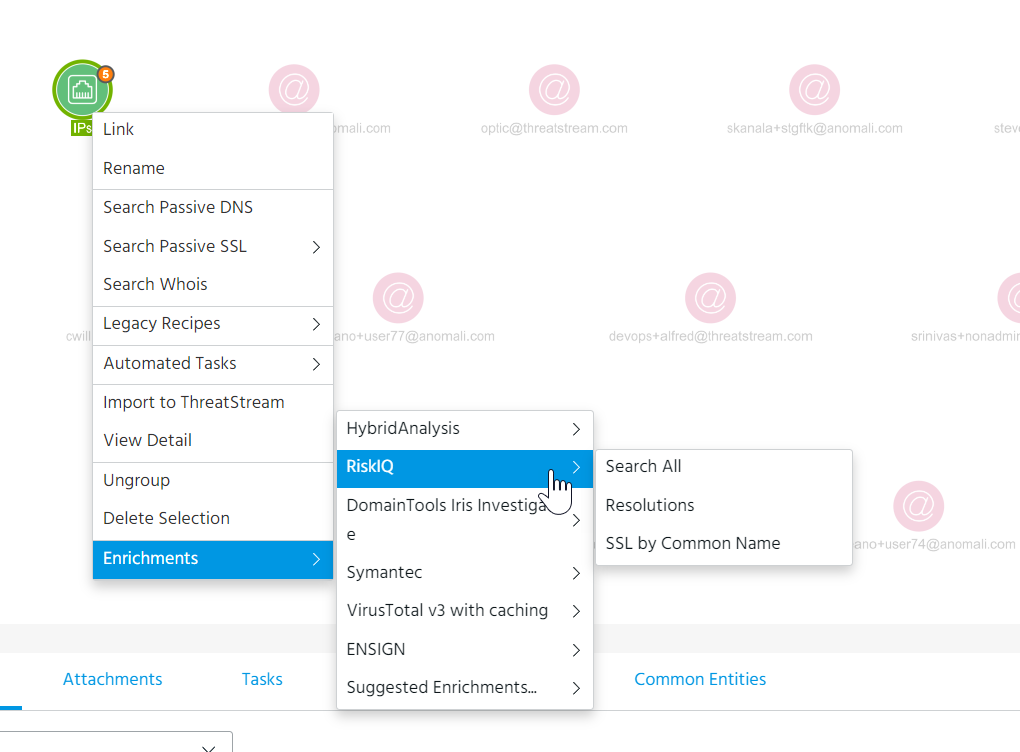
Click Search All within an enrichment pivot menu to execute all available pivots from the enrichment on the selected nodes.
Note: The Enrichments menu is not available when nodes of more than one type are selected.
 Chart Options:
- Center the chart.
- Reset the chart. This removes all nodes from the chart.
-
Zoom in or out on the chart.
Tip:
-
You can zoom using your mouse wheel by clicking inside the chart and holding the control key on your keyboard.
-
Zoom centers on specific nodes when you select nodes and zoom in or out.
-
When you zoom in on a section of the chart and add a new node, the current zoom setting persists after the node is added.
-
- Toggle the pointer between move and select modes. Move enables you to click and drag the entire chart around the workspace; select enables you to click and select individual node or click and drag to select multiple nodes. Alternatively, you can right click on the chart to drag the entire chart around workspace.
- Toggle full screen view.
- Export the chart in the PNG format.
- Toggle between standard, hierarchical, and structural views.
- Undo:
- Add nodes: Reverses addition of one or more nodes including bulk additions.
- Delete nodes: Restores one or more nodes (and associated edges) removed in a single delete action.
- Move nodes: Reverts the last node or group position change.
- Redo: Re-applies the last undone action, if feasible.
The Undo and Redo options are available only on the Association layout.
As investigations can be saved, the Save Chart and Open Existing Chart options are not available on Explore charts within Investigations.
 Search Nodes: Search for nodes on the chart by keyword. Nodes that match the keyword you enter are spotlighted on the chart.
 Chart Key: Select nodes on the chart by type.
 Matches / My Attacks: View the nodes for which matches were received from Anomali Security Analytics and other integration destinations that you have configured to send My Attacks report. These nodes are indicated with a red dot on them. Click on a node to see its details in the Selection Details widget on the right-hand side. The matches count typically reflects the matches that were found when the investigation was created or last refreshed. The count may update when a new node is added to the investigation and new matches are found against this node.
For more information about Matches and My Attacks, see Viewing Matches and My Attacks.
 Node Search Limit: When you execute a search on a chart node, this setting limits the maximum number of nodes added to the chart from the total search results.
 Auto-Zoom: When enabled, the chart automatically adjusts when you add nodes so that new nodes are in view.
 Scroll to Zoom: When enabled, nodes added to the chart can be zoomed with a mouse wheel. By default, the feature is disabled.
 Auto-Arrange: When enabled, nodes added to the chart are automatically arranged based on the current view.
 Auto-Map to MITRE: When enabled, MITRE TTPs associated with entities resulting from pivots are automatically added to the investigation. These TTPs are mapped on to the MITRE ATT&CK model. For more information on MITRE ATT&CK TTPs in investigations, see Using the MITRE ATT&CK Framework in Investigations.
 Bulk Add: Add candidate observables to the investigation from a PDF or TXT file. Structured data is not supported. PDFs must be 20MB or less. TXT files must be 10MB or less.
Up to 1000 observables will be parsed from the file and added to the investigation as Not Imported Observables and available on the Explore tool and table view. If any parsed observables already exist in ThreatStream, they are added to the investigation as Already Imported Observables.
Adding candidate observables does not trigger an import session. Global and organization exclude lists are not applied to candidate observables until they are imported. Hence, observables present on your organization Exclude List can be added to the investigation as Not Imported Observables. If you want to import any of the parsed observables, click Import Observables in the Actions menu of the investigation.
When candidate observables are added to investigations, they can only be assigned IP, Domain, Email, Hash, or URL type.
Viewing Node Details
When you hover over a node on the chart, node details are displayed in the Selection Details section of the chart.
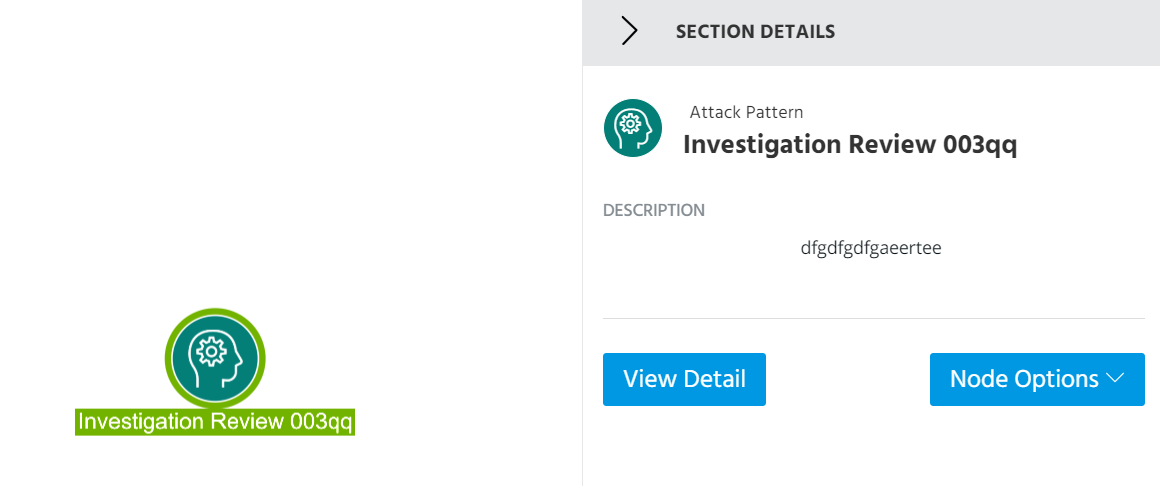
Click View Detail to drill down on the entity details page. You can execute any of the actions listed under above from the Node Options menu.
Entities are displayed in a list view when you select multiple nodes.
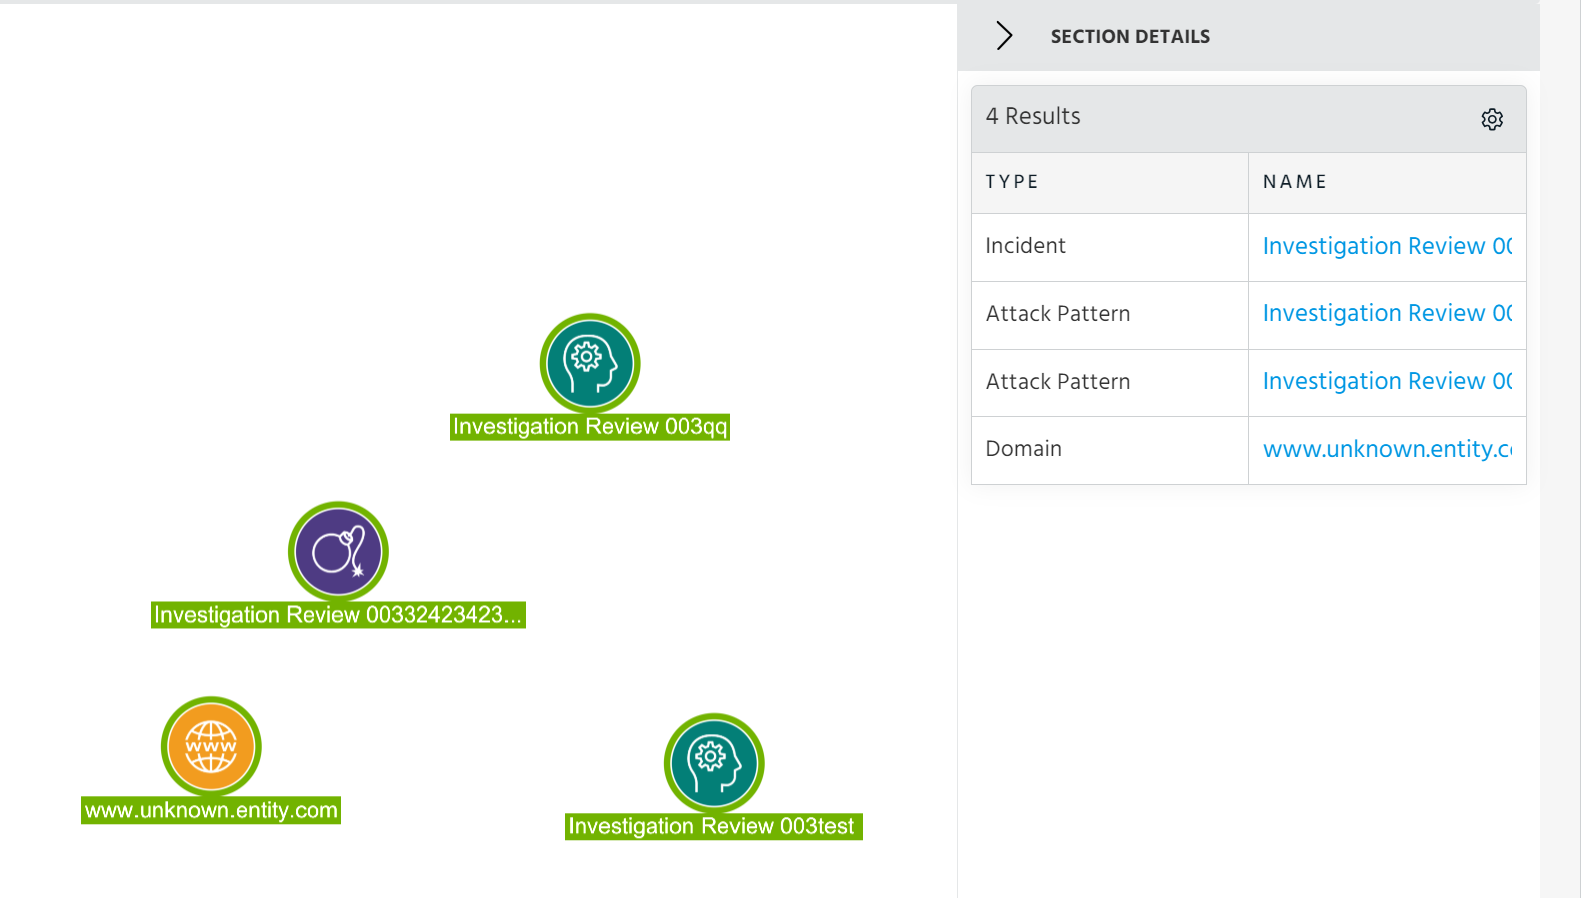
Click a node name to open the entity in the Selection Details section.
Using Enrichments on Explore
In addition to executing pivoting enrichments on nodes in the Explore chart, you can also use the Explore pivoting tool leverage contextual data enrichments within the investigation. Contextual enrichments, which are also available in the Enrichments section on observable details pages, provide qualitative information from third-party sources on individual observables.
When you select a node on the Explore chart, available enrichments are listed in the Enrichments section of Selection Details.
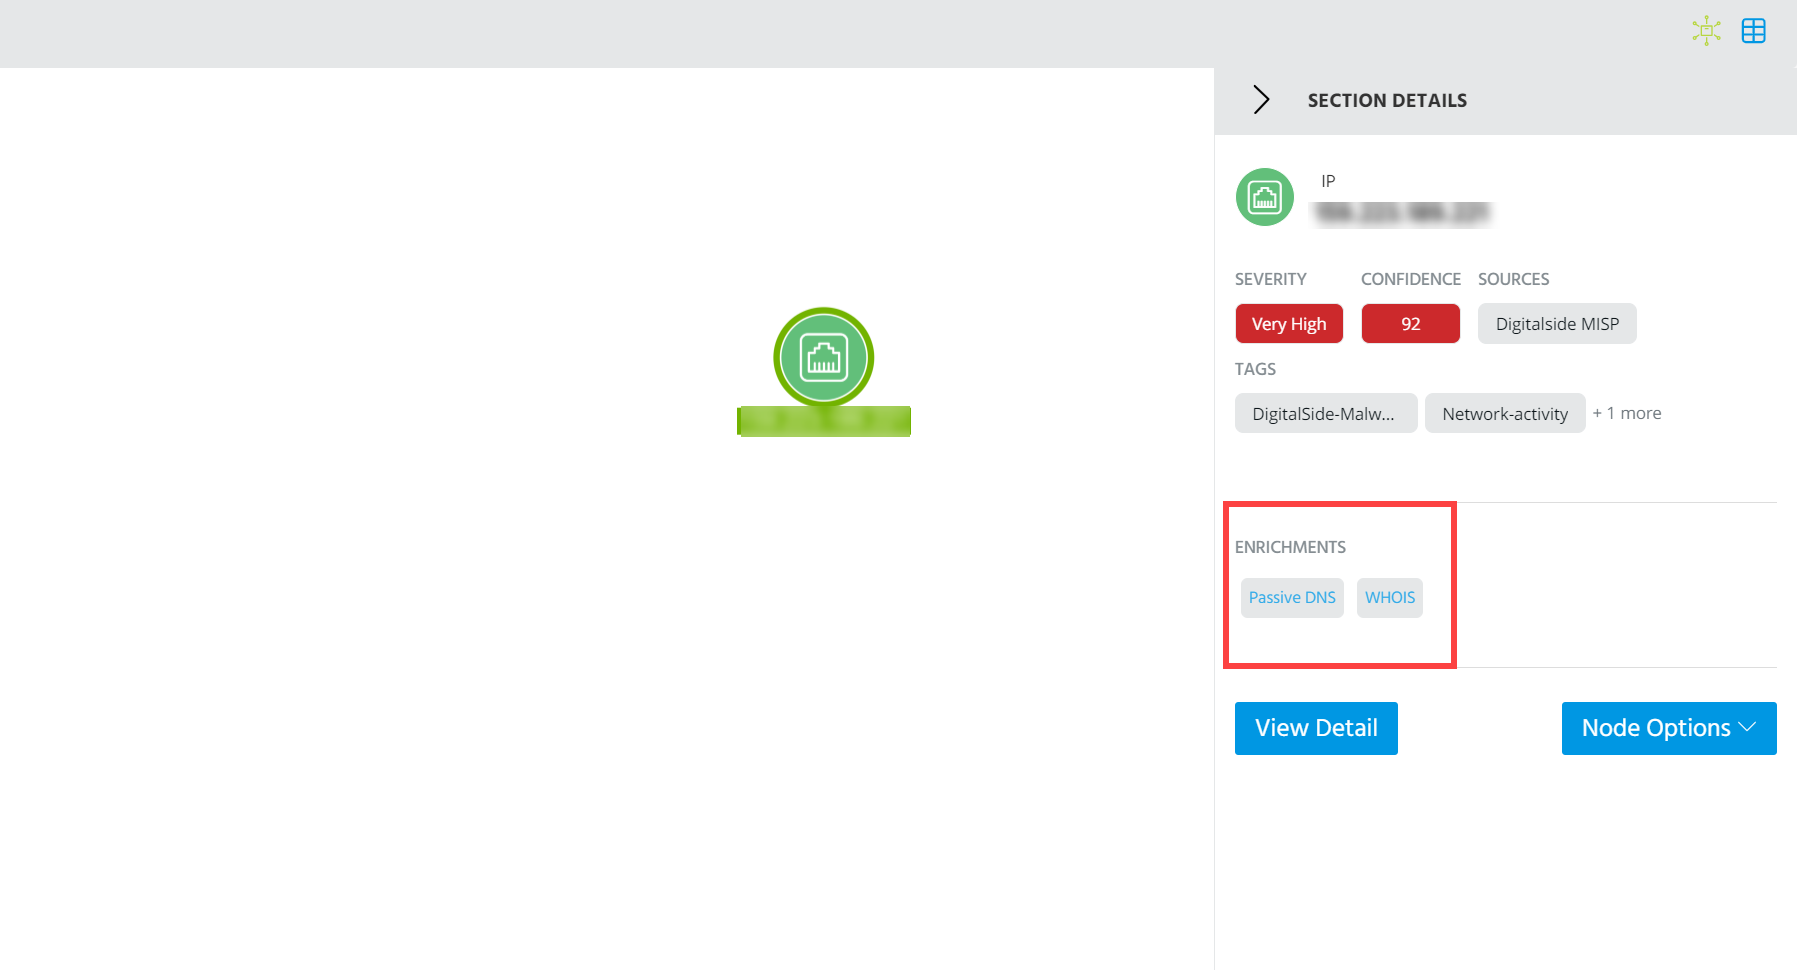
To execute an enrichment, click the enrichment of interest. When you execute an enrichment, ThreatStream opens a tab underneath Entities, as displayed below. To retrieve the latest enrichment data, click Refresh.
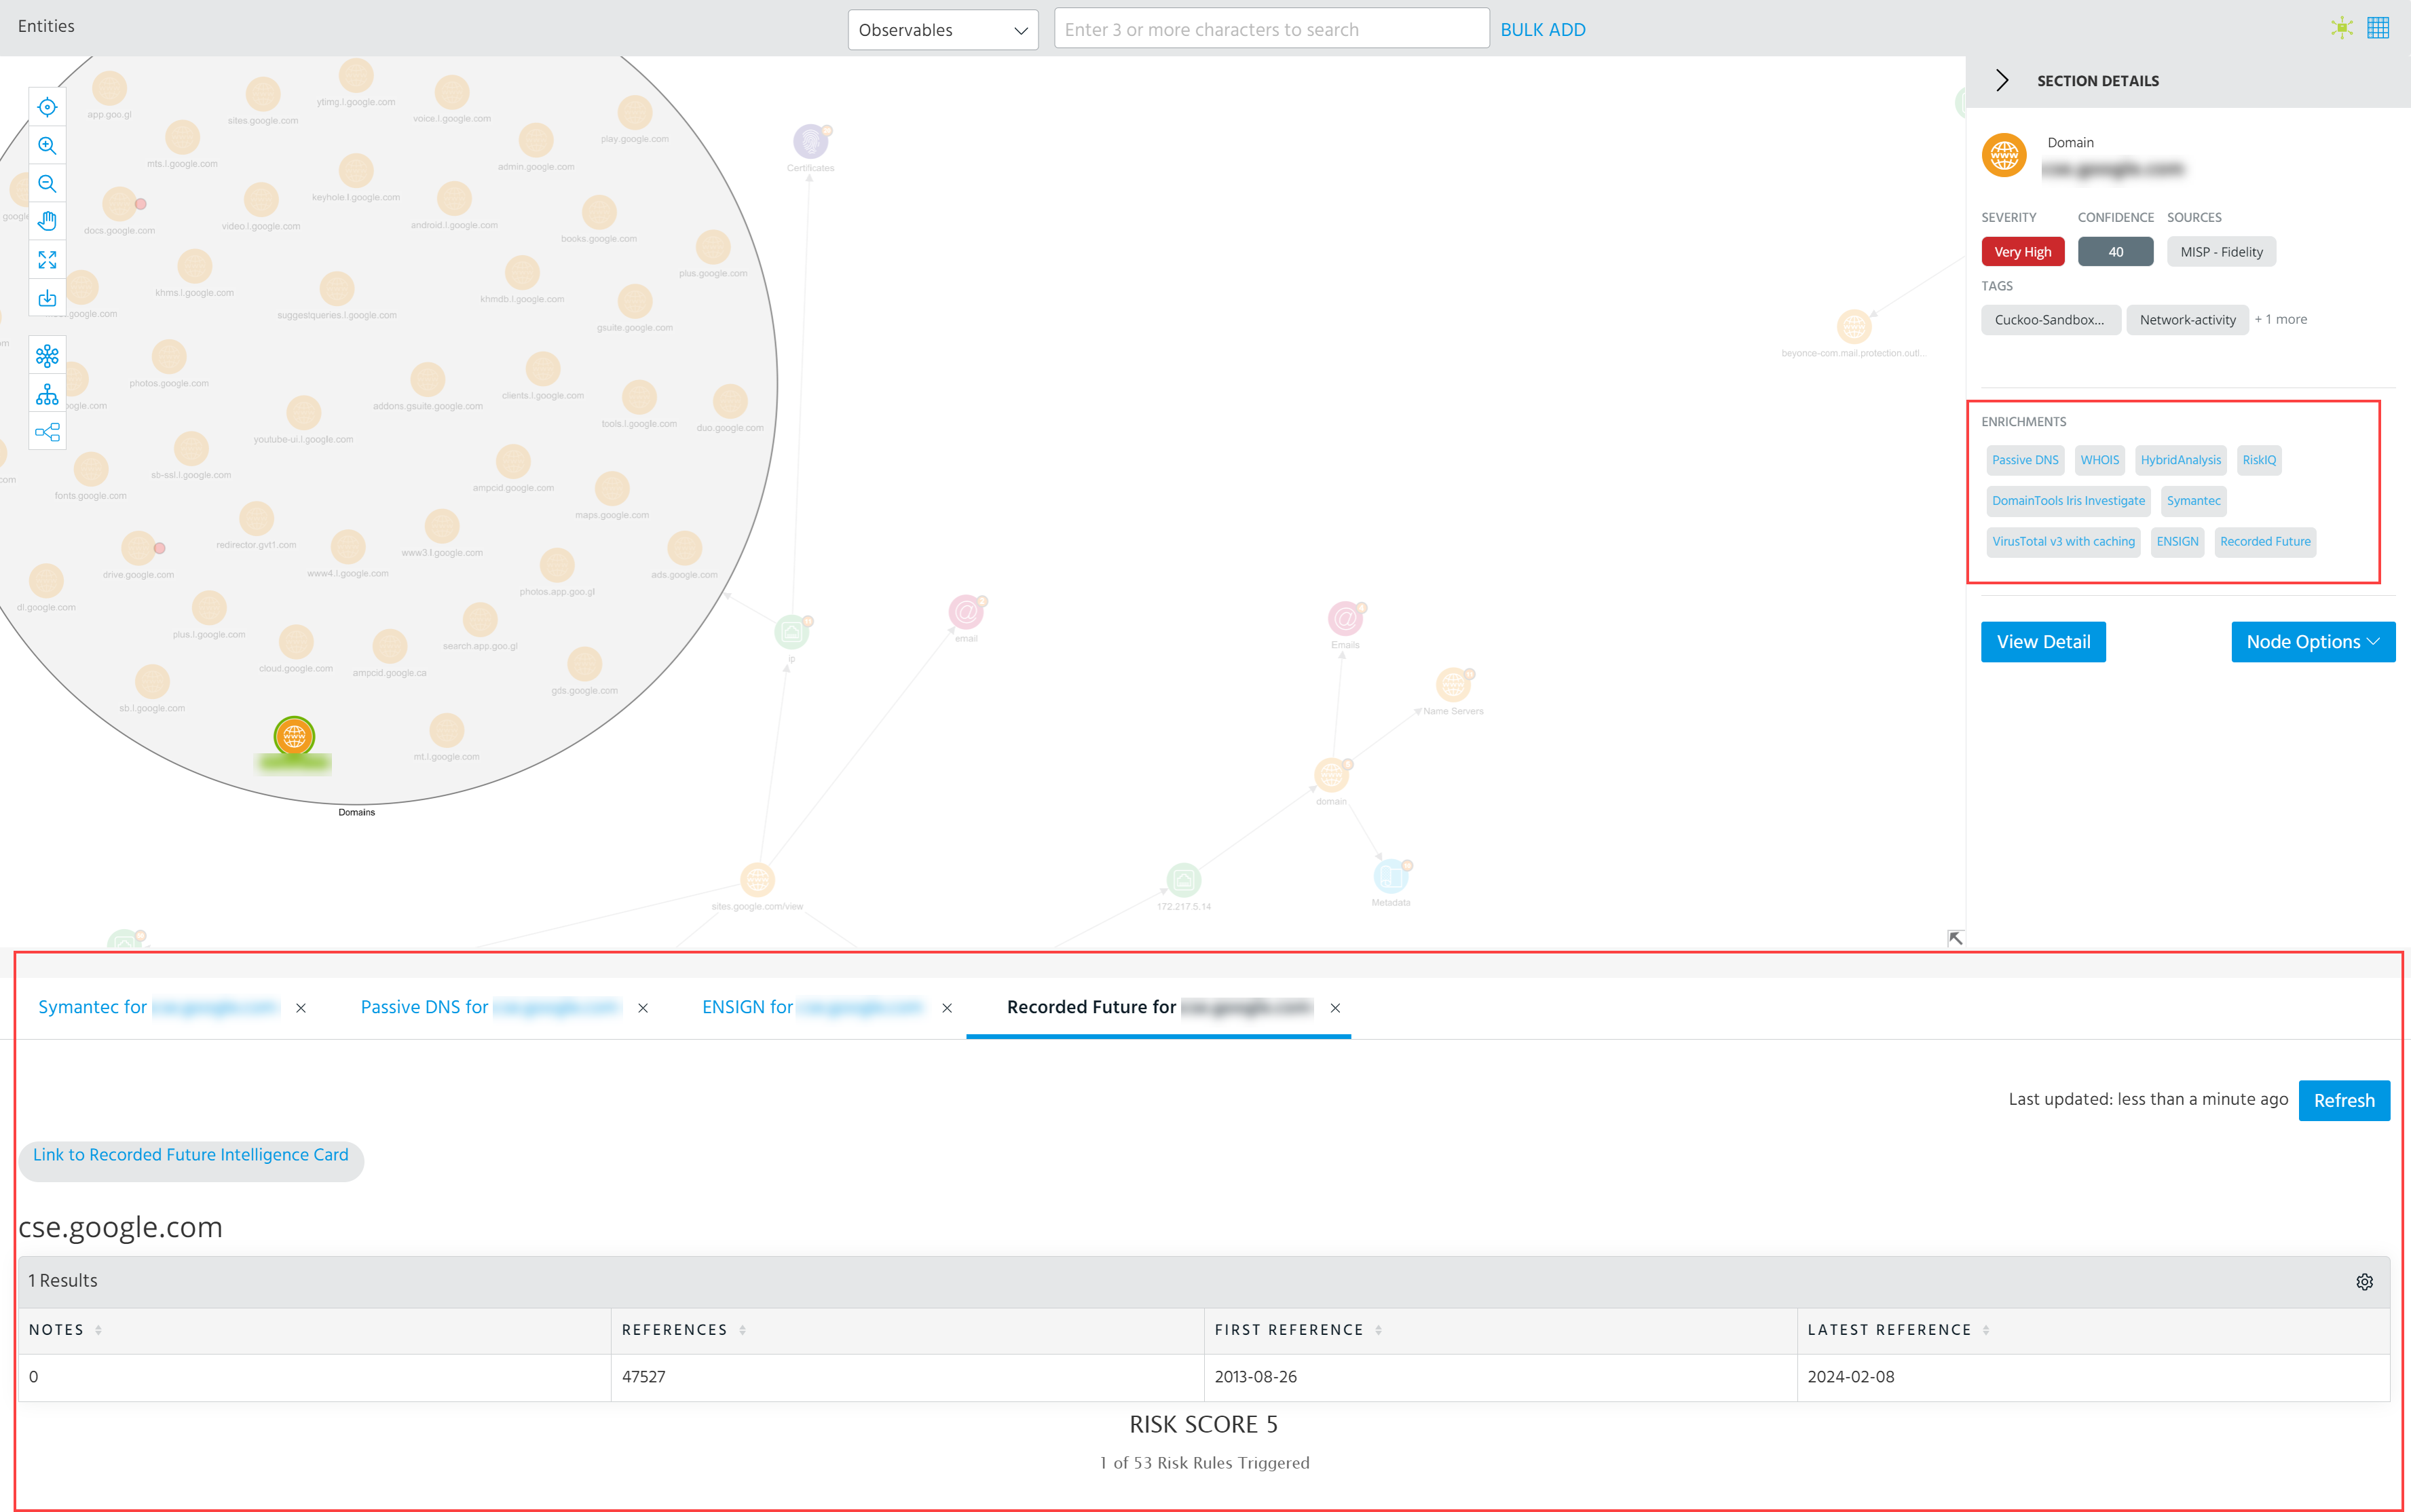
Tabs are added for each enrichment you launch, thus enabling you to reference enrichment data for multiple observables and enrichments in the same section. You can launch up to 100 tabs.
Managing Entities on the Table View
Investigations also provide a table view that displays all entities contained in the investigation for entity management.
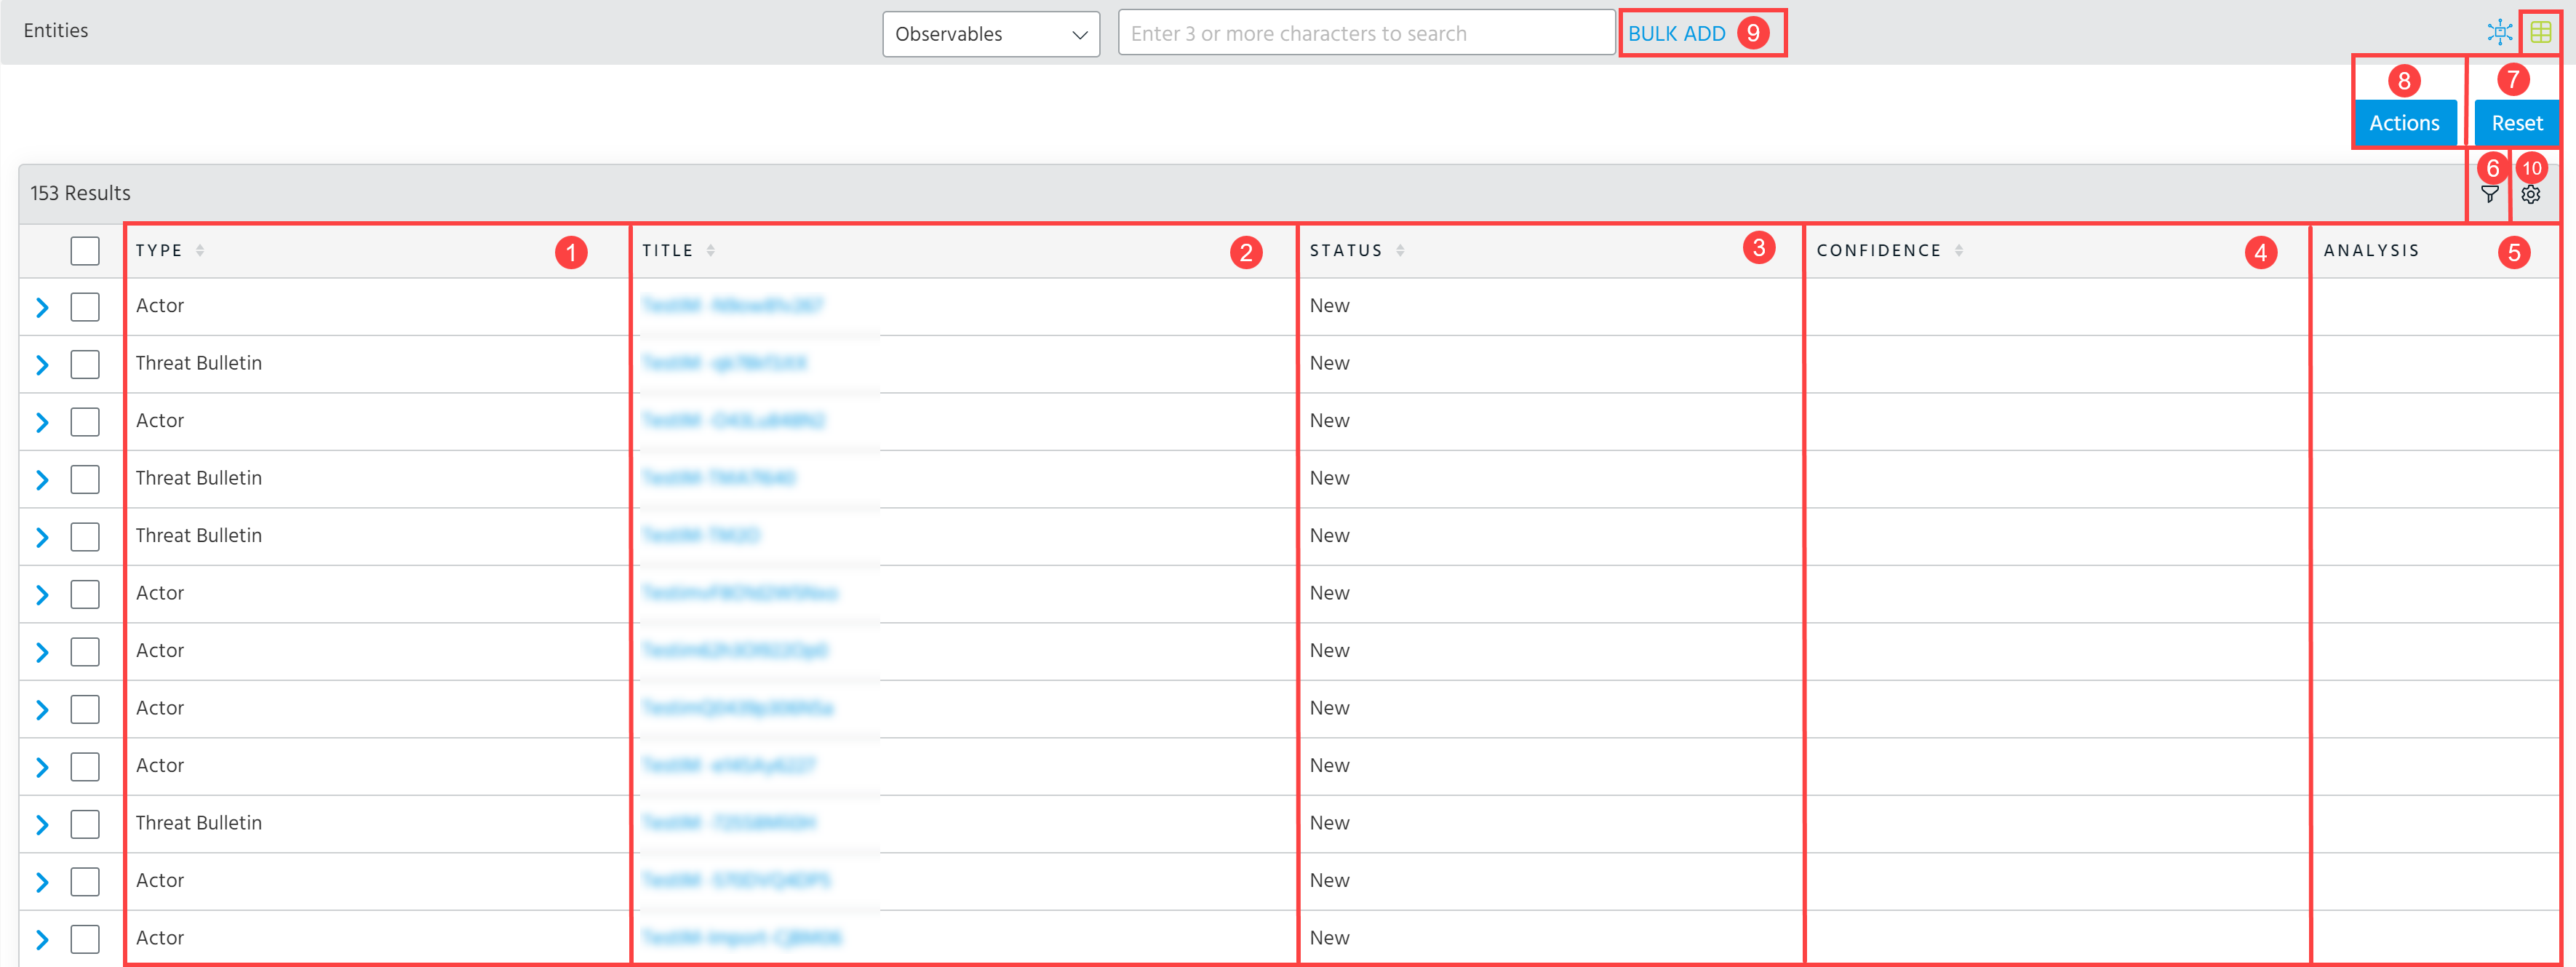
Type: Type of entity.
Title: Name or value of the entity. Click the Threat Model entity name or the Observable value to drill down on the details page.
Status: Possible statuses for observables include Active (imported) or Not Imported (candidate observable). Threat model entities display their current publication status.
You can start an import session from the investigation by selecting the Not Imported observables of interest and clicking Import to ThreatStream in the Actions menu. Observables remain in the Not Imported status until the import session is approved.
Confidence: Confidence score for imported observables.
Analysis: Add contextual information to entities as analysis. Click the Analysis icon ( ) in the Analysis column corresponding to the entity of interest. You can add analysis to Already Imported Observables, Not Yet Imported Observables, Threat Model entities, and entities returned from pivoting on Explore such as tags, ASNs, DNS entities, metadata, or certificates.
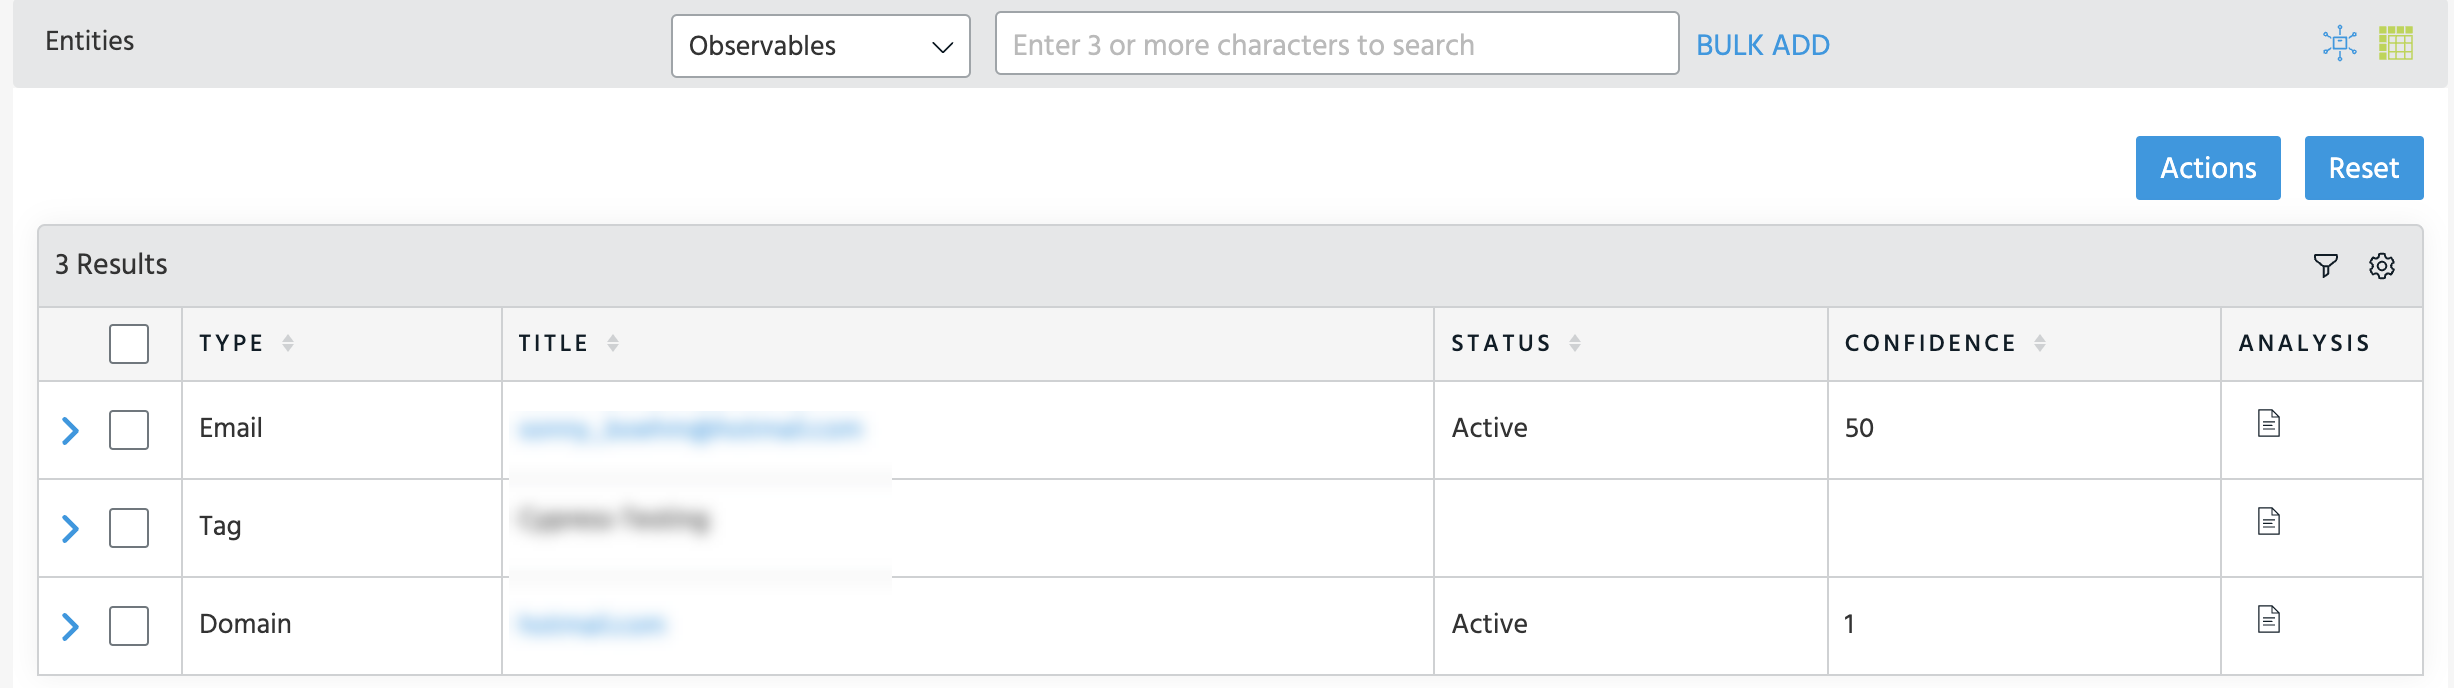
Enter the contextual information on the resulting Analysis window. Previous analysis entries for the entity are displayed below the text box.
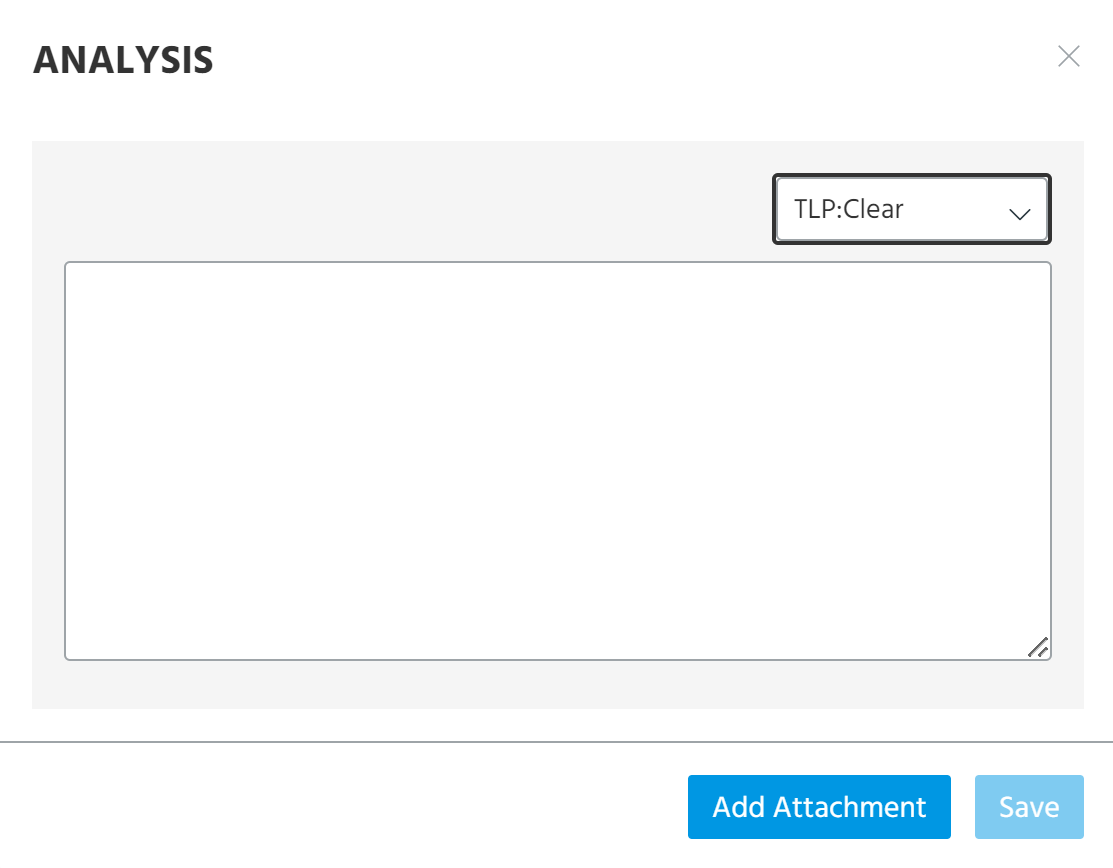
Analysis can also include attachments. Click Add Attachment to upload a file.
Filter: Filter the entities listed in the table. Observables can be filtered by import status, observable type, and confidence. Threat model entities can be filtered by publication status.
Reset Filter: Remove any filter conditions and display all entities associated with the investigation.
Actions:
-
Add Observables: Add observables that are already available in ThreatStream to the investigation.
- Add Threat Model Entities: Add ThreatStream threat model entities to the investigation.
- Import to ThreatStream—Import a selected unknown observable to ThreatStream. The TLP color assigned to the investigation is automatically applied to the import session.
- Delete: Remove the selected entity from the investigation.
- Assign Feature: Assign the selected entity to a Diamond feature. You must have the Diamond tab open in the Models section of the investigation in order for this action to appear in the menu.
- Assign Phase: Assign the selected entity to a Killchain phase. You must have the Killchain tab open in the Models section of the investigation in order for this action to appear in the menu.
- Assign Technique: Assign the selected entity to a MITRE ATT&CK TTP. You must have the MITRE ATT&CK TTP tab open in the Models section of the investigation in order for this action to appear in the menu. See Managing MITRE ATT&CK Technique Associations Within Investigations for more information.
Bulk Add: Add candidate observables to the investigation from a PDF or TXT file. Structured data is not supported. PDFs must be 20MB or less. TXT files must be 10MB or less.
Up to 1000 observables will be parsed from the file and added to the investigation as Not Imported Observables and available on the Explore tool and table view. If any parsed observables already exist in ThreatStream, they are added to the investigation as Already Imported Observables.
- Adding candidate observables does not trigger an import session. Observable exclude lists are not applied to candidate observables until they are imported. Hence, observables present on your organization Exclude List can be added to the investigation as Not Imported Observables. If you want to import any of the parsed observables, click Import Observables in the Actions menu of the investigation.
- When added to investigations, candidate observables can only be assigned IP, Domain, Email, Hash, or URL type.
Table Settings: Select what columns to be displayed in the table. Available columns include Type, Title, Status, Confidence, Country, iType, Source, Tags, and Analysis. Additionally, you can change the order of columns in the table by using the drag-and-drop functionality, specify the number of rows to be displayed per page, and enable or disable horizontal scrolling.
Using Automated Tasks in Investigations
You can use automated tasks in your investigations to make a series of checks automatically. You can use automated tasks on one or several selected nodes of the same type.
To use an automated task in the investigation:
Within the investigation, right-click the observable(s), and then in the Automated Tasks section, select the required task.
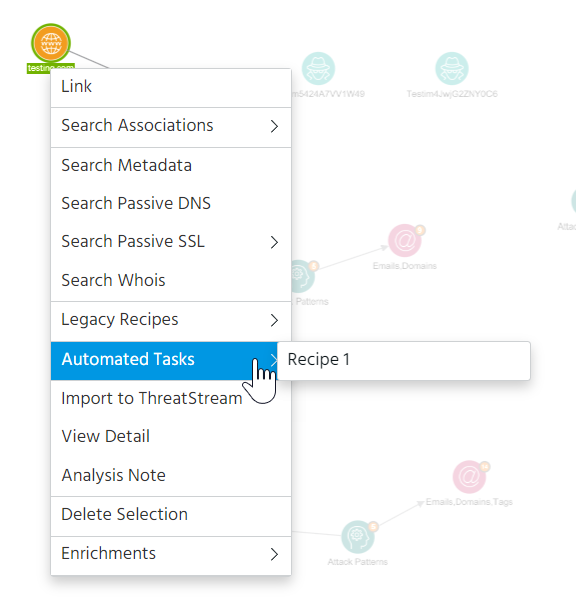
The details of the automation task steps are displayed in the threat card.