Managing Custom Lookup Tables
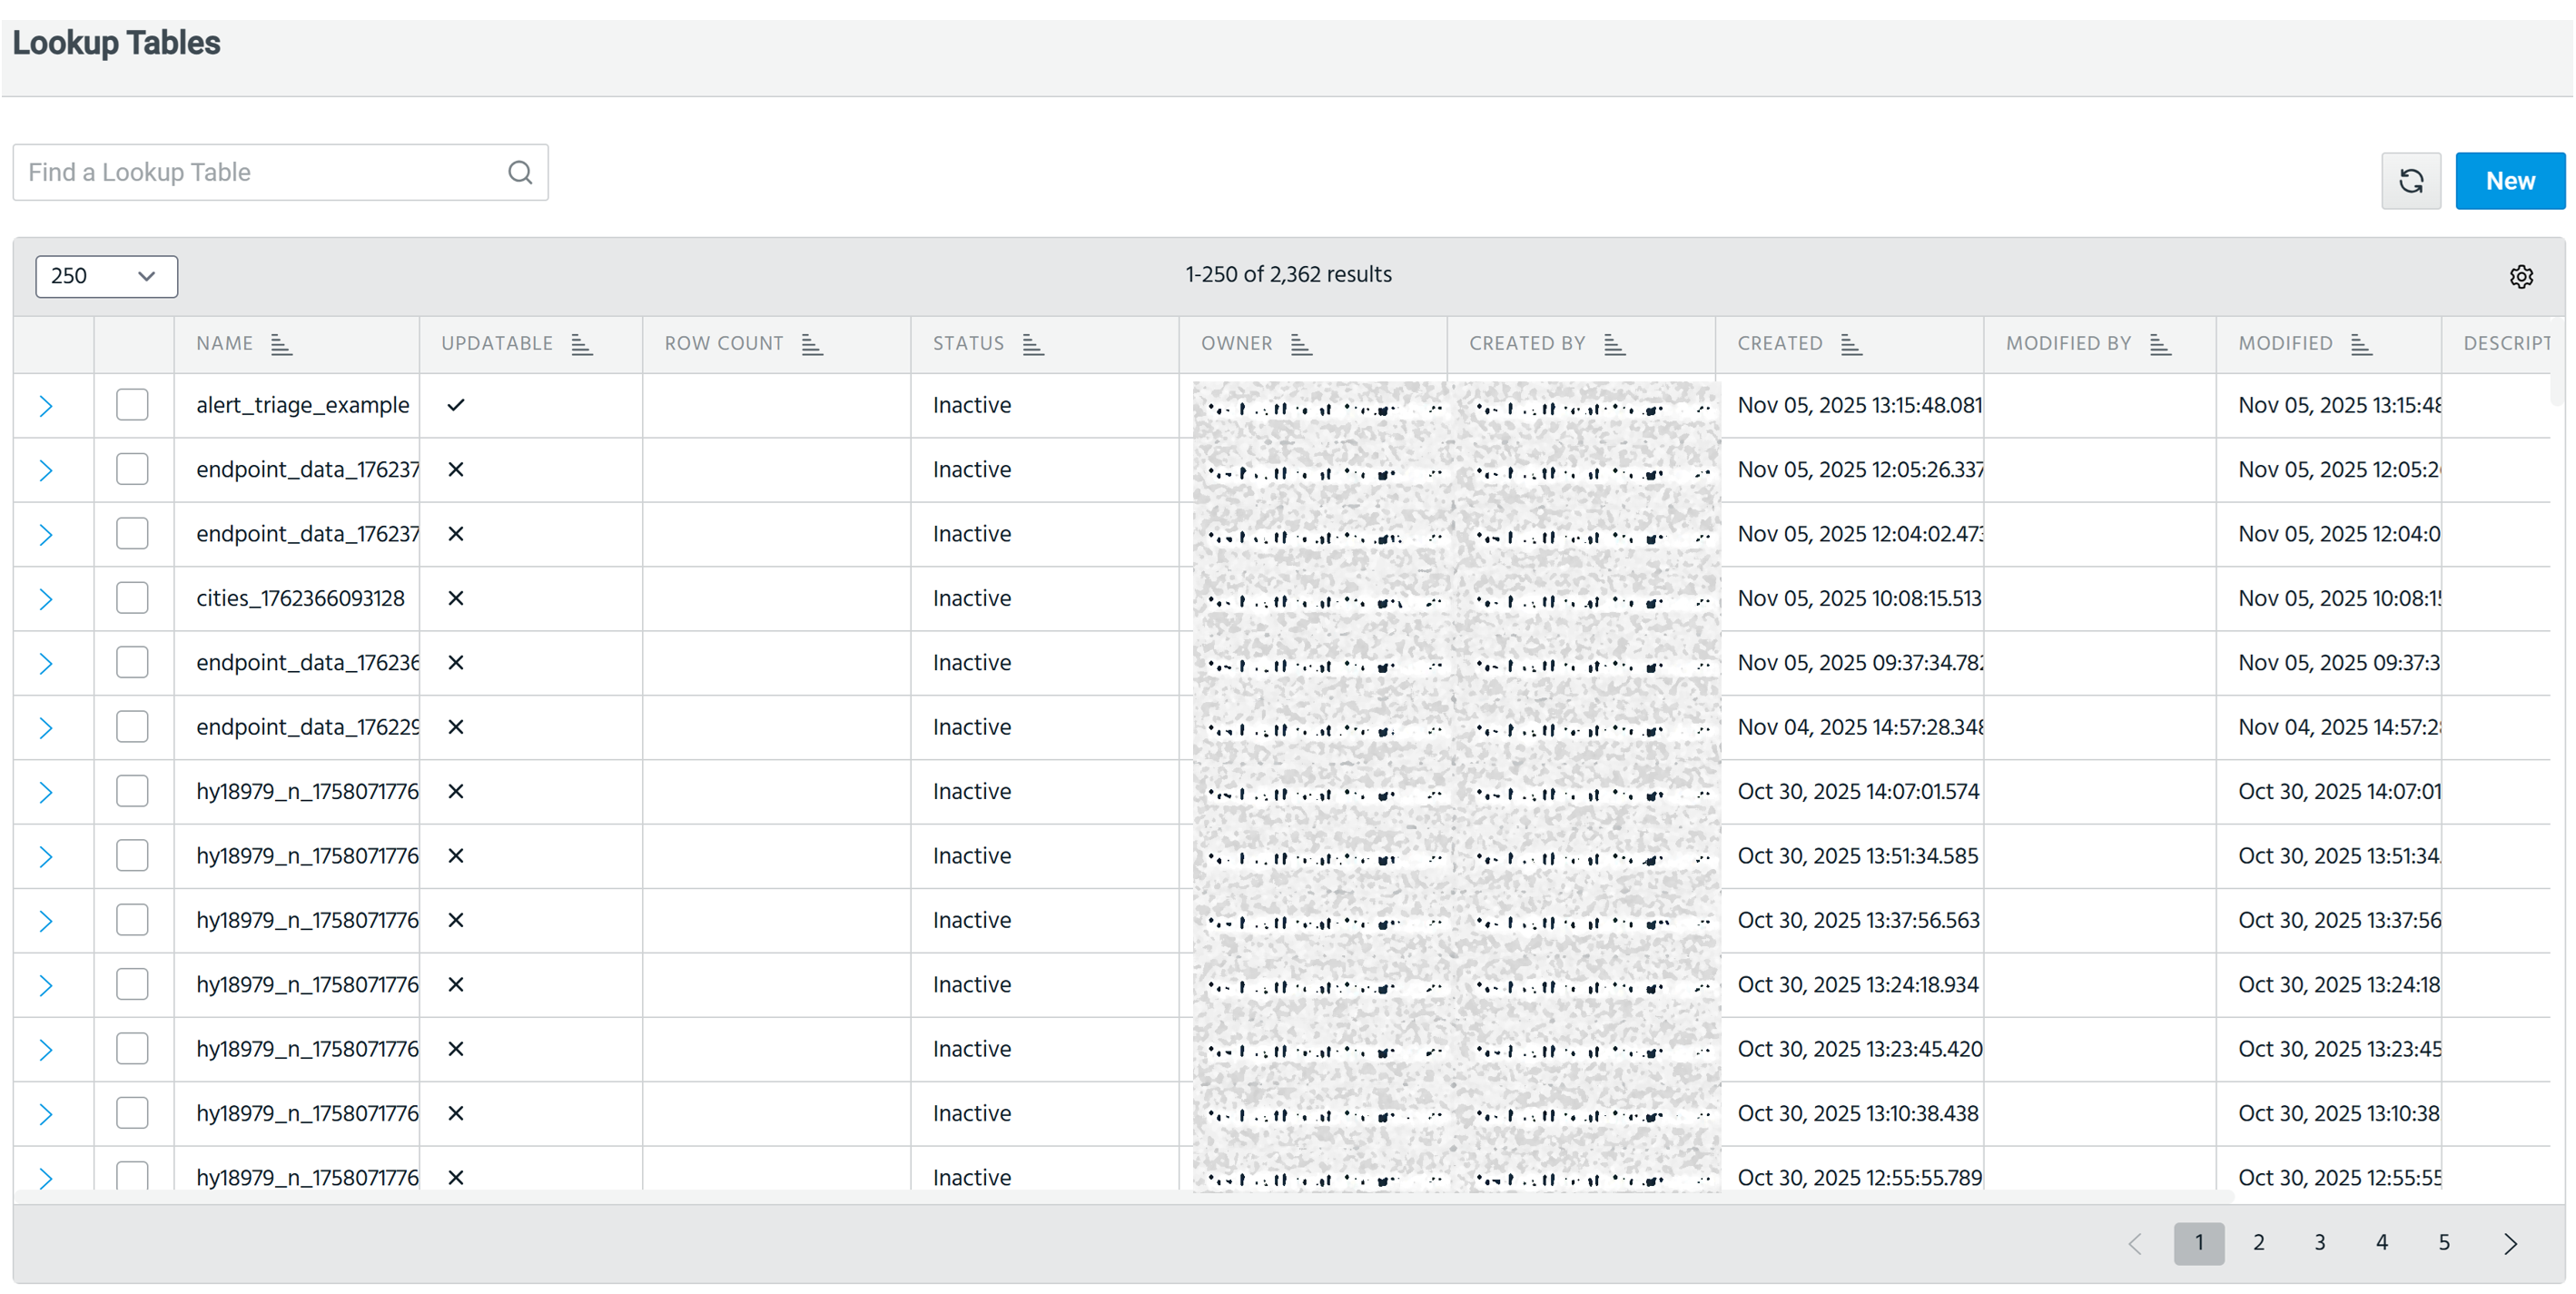
From the Search > Manage > Lookup Tables page, you can perform the following actions with custom lookup tables:
Lookup table validation
If there is a problem with the table validation, the status of the table turns to Failed. To know the reason the lookup table activation failed, click View Details next to the Failed status.
Appending to an Existing Lookup Table
 ) on the Lookup Table tab. Refer to Updating Lookup Tables for details.
To append (add rows in bulk) to an existing lookup table:
Note: A user can always only view and edit tables they own. See User Sharing and Permissions for more information.
-
Create a CSV file that contains the rows you want to add to an existing lookup table. Note that the rows you add must have the same number of columns as the lookup table to which you add the rows.
-
Navigate to Manage > Lookup Tables.
-
Click the New. The New Lookup Table dialog box opens.
-
Click Append to existing table.
-
Select the lookup table to which you want to add rows.
-
(Optionally) Enter a description of the lookup table in the Description box.
-
Use the file controls to browse and select your CSV file.
-
Configure User Sharing and Permissions.
-
Click Create.
The rows are added to the existing lookup table.
Updating Lookup Tables
Note: A user can always only view and edit tables they own. See User Sharing and Permissions for more information.
Updatable lookup tables can be modified. You can edit cell values, add rows, and delete rows.
To update a lookup table:
-
Navigate to Manage > Lookup Tables.
-
Hover your mouse over the lookup table you want to update and click the Edit icon (
). You are redirected to the table in the edit mode.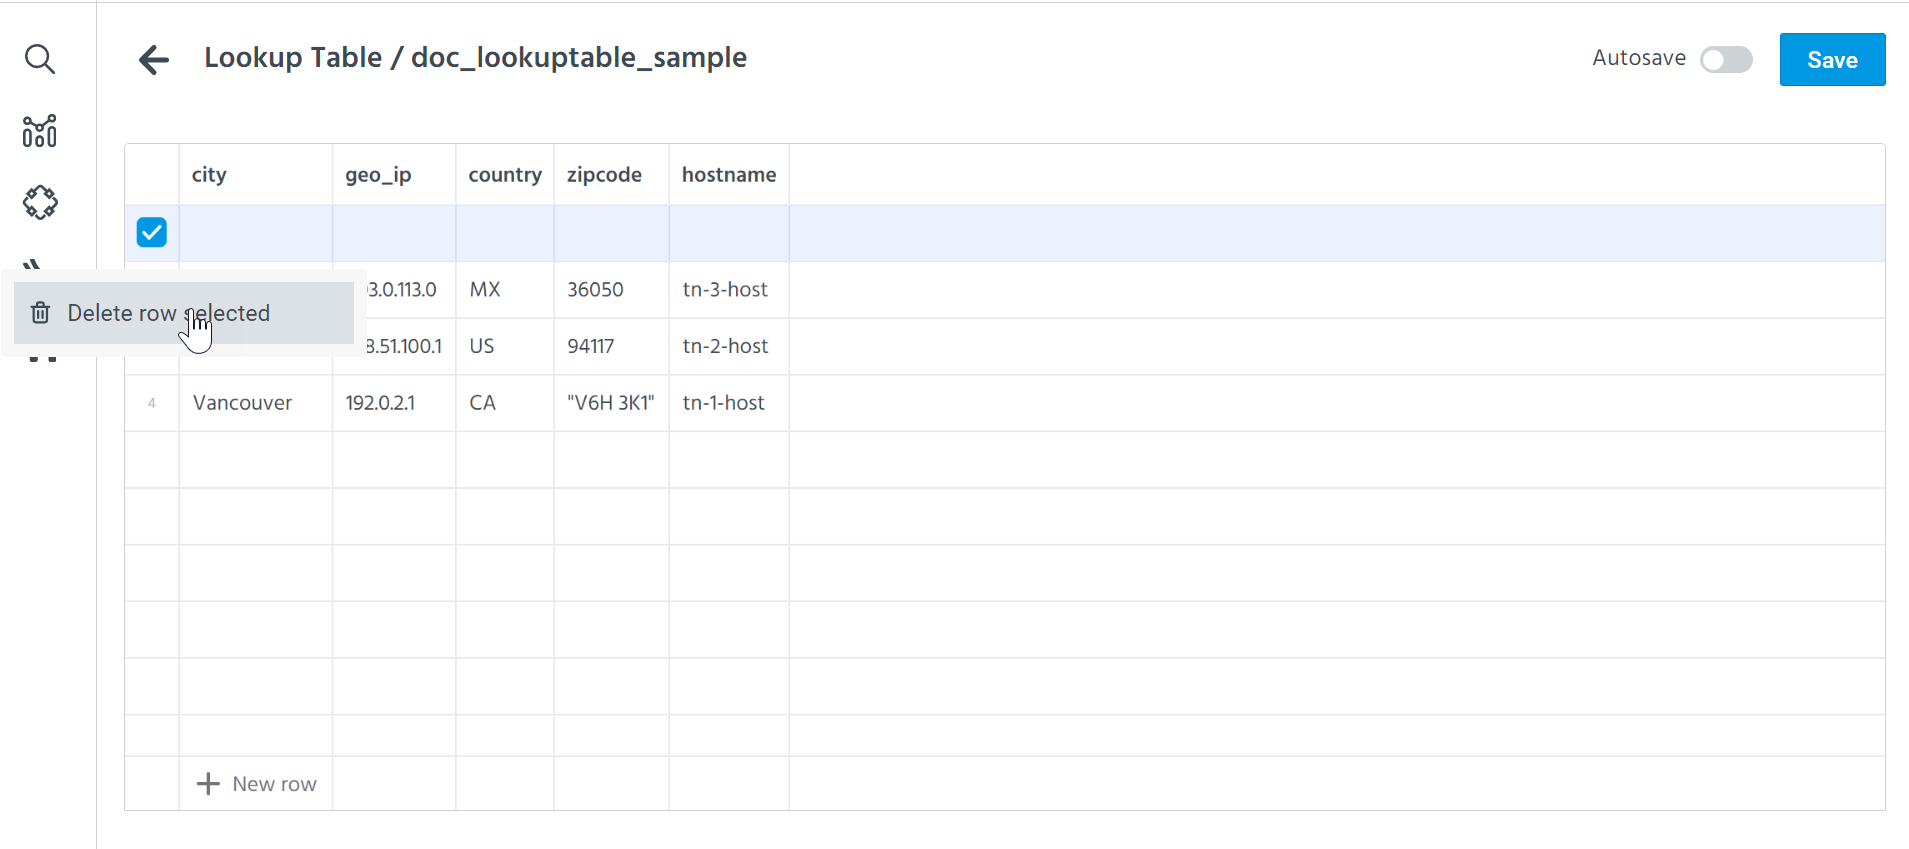
(Optional) In the Tags field:
-
Enter or select resource tags to apply to the lookup table. The auto-complete suggestion shows tags you own and tags shared to your organization. Private tags associated with other users are not shown, except to organization administrators.
-
To create a new tag inline, type a name containing up to 50 characters and click Customize tag color to select a color. A new tag is added to the shared tag list immediately, even if you abandon updating the lookup table.
-
To apply an existing tag, type in the field and select it from the auto-complete suggestion results.
-
Click Manage Resource Tags to view existing or newly created tags.
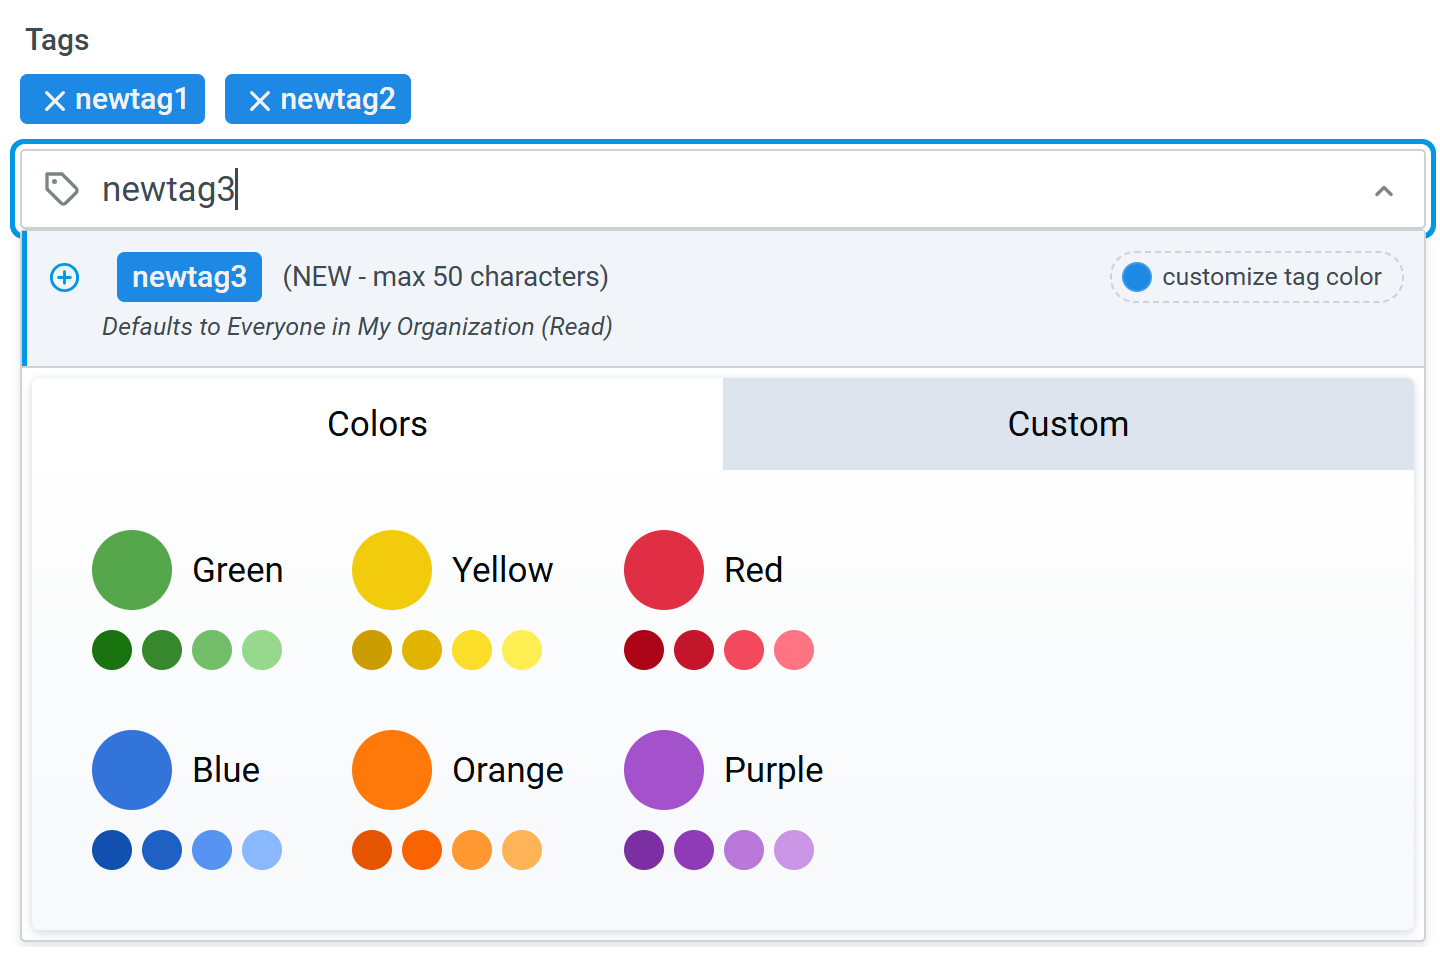 Note: Newly created tags default to Everyone in my Organization (Read). Only tag owners and users with write permission can add or remove tags. See Resource Tagging Permissions for more information.
 -
-
(Optionally) Disable Autosave if you do not want to automatically save your updates. When Autosave is enabled, updates are auto-saved every minute.
-
Modify the lookup table:
-
To add a new row to the table, click + New row.
-
To delete a row, select the row you want to delete, right click on the selected row, and click Delete row selected.
To delete all rows, select the header row, right click on the rows, and click Delete rows 1-x. -
To edit a cell value, double click on a cell and edit its value. Values in the header row cannot be modified.
-
-
If Autosave is disabled, click Save.
The lookup table is updated.
Viewing Lookup Tables
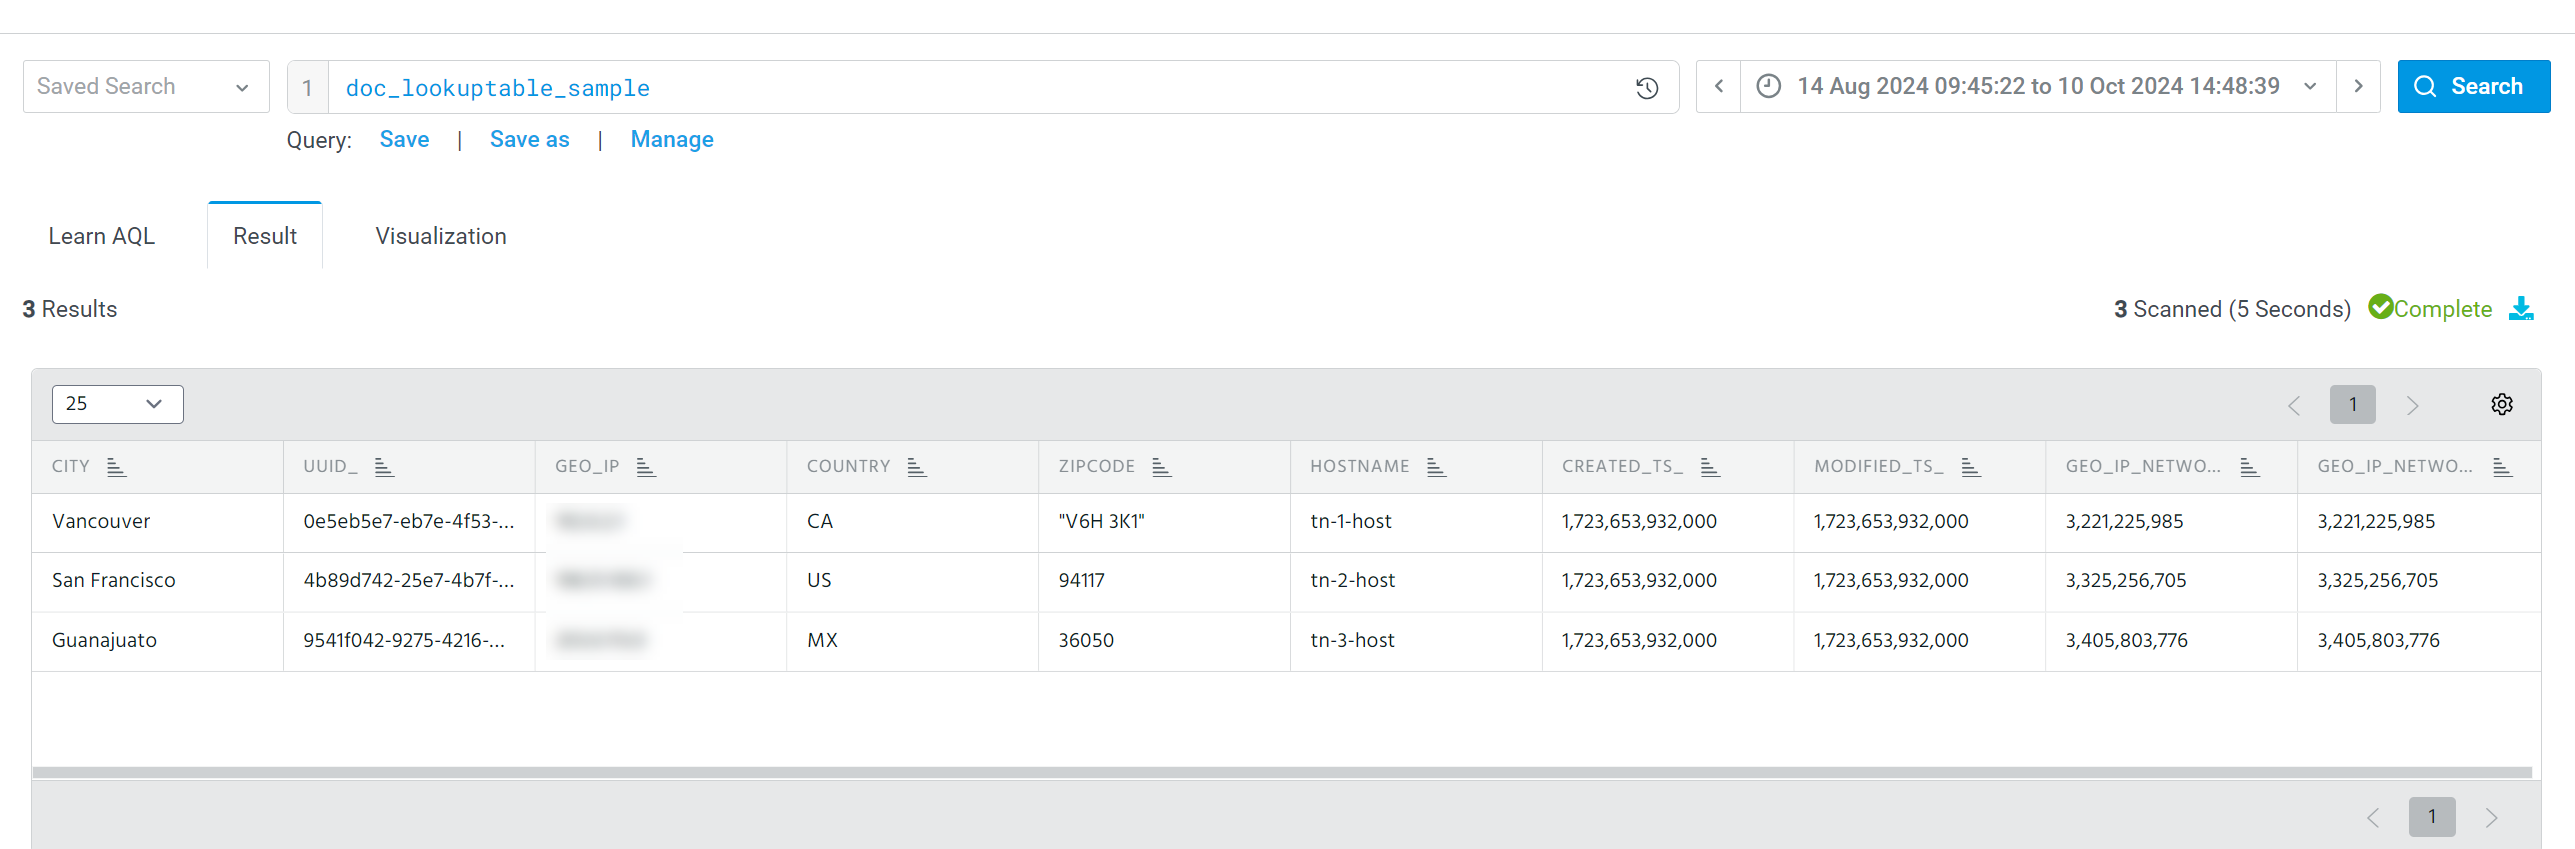
You can view all lookup tables in Search on the Result tab.
Note: A user can always only view and edit tables they own. See User Sharing and Permissions for more information.
To view a lookup table:
-
Navigate to Manage > Lookup Tables.
-
Click the active lookup table of interest.
You are redirected to the Result tab of the AQL Search page.
Exporting Lookup Tables
Lookup tables can be exported in CSV or JSON format.
To export a lookup table:
-
Navigate to Manage > Lookup Table.
Navigate to Search > Manage > Lookup Tables.
-
Hover your mouse over the active lookup table of interest.
-
Click the Export icon (
 ).
).
Alternatively, you can also:
-
Click on the active lookup table name. This opens the Result tab of the AQL Search page.
-
Click the Export icon (
 ).
). -
Select the format and the number of rows to export.
-
Click Submit.
Downloading of the lookup table starts immediately.
Deleting Lookup Tables
To delete a lookup table:
-
Navigate to Manage > Lookup Tables.
-
Mouse over the lookup table you want to delete and click the Delete icon (
 ).
).
The lookup table is deleted.
Alternately, to delete a lookup table, select a lookup table of your interest and click Delete.