Importing STIX Data into the Anomali Threat Model
You can use Import Assistant to import STIX compatible data from a file into a threat model. ThreatStream supports files that follow the STIX 1.2, 2.0, or 2.1 data models. Files can contain any attributes, however, the attributes listed in Supported Attributes for STIX Entities are the only ones supported. If the file contains other attributes, they are ignored.
STIX 1.2 imports must be specified in a valid XML file. STIX 2.0 and 2.1 imports must be specified in a valid JSON file.
When you import the file, ThreatStream extracts the Observables and threat model entities and any associations from it. The associations specified in the file are preserved upon a successful import. You can select whether the imported data is available to everyone (Anomali Community) or accessible to your organization only (My Organization), or shared with Trusted Circles.
If the imported file contains any observables of these types—IP address, URL, email, hash, or domain—then the STIX import process also creates an Observable import session for all the observables. The observable import process goes through the same process described in Importing Observables. Also, see Understanding the Difference Between Observable Import and STIX Data Import.
During the import, a conflict may occur if you try to import a threat model entity of the same name that already exists in your organization. If a conflict occurs, the threat model entity is not imported. Any other entities defined in the XML or JSON file and associated with the conflicting entity may still be imported; however, their association information with the un-imported entity is not preserved.
You can check the status of an import in the STIX Import view of the Threat Model Dashboard (see Threat Model Dashboard). In this view, you can also see any observable import jobs that get created as part of the STIX import.
Understanding the Difference Between Observable Import and STIX Data Import
 Read More...
Two types of import processes exist on ThreatStream:
-
Observable import
Allows you to import structured and unstructured data containing observables into ThreatStream. Imported data needs to be approved before it becomes part of threat intelligence on ThreatStream.
-
STIX Data import
Allows you to import STIX Indicators such as Threat Actors (Actors in ThreatStream), Attack Patterns, Campaigns, Courses of Action, Custom Objects, Identities, Indicators (Observables in ThreatStream), Incidents, Infrastructure, Intrusion Sets, Malware, Notes, Reports (Threat Bulletins in ThreatStream), Tools, TTPs, and Vulnerabilities.
Besides observables, the imported data does not need to be approved and becomes part of threat model right after it has been successfully imported. If any observables are included in the STIX import file, a separate observable import session is created for importing them into ThreatStream. The observable import session must be approved before the observables become part of your threat intelligence.
Guidelines for Importing Observables Through STIX Data Import
Adhere to the following guidelines when importing Observables through the STIX Data Import:
- Only supported STIX Indicators can be imported through the ThreatStream STIX Data Import. STIX Indicators are imported as Observables in ThreatStream.
- The following STIX 1.x CybOX Objects are supported:
Address,DomainName,EmailAddress,EmailMessage(sender_address or from_address),File(hashes),Hostname,Mutex,SocketAddress(ip_address),URI,WinRegistryKey. - The following STIX 2.x indicators are supported:
domain-name,email-addr,email-message,file(hashes and name),ipv4-addr,ipv6-addr,mutex,url,windows-registry-key. -
For STIX 2.0 and 2.1 imports, only basic patterns are supported. A basic pattern consists of a single Observation Expression containing one Comparison Expression, which may use the
=andLIKEoperators.-
Example of a valid basic pattern with the
=operator"pattern": [file:hashes.'SHA-256' = '9a0b50e2a80ad7ad78d7fc4d7edfa0a92c2ee99c72a0f9b46dc9fa9f2'] -
Example of a valid basic pattern with the
LIKEoperator"pattern": "[domain-name:value LIKE '%.checkmeup.com']"
-
- ThreatStream supports 325 locations as defined by STIX 2.1 including:
- 27 regions. For example,
"region": "northern-america"(Northern America) - 247 countries. For example,
"country": "JP"(Japan) - 50 US States and Washington DC. For example,
"administrative_area": "US_AZ"(Arizona, US)
- 27 regions. For example,
- Only attributes listed in Supported Attributes for Indicators are supported.
Supported Attributes for Threat Model Entities
See Supported Attributes for STIX Entities to reference the attributes included in STIX exports.
Importing STIX Data Through the Import Assistant
To import STIX data:
-
Click the Import icon
 .
. -
Click STIX.
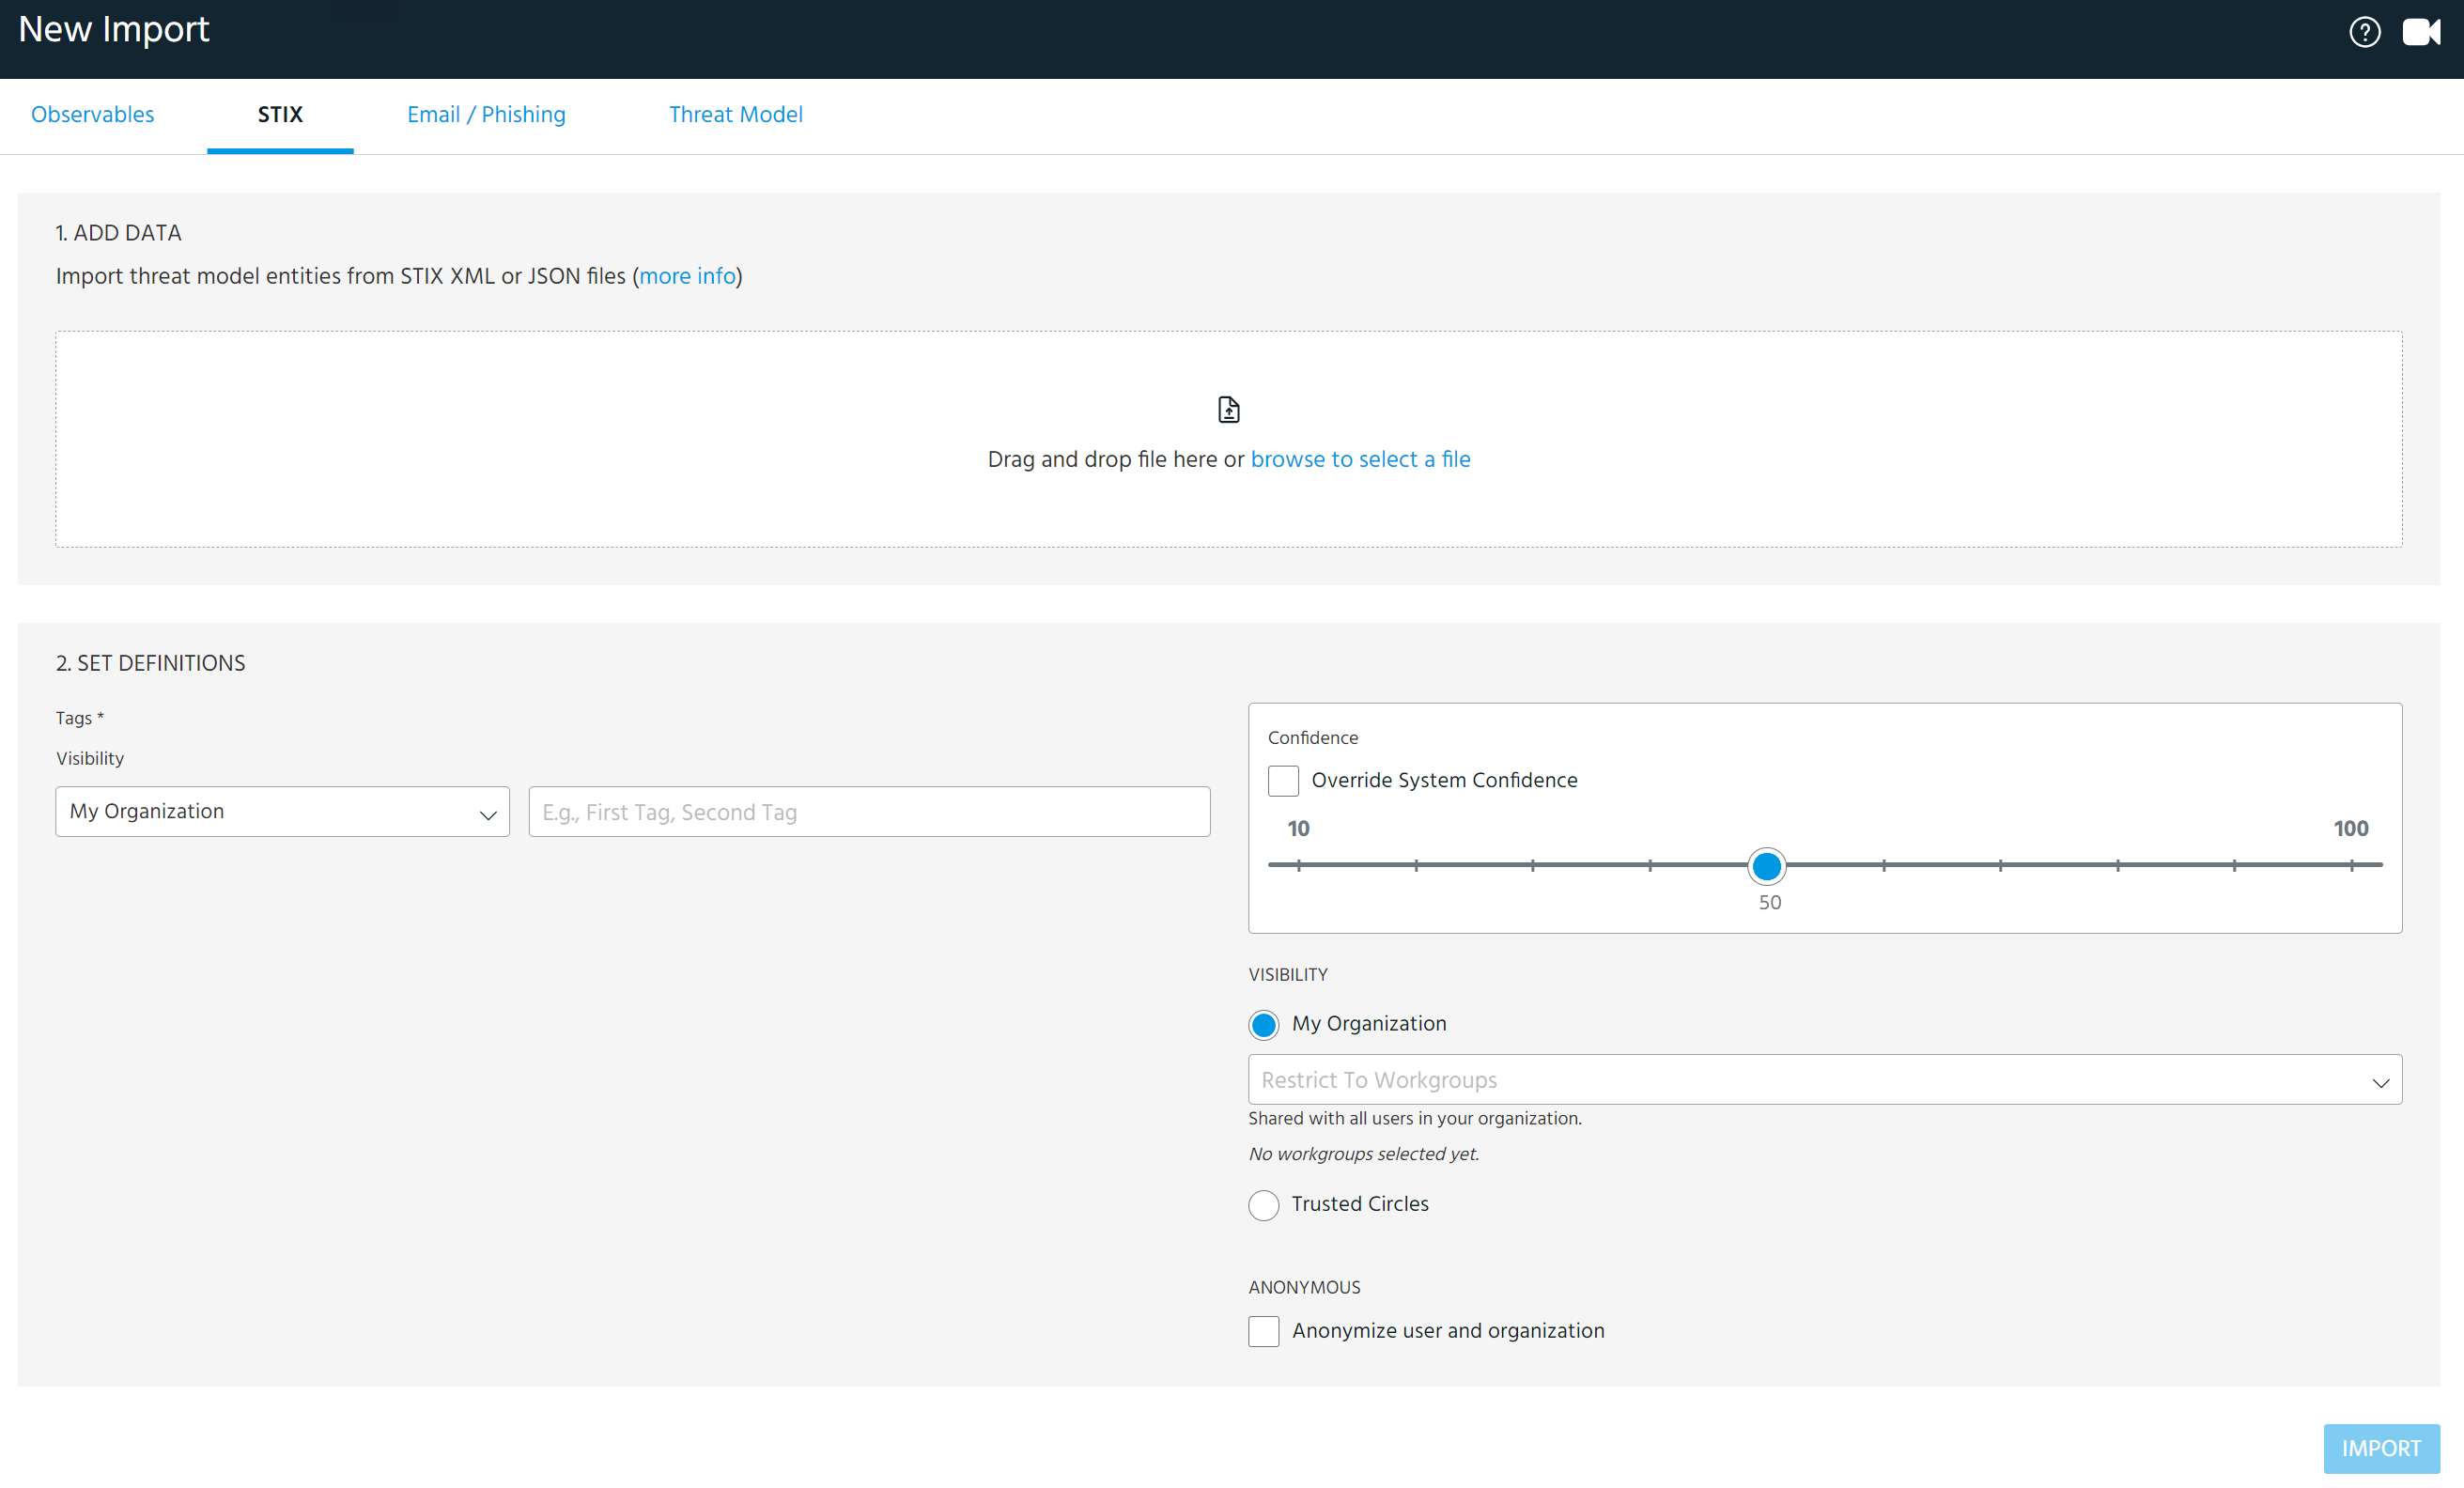
The STIX Import page is displayed as shown below.
-
Drag and drop the file into the window, or click browse to select a file to browse to the location of the file and select it.
-
Enter Tags that you want to associate with the imported data. To add a tag, select a Visibility setting, enter the tag, and click Add. Tags can contain spaces.
Tags assigned the My Organization visibility setting are only visible to your organization. Tags assigned the Anomali Community visibility setting are visible to users of all organizations that have access to the data. See Adding Private Tags to Observables for more information.
As you type the first few characters of the tag, the 20 most used tags in your organization from the previous seven days are displayed. Enable the Preferred Tags Only toggle to display and search though only the list of preferred tags. Alternatively, enter * to display preferred tags.
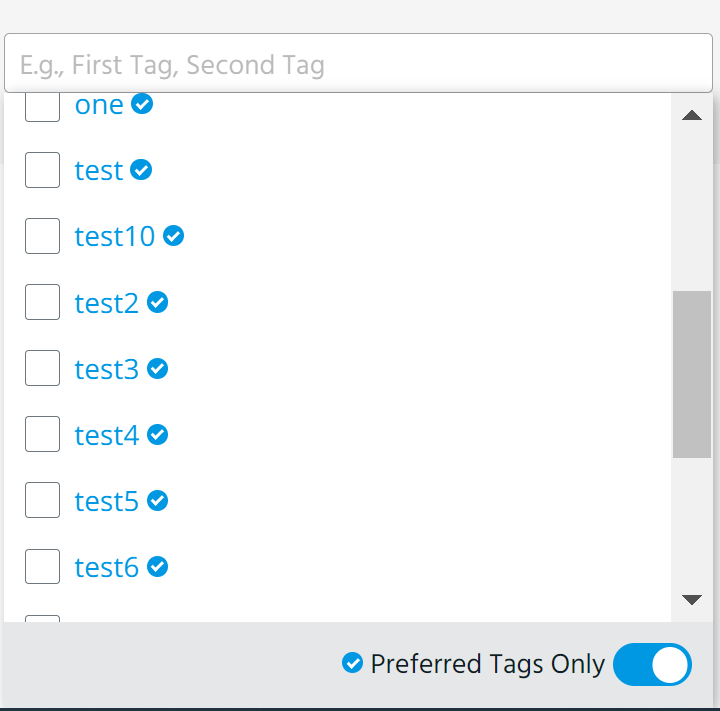
Additionally, you can associate imported data with system imported Vulnerabilities by entering the Vulnerability title as a tag and assigning it the Anomali Community visibility setting. Only Vulnerabilities imported by ThreatStream—not those created by your organization or other organizations—can be associated with the data during import via tagging. You can associate non-system imported Vulnerabilities with the data after import, from the details page of the imported entity or Vulnerability.
Note:
-
Tags must be 2,000 characters or less.
-
You can assign up to 200 tags per organization. Tags added by other organizations do not count toward this limit.
-
-
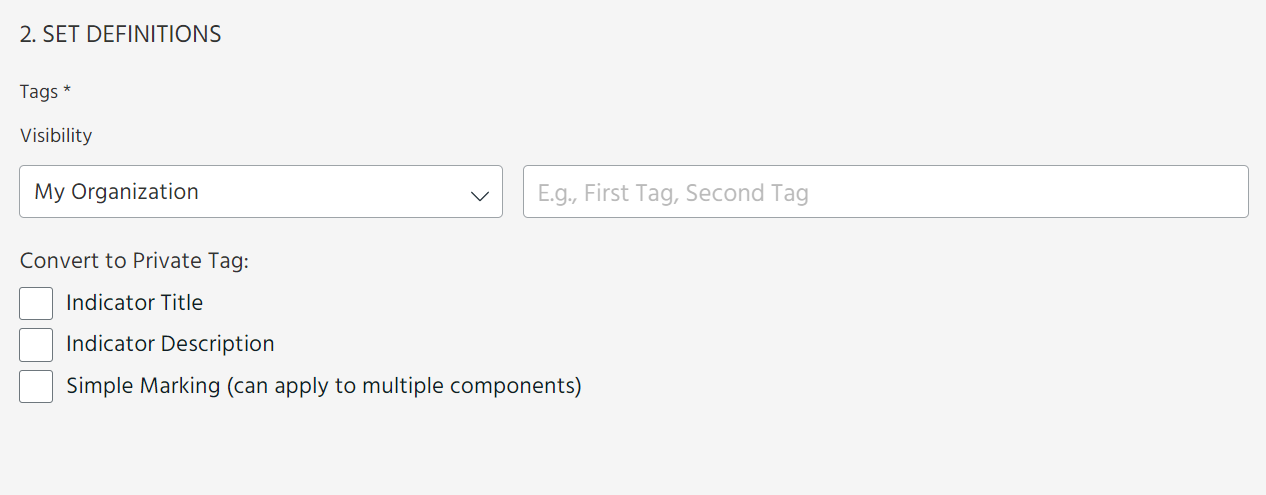
(Optional) If you import STIX 1.x XML files, you can add additional private tags. The following private tag options are available: Indicator Title, Indicator Description, and Simple Marking (can apply to multiple components).
-
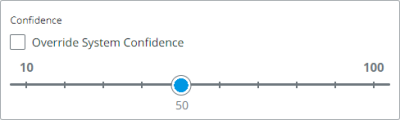
Select the Confidence value you want to assign to the imported observables.
The Confidence value is re-assessed when ThreatStream analyzes the imported data. To enforce the Confidence value you selected, check Override System Confidence.
-
Select a Visibility for the imported data.
You can select My Organization, or Trusted Circles.
Note: The Anomali Community Visibility setting, which was previously available for imported data, is no longer supported. Effective April 14, 2023.If you select Trusted Circles, select trusted circles from the drop down menu. If you selected Override System Confidence in the previous steps, only trusted circles with Allow Members to Override System Confidence enabled are displayed. For more information, see Creating a Trusted Circle.
If you select My Organization, you can further restrict the visibility to specific workgroups in your organization. To do so, click Restrict to Workgroups and select the workgroups to which you want to give exclusive access to the observables. You can only select workgroups you are a member of during import. At least one user in the workgroups you select must have the Approve Import privilege. For more information on workgroups, see Restricting Access to Intelligence with Workgroups .
- If you want to anonymize your user and organization information, select Anonymize user and organization. Users outside of your organization with access to the data will see "Analyst" in all fields that would otherwise display an organization or user name.
-
Click Import.
The threat model entities become part of the threat model right after the data has been successfully imported. If the entities had any observables associated with them, an import job is created for those observables. The job is in Ready to Review status and must be approved for the observables to become part of your threat intelligence on ThreatStream. See Approving Import Jobs for more information.
To view the status of STIX imports, visit the The STIX Imports screen. See Viewing STIX Import Jobs for more information.