Creating Dashboards 
Custom dashboards are collections of panels that visualize AQL search results. You can initiate the creation of a new dashboard in the following ways:
After creating a dashboard, you can add up to 30 panels to it and create rows and tabs to keep the panels organized. For details, refer to these sections:
Creating Dashboards from the Dashboard Library Page
On the Dashboards Library page, you can create new dashboards and configure their sharing permissions.
To create a dashboard from the Dashboard Library page:
-
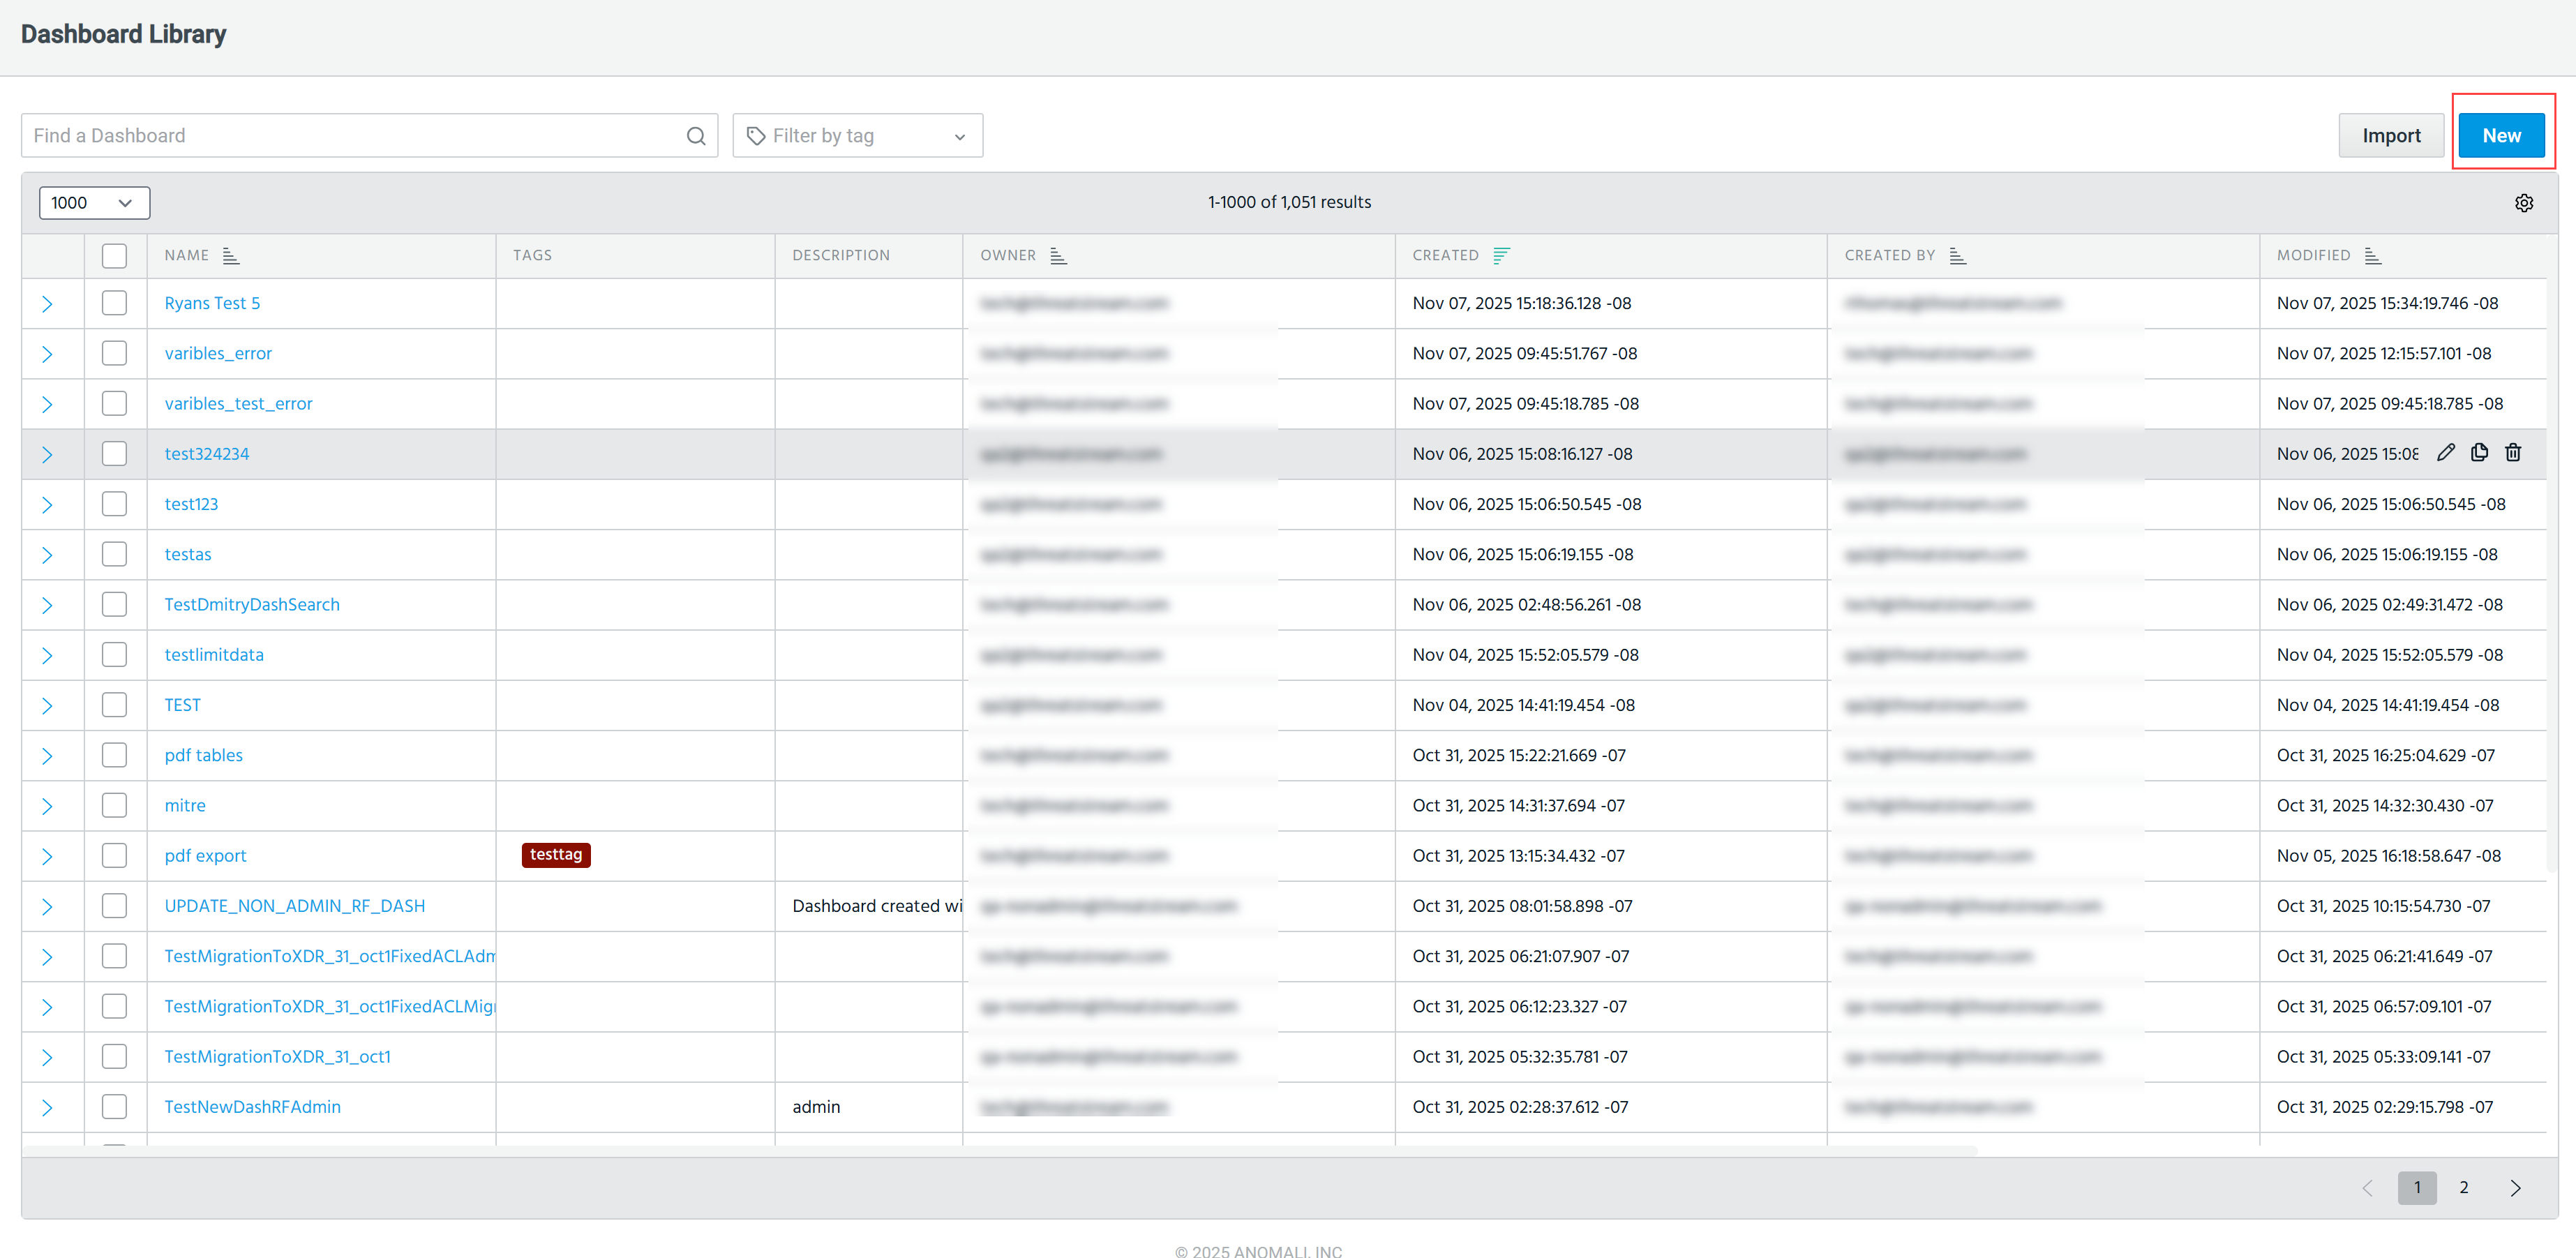
Navigate to Dashboard > Library.
-
Click New. The Create Dashboard dialog box opens.
-
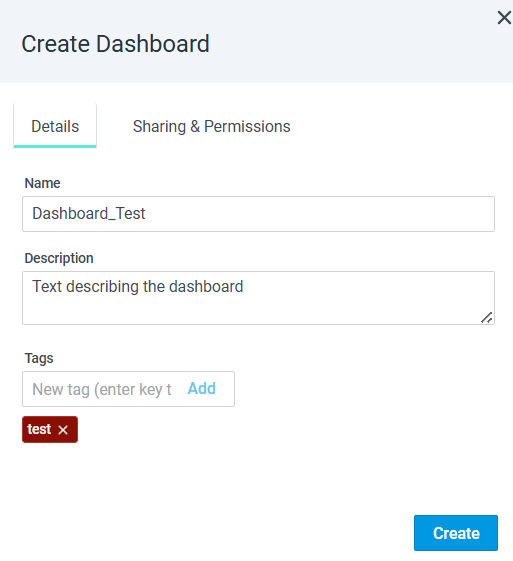
On the Details tab, enter a meaningful name for the dashboard, description (optional), and tags.
-
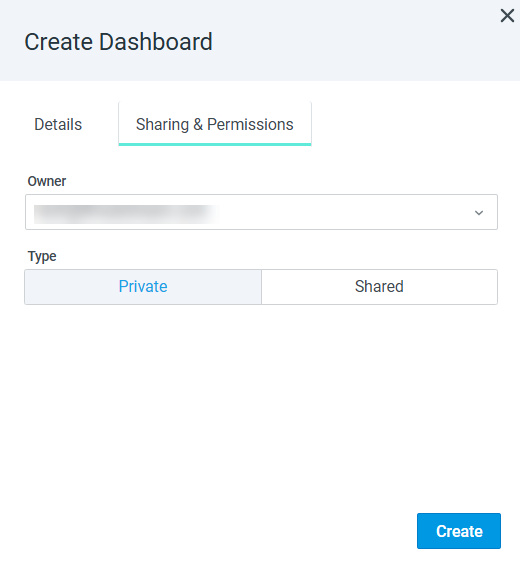
Configure the Sharing & Permissions settings:
-
Select an owner of the dashboard. The owner can edit all data, configure permissions, and delete the dashboard. If no owner is specified, the user creating this dashboard is considered the owner.
-
Define whether the dashboard is private or can be shared. If no type is specified, the dashboard type is set to Private.
If you select Shared, choose which user roles can access the dashboard and define their permissions. For more details on dashboard permissions, refer to Managing Custom Dashboard Permissions.
Note: To learn more about user roles, refer to Managing Roles.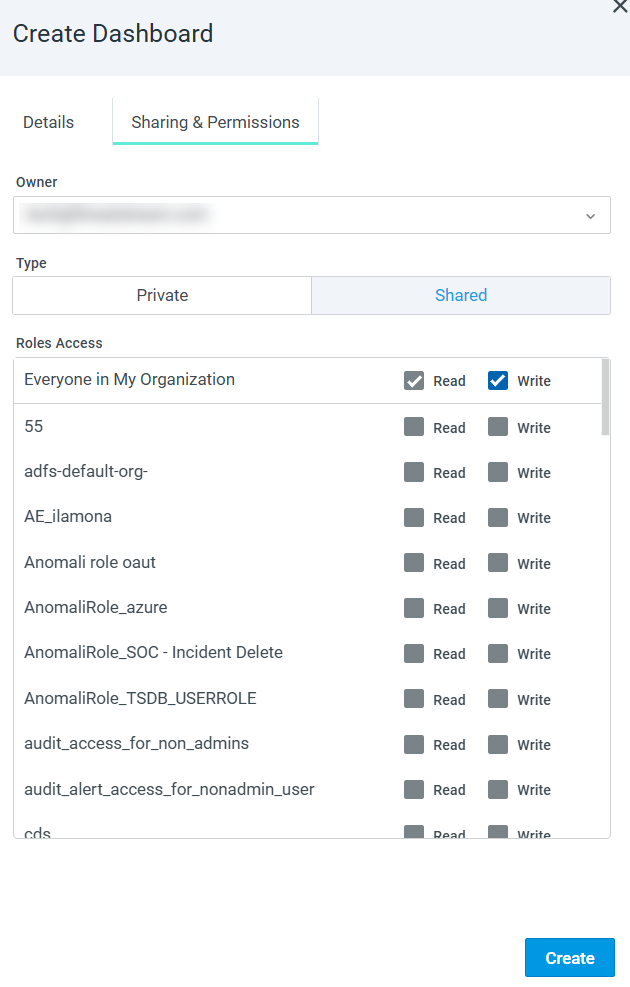
-
-
Click Create.
The dashboard is added to the list of dashboards on the Dashboards Management page. You can now start adding panels to this dashboard. For details, refer to Adding a Panel to a Dashboard.
Creating Dashboards from the Visualization Tab
To create a new dashboard from the Visualization tab on the Search Home page, you must run an AQL query. The search results of this query are then displayed on the first panel of the new dashboard.
To create a custom dashboard from the Visualization tab:
-
Navigate to Search > Home.
-
Run a desired AQL query.
-
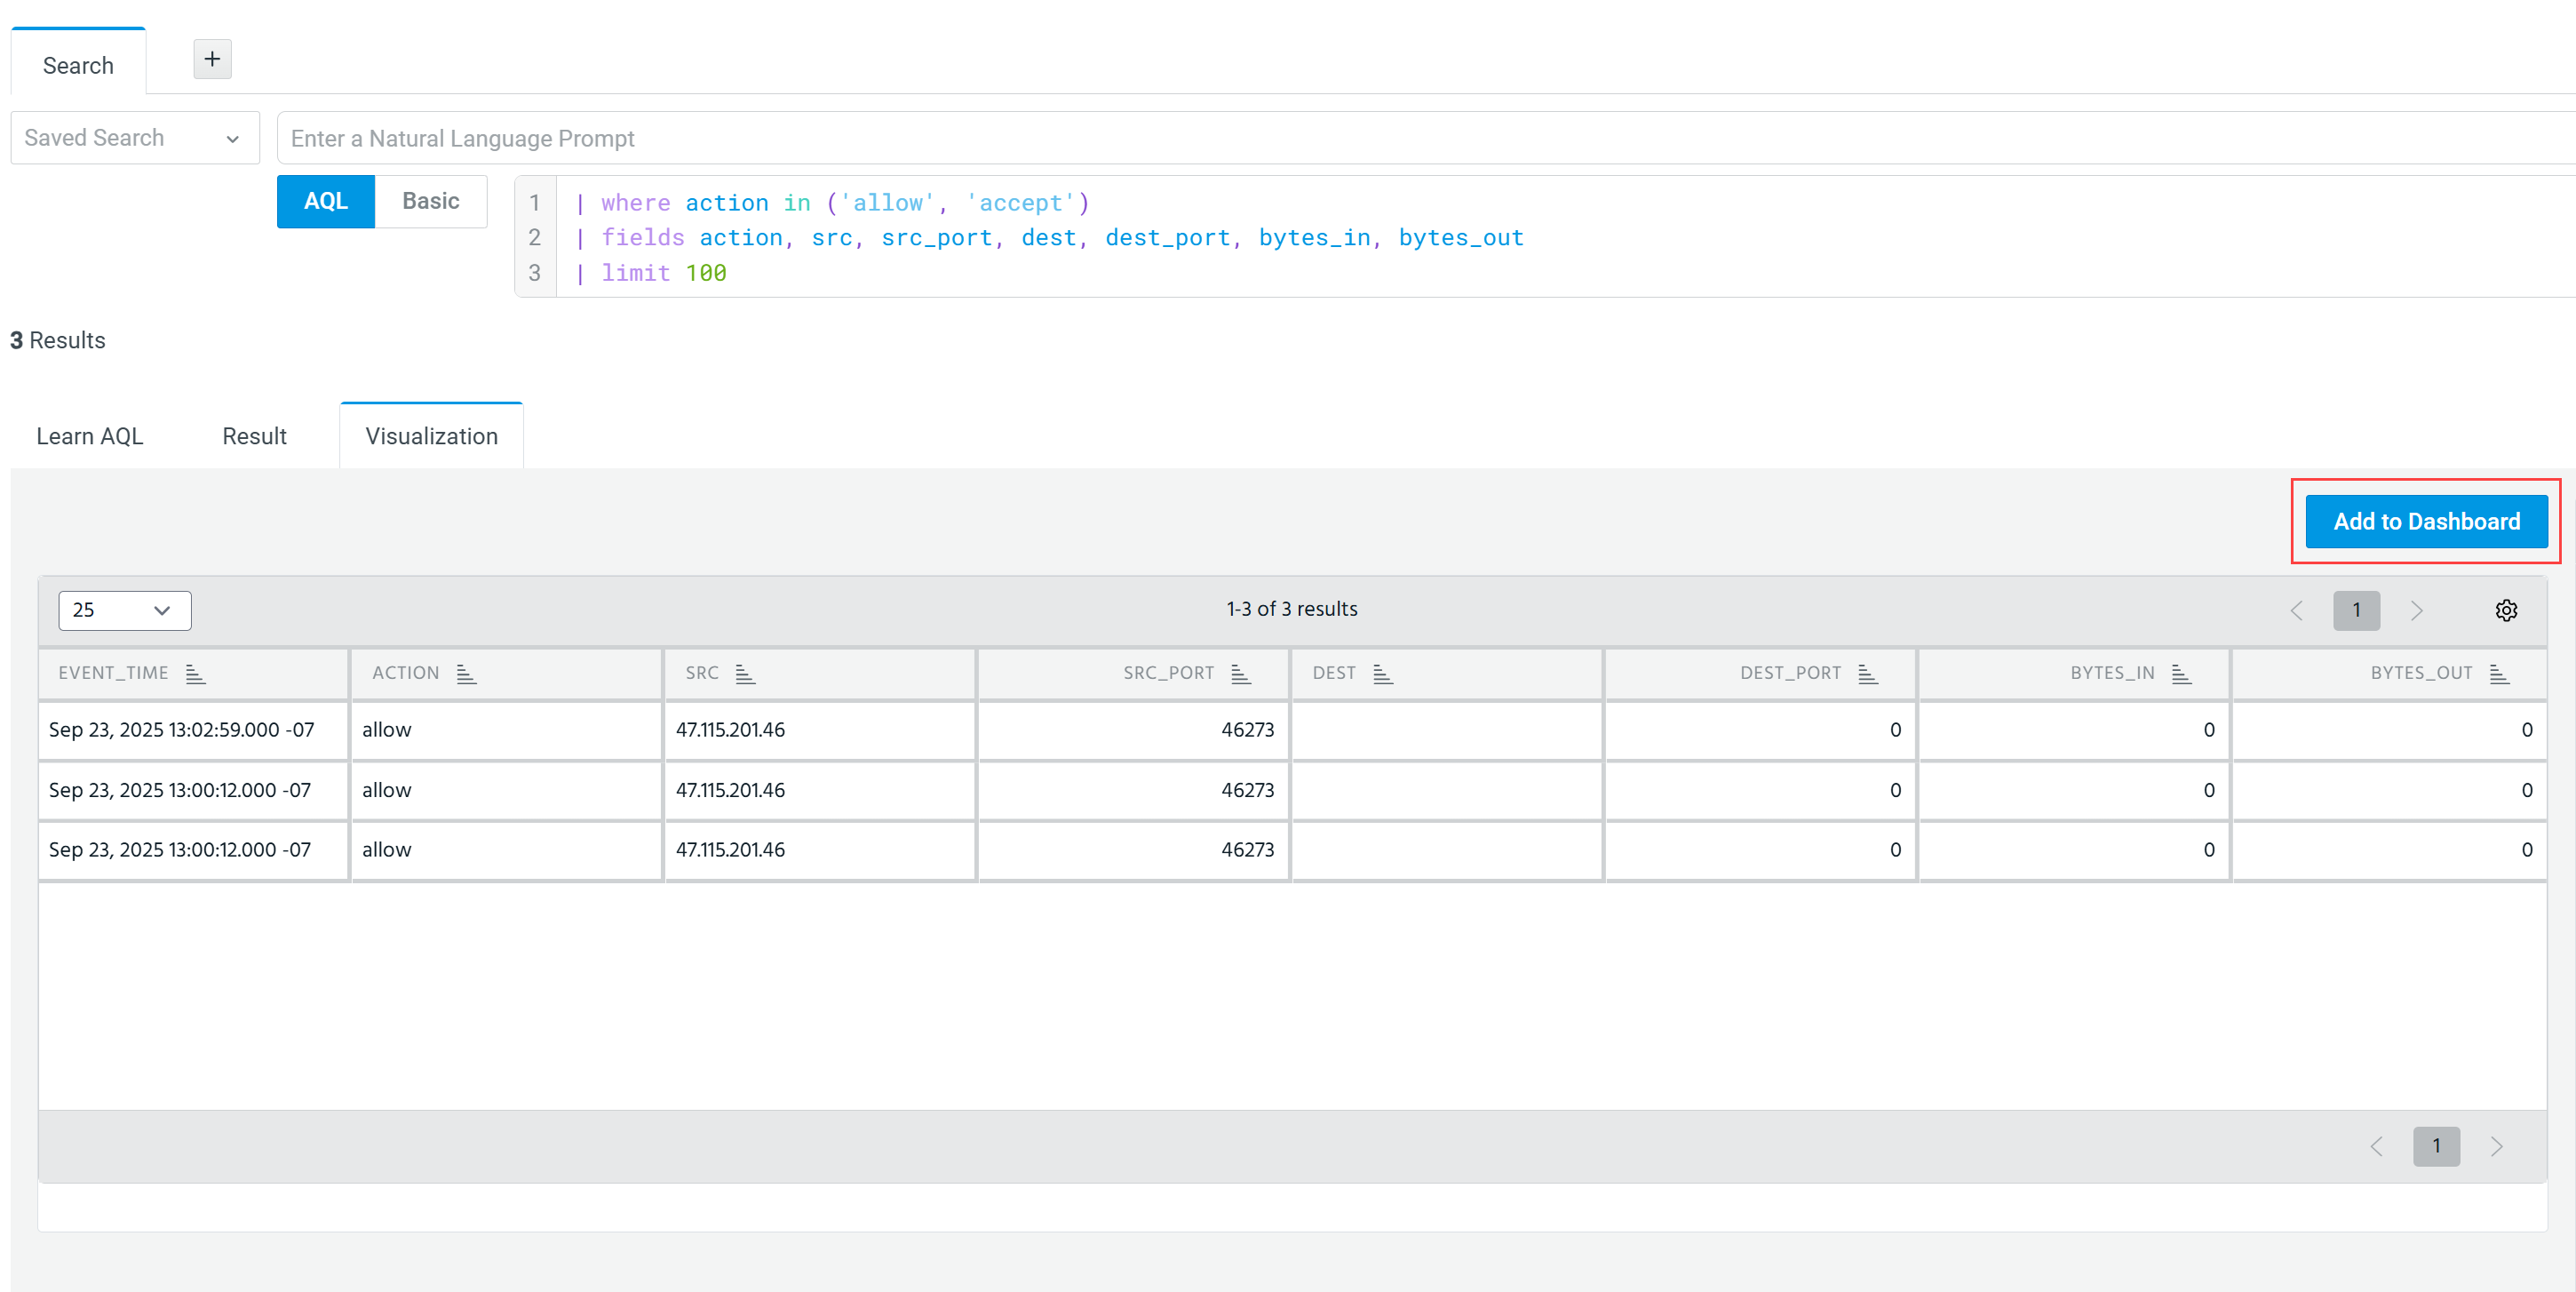
When the search results are displayed, click the Visualization tab.
-
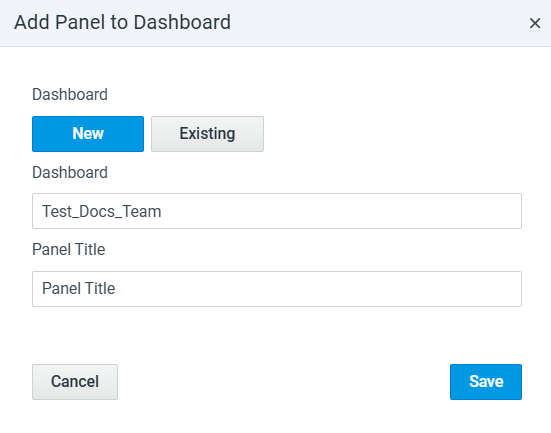
Click Add to Dashboard. The Add Panel to Dashboard dialog box opens.
-
Click New.
-
Enter a meaningful name for the dashboard.
-
Enter a meaningful title for the panel title. The panel will be a visual representation of your AQL search results.
-
Click Save.
The dashboard with the panel is added to the list of dashboards on the Dashboards Management page. If needed, you can add more panels to this dashboard. For details, refer to Adding a Panel to a Dashboard.
Adding a Row to a Dashboard
You can add row separators to dashboards and give the row a title.
To add a row:
-
Click the Add panel icon (
 ) in the tool bar in the upper right corner of the dashboard you want to modify.
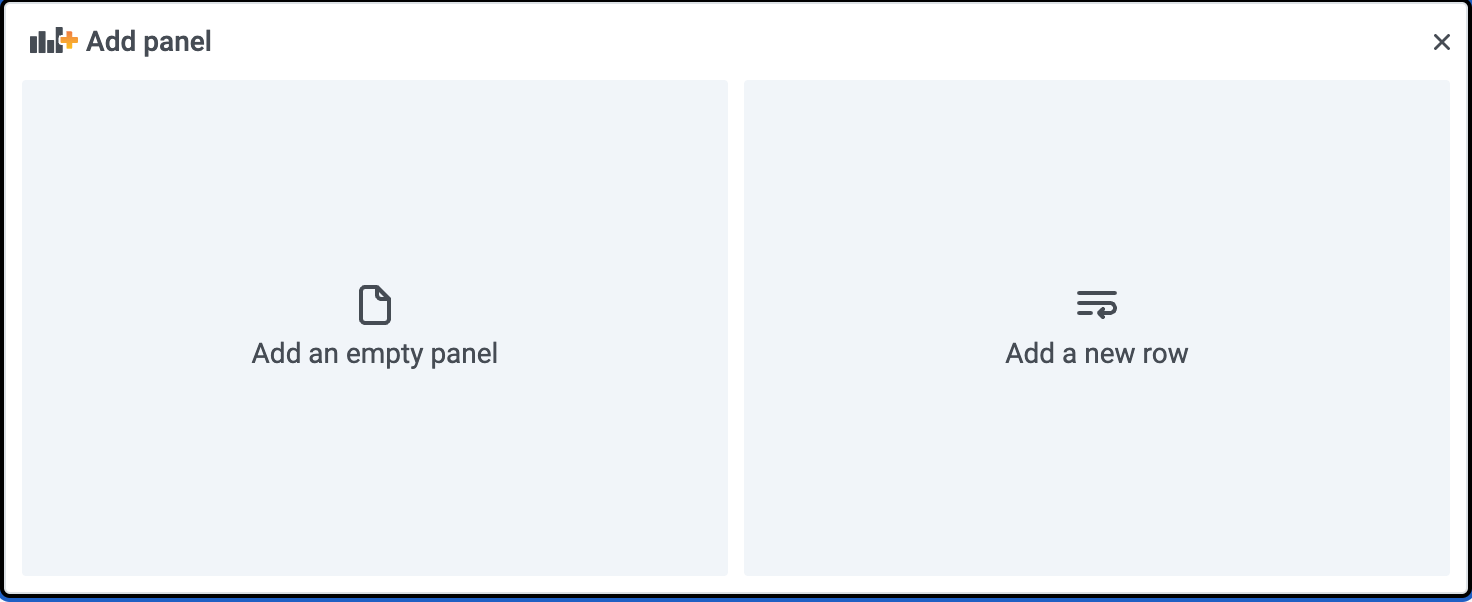
The tool adds a prompt to add a panel or a row.
-
Click Add a new row.
-
Mouse over the area to the right of the temporary title and click the settings icon to display the setting menu.

-
Enter a row title and click Update.
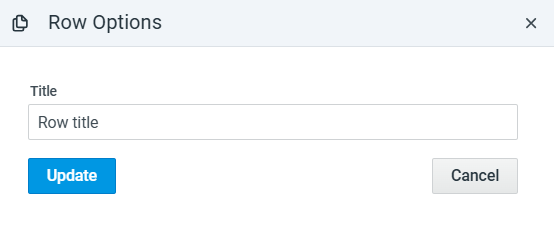
The row is created.
Adding a Panel to a Dashboard
Typically, you add a new panel to a dashboard from the Search results Visualization tab. See Creating Dashboards from the Visualization Tab.
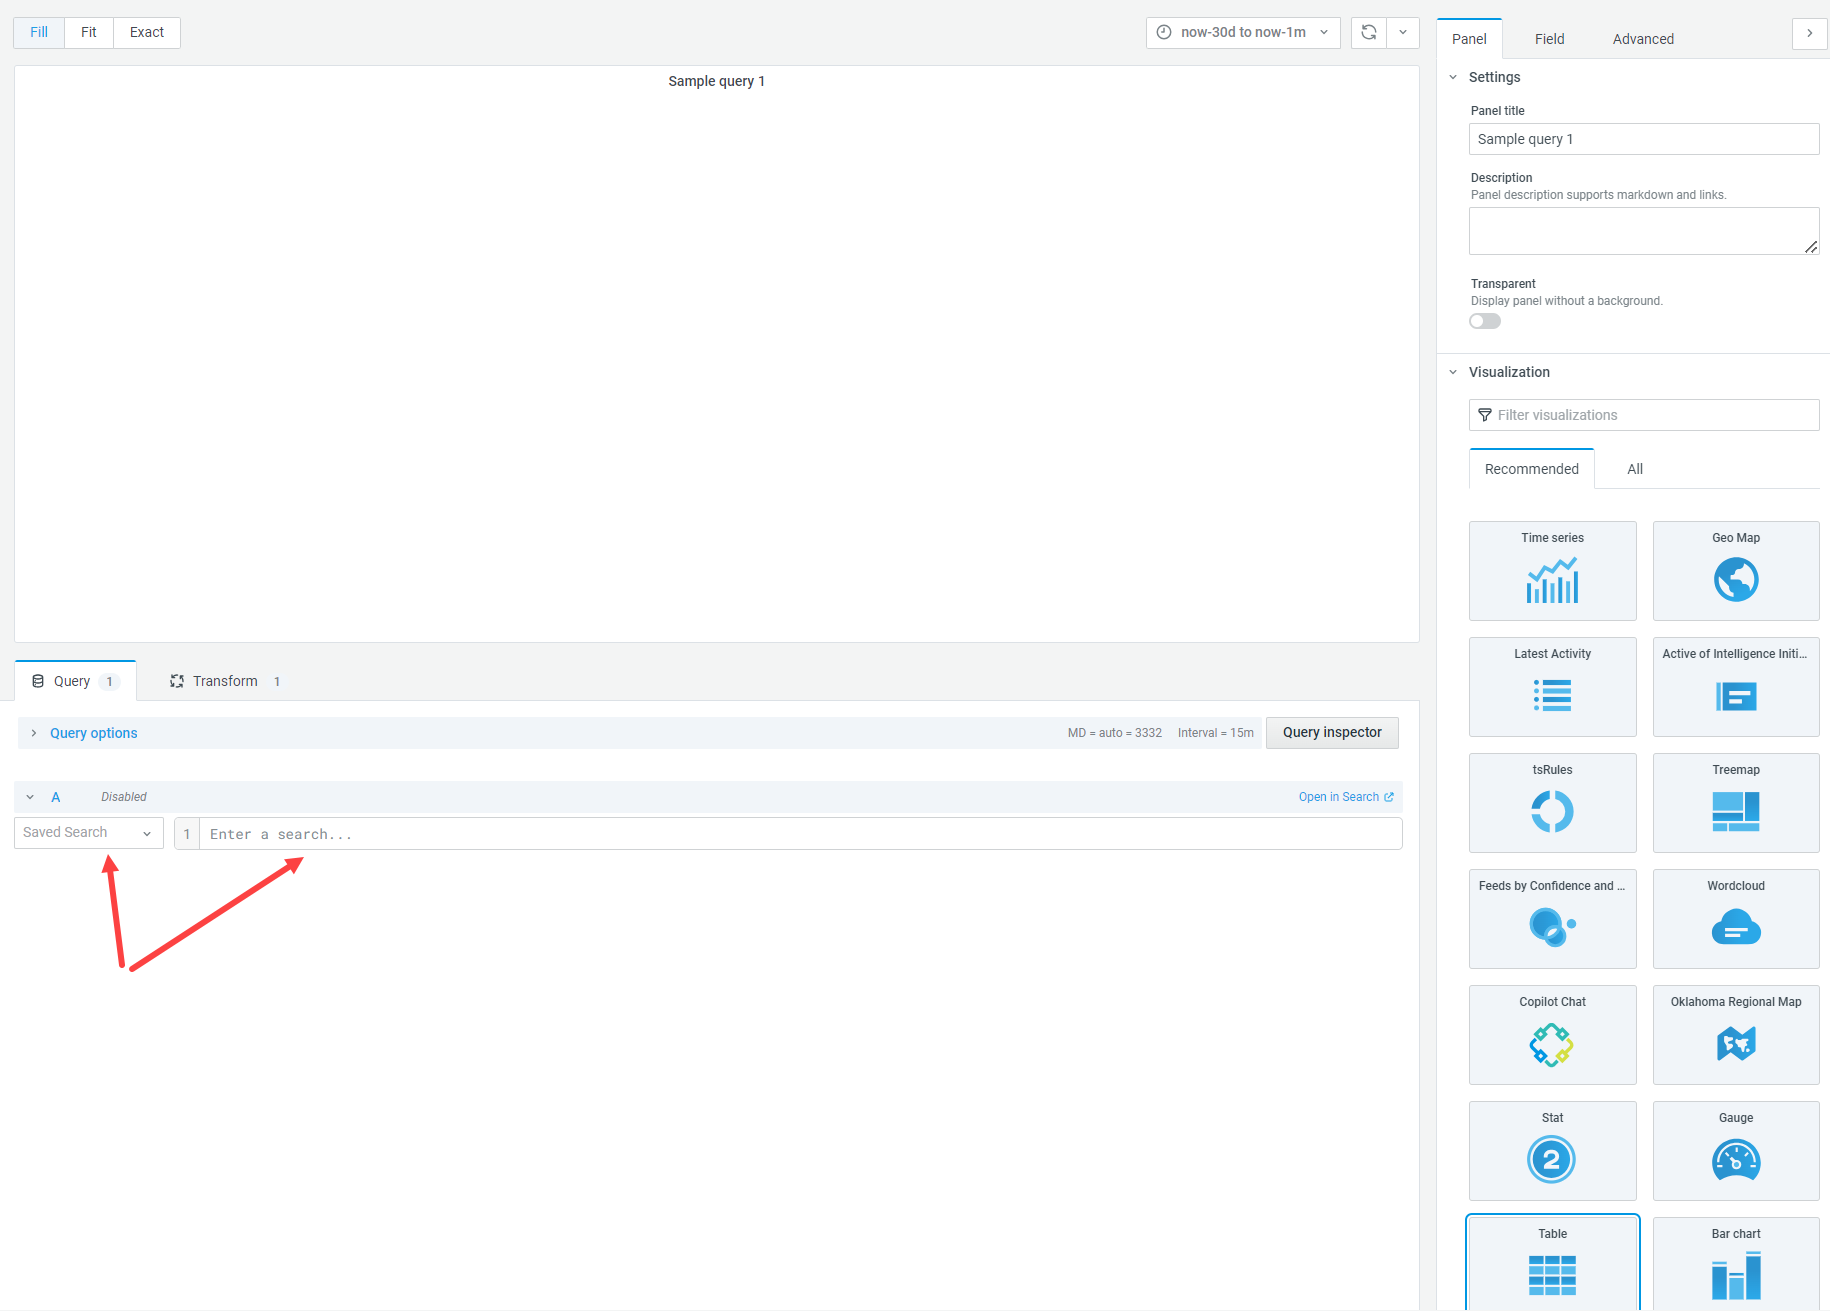
However, you can also add an empty panel within a dashboard, and then use a saved search or build an AQL search to customize visualization and panel settings.
Note: Anomali allows you to add up to 30 panels to custom dashboards, including cloned dashboards. If you exceed this limit, the dashboard cannot be saved or imported.
To add an empty panel to a dashboard:
-
Click the Add panel icon (
) in the tool bar in the upper right corner of the dashboard you want to modify.The tool adds a prompt to add a panel or a row.
-
Click Add an empty panel.
-
Start with a saved search or specify a valid AQL query.
-
Customize panel settings and save your changes. For details on using various visualization types, refer to Visualization Types.
Adding a Tab to a Dashboard
You can add tabs to the dashboards to organize and separate content within a single dashboard.
To add a tab:
-
Click the Add panel icon (
) in the tool bar in the upper right corner of the dashboard you want to modify.The tool adds a prompt to add a panel or a row or a tab.
-
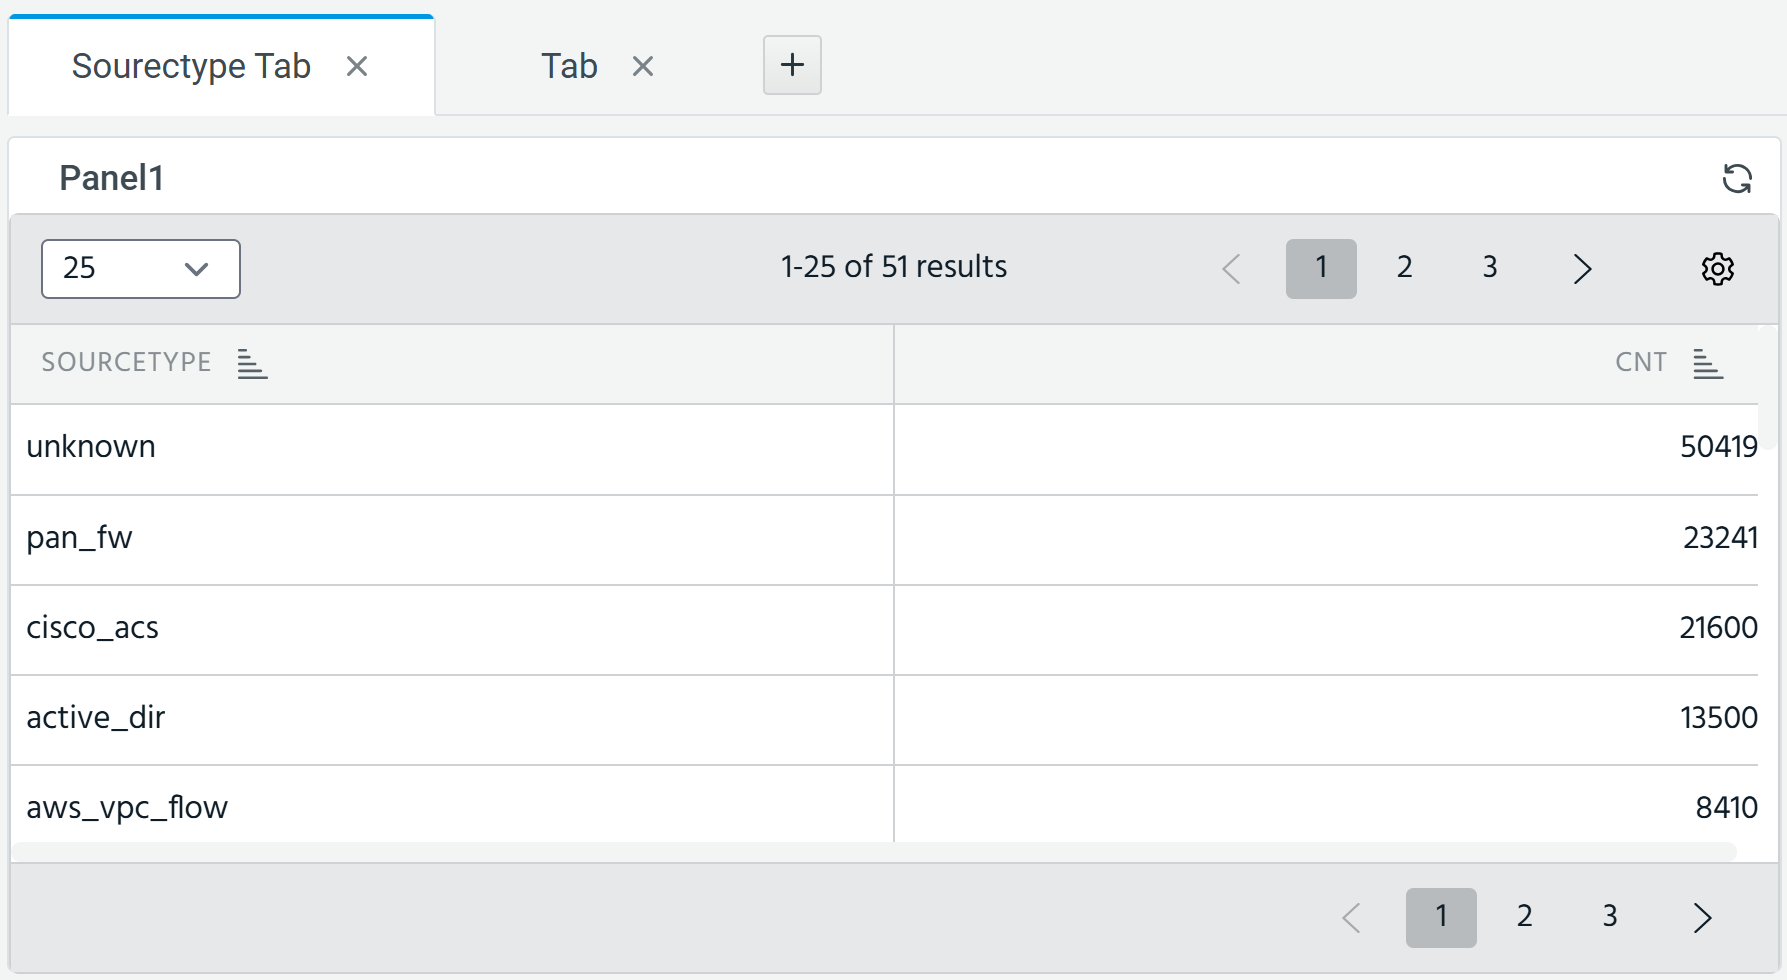
Click Add a new tab. This switches your view to a tab display, wherein you can add up to a maximum of 5 tabs.
-
(Optional) Double-click the tab name to rename the tab.
-
To add a panel in this tab, complete all the steps in Adding a Panel to a Dashboard.