Managing Dashboards 
You can perform the following actions on custom dashboards:
Editing Dashboards
Dashboard owners and Organization Administrators can modify the dashboard's name, description, and permissions. Users whose roles have write permissions can only modify dashboard's name, description, and tags.
To edit a dashboard:
-
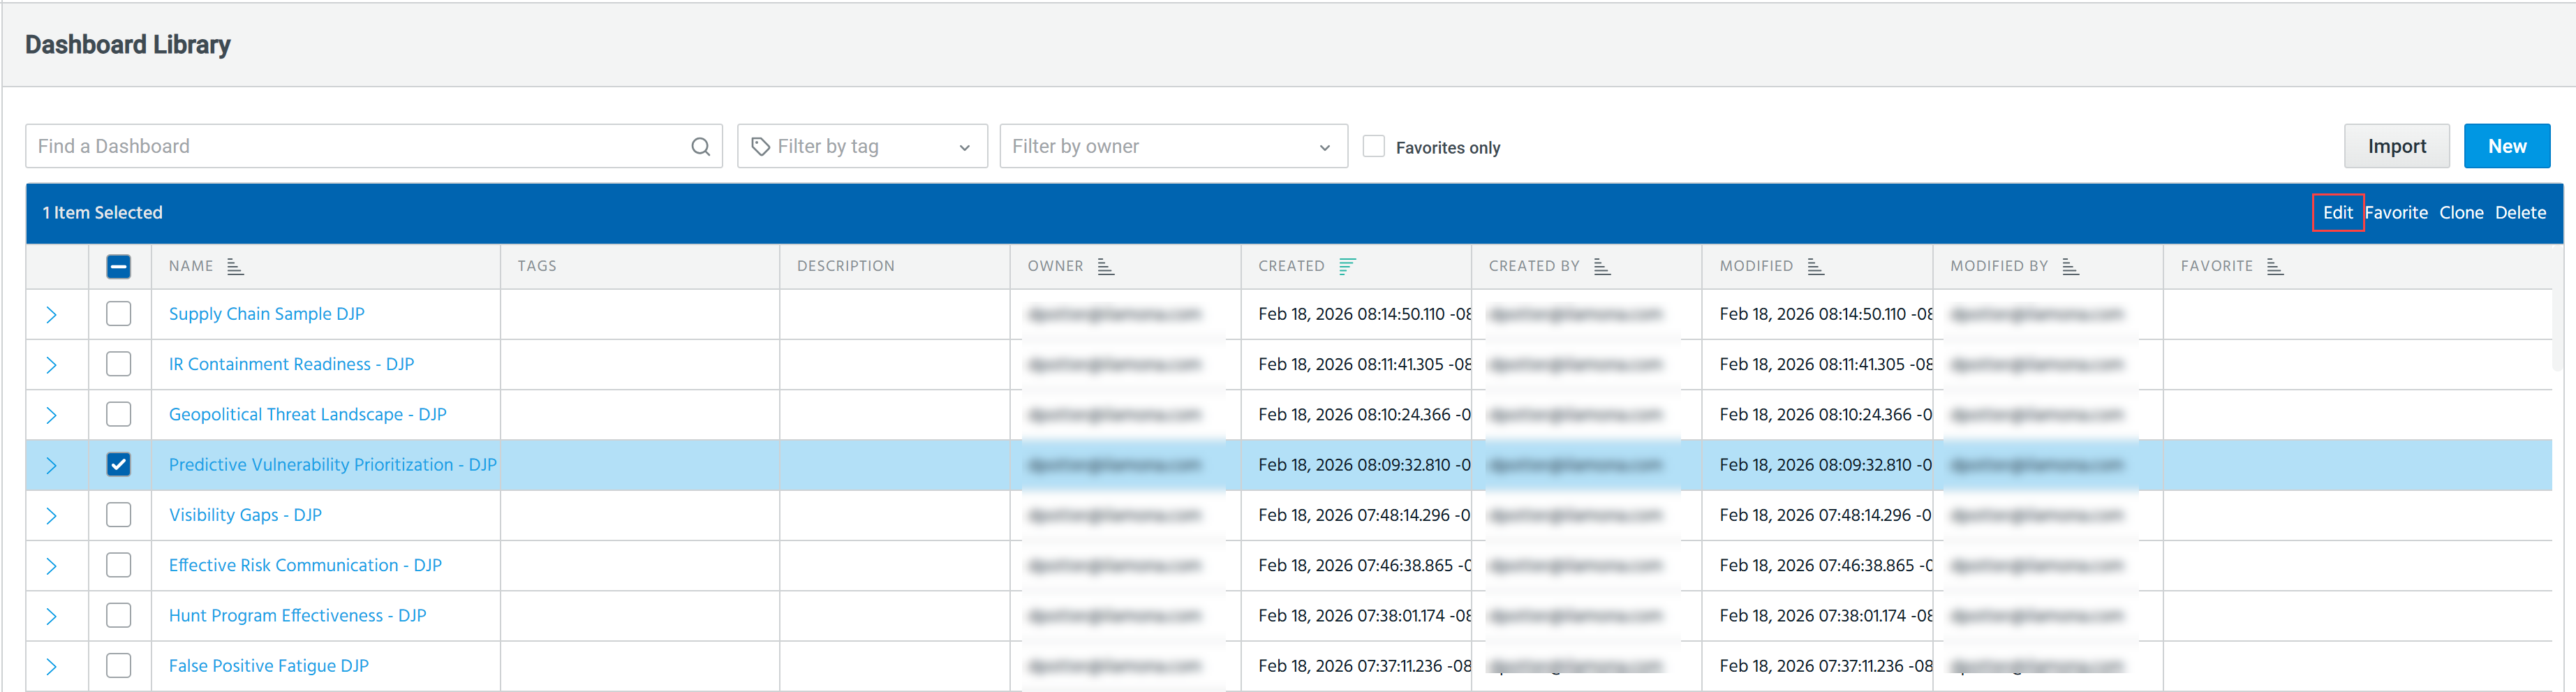
Navigate to Dashboard > Library.
-
Select the dashboard you want to modify.
-
Click Edit. Alternatively, hover over the dashboard of your interest and click the Edit icon (
 ).
). 
The Edit Dashboard dialog box opens.
-
Make the necessary changes on the Details tab and the Sharing & Permissions tab.
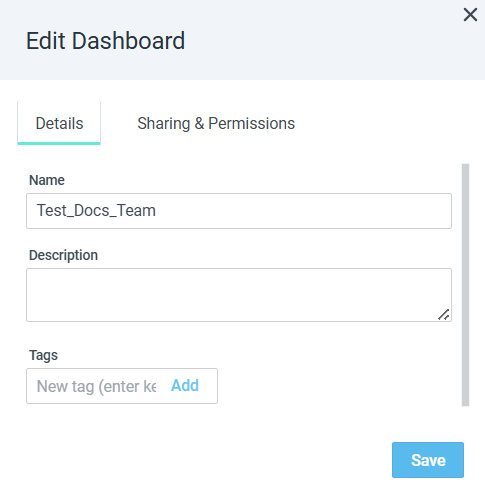 Note: The Sharing & Permissions settings can also be modified on the Dashboard Settings page. See Configuring Dashboard Settings for details.
 -
Click Save.
The dashboard is modified.
Rearranging Rows and Panels
Dashboards owners, Organization Administrators, and users with write permissions can rearrange rows and panels of custom dashboards.
To move a row:
-
Navigate to Dashboard > Library.
-
Locate and open the dashboard of your interest.
-
Click Edit.
-
Click the expander icon
 to collapse the panels contained in the row.
 -
Click the handle at the right end of the row and drag row before or after other rows as desired.

To move a panel:
-
Navigate to Dashboard > Library.
-
Open the dashboard of your interest.
-
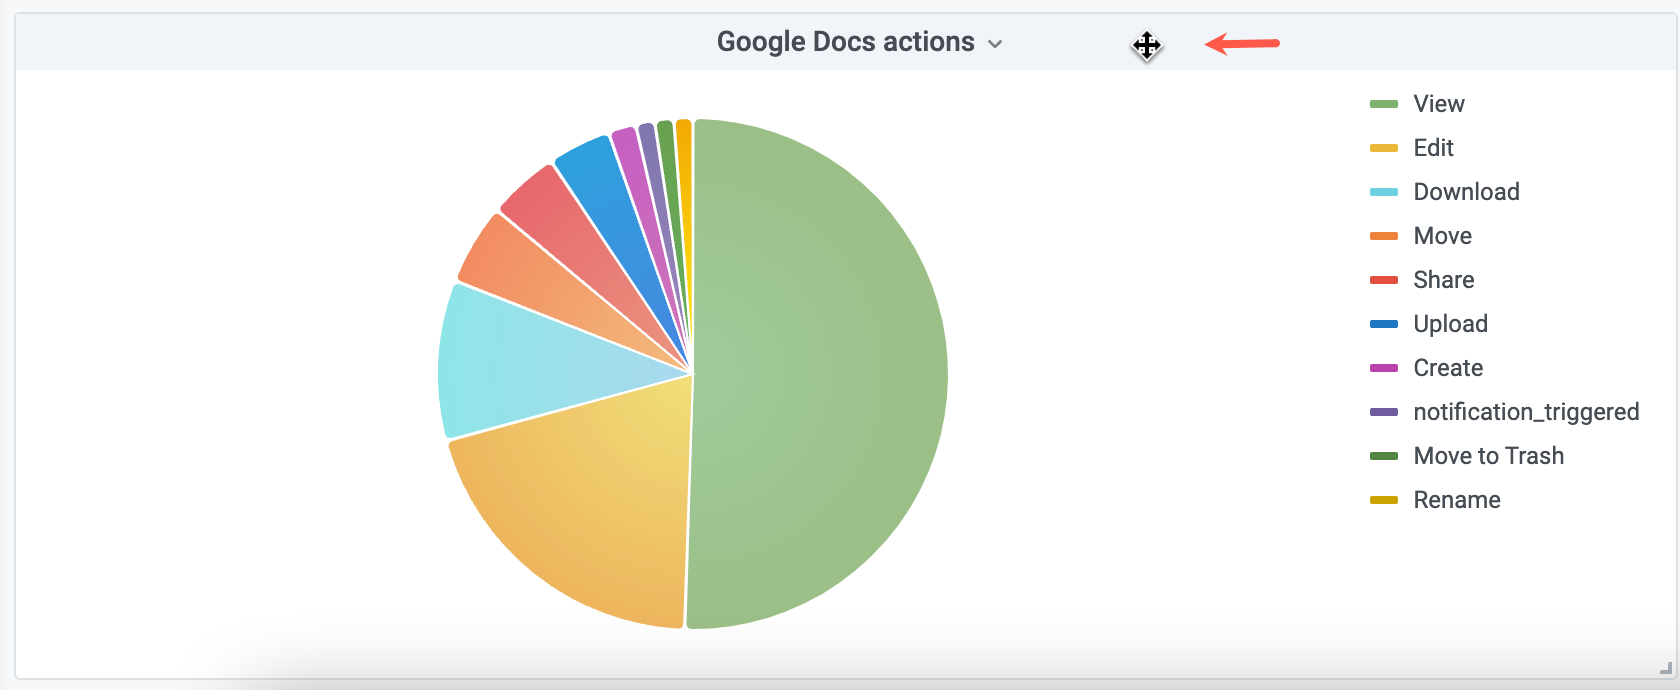
Click the panel, mouse over the panel title bar, and notice the cursor change from a pointer to a selector.
-
Click the panel title bar and drag the panel where you want it.
To resize a panel:
-
Navigate to Dashboard > Library.
-
Locate and open the dashboard of your interest.
-
Click Edit.
-
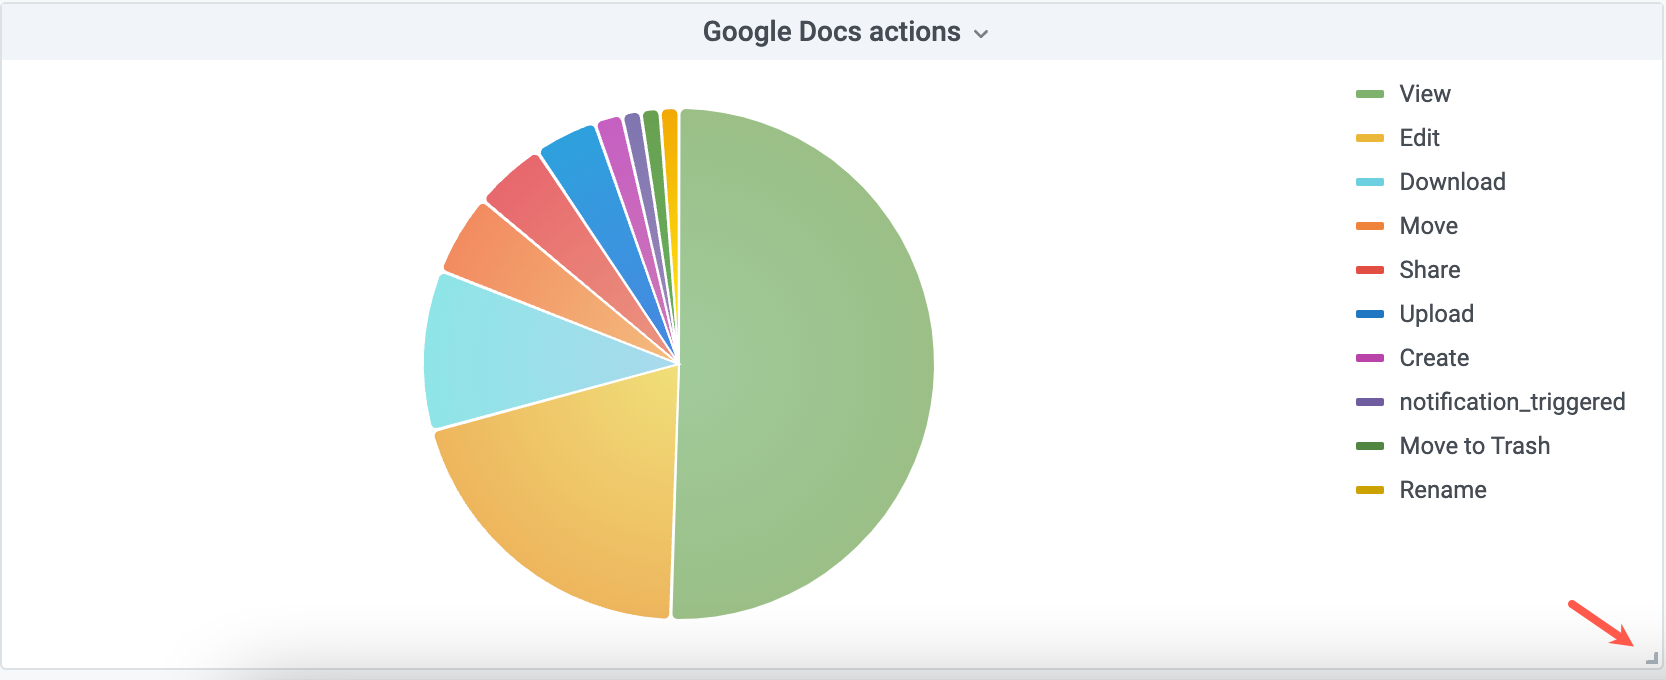
Click the panel and mouse over the bottom right corner to reveal the resize tool.
-
Drag the edge to resize it as you prefer.
Managing Dashboard Panels
Refer to Managing Dashboard Panels to learn about managing dashboard panels.
Bookmarking Dashboards
All dashboards you have access to can be bookmarked. You can bookmark a dashboard by marking it as a favorite from the Dashboard Library page or directly from the dashboard itself. For details on bookmarking dashboards directly from dashboards, see item  in Dashboard Actions.
To mark a dashboard as your favorite from the Dashboard Library page:
-
Navigate to Dashboard > Library.
-
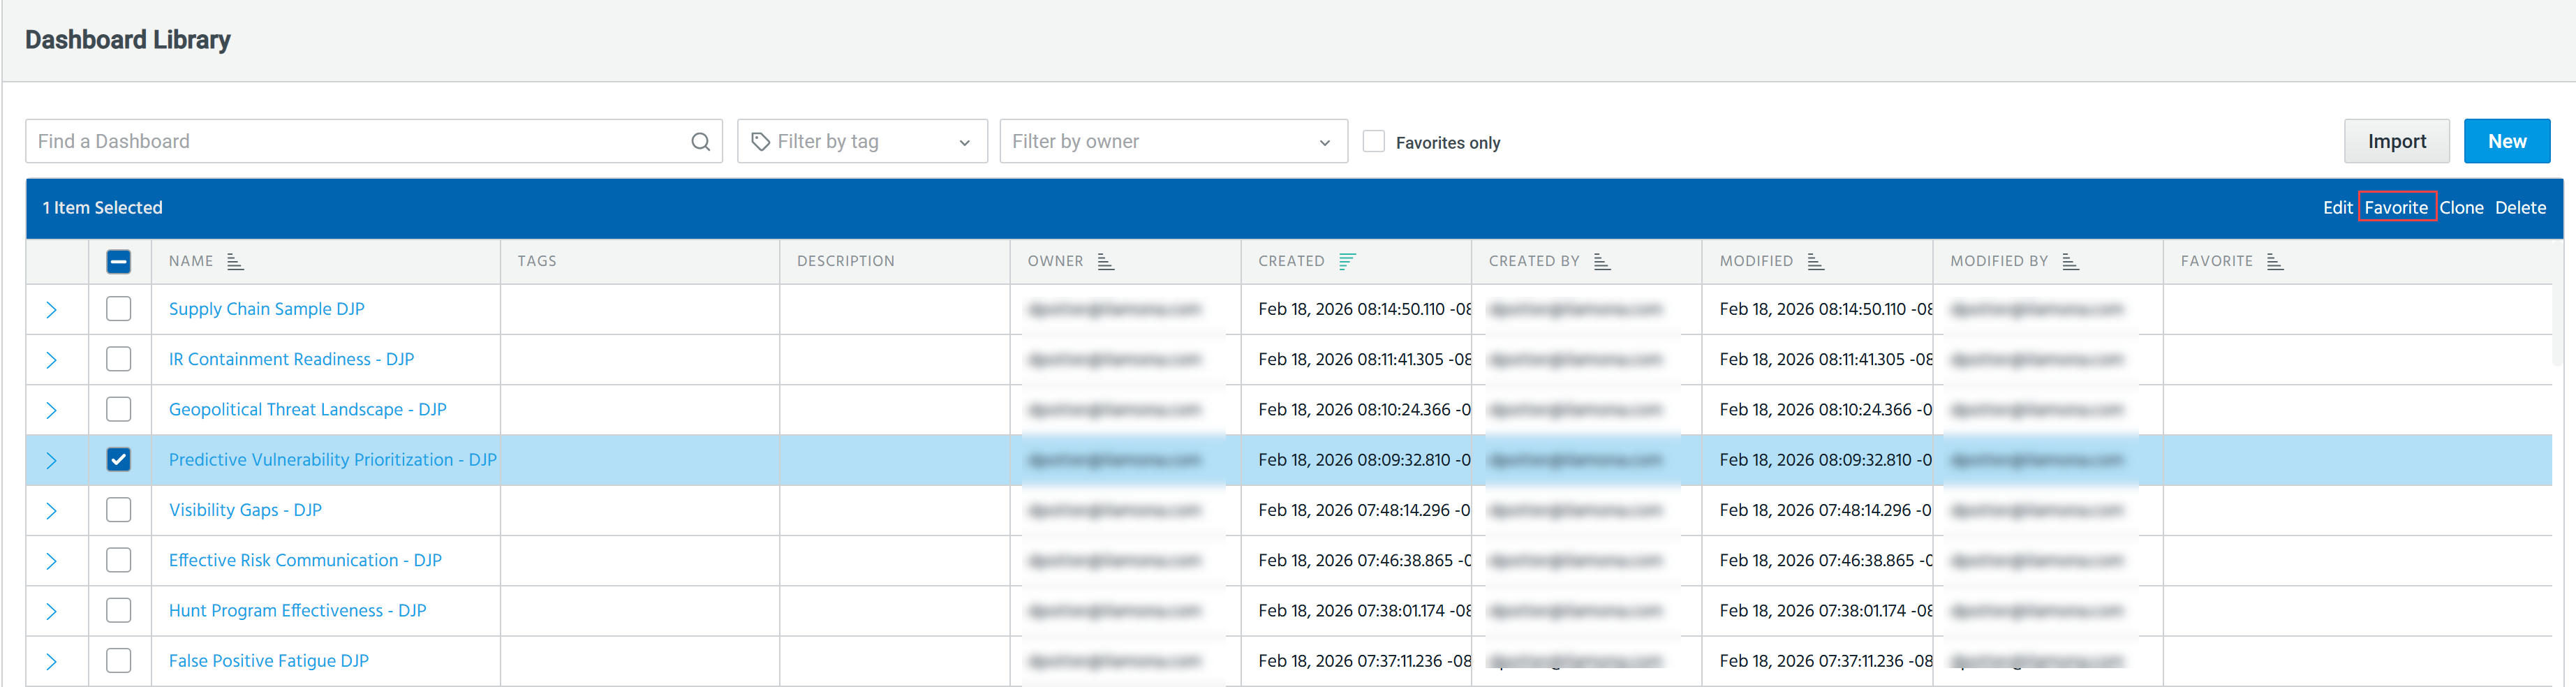
Select the dashboard you want to bookmark and click Favorite.
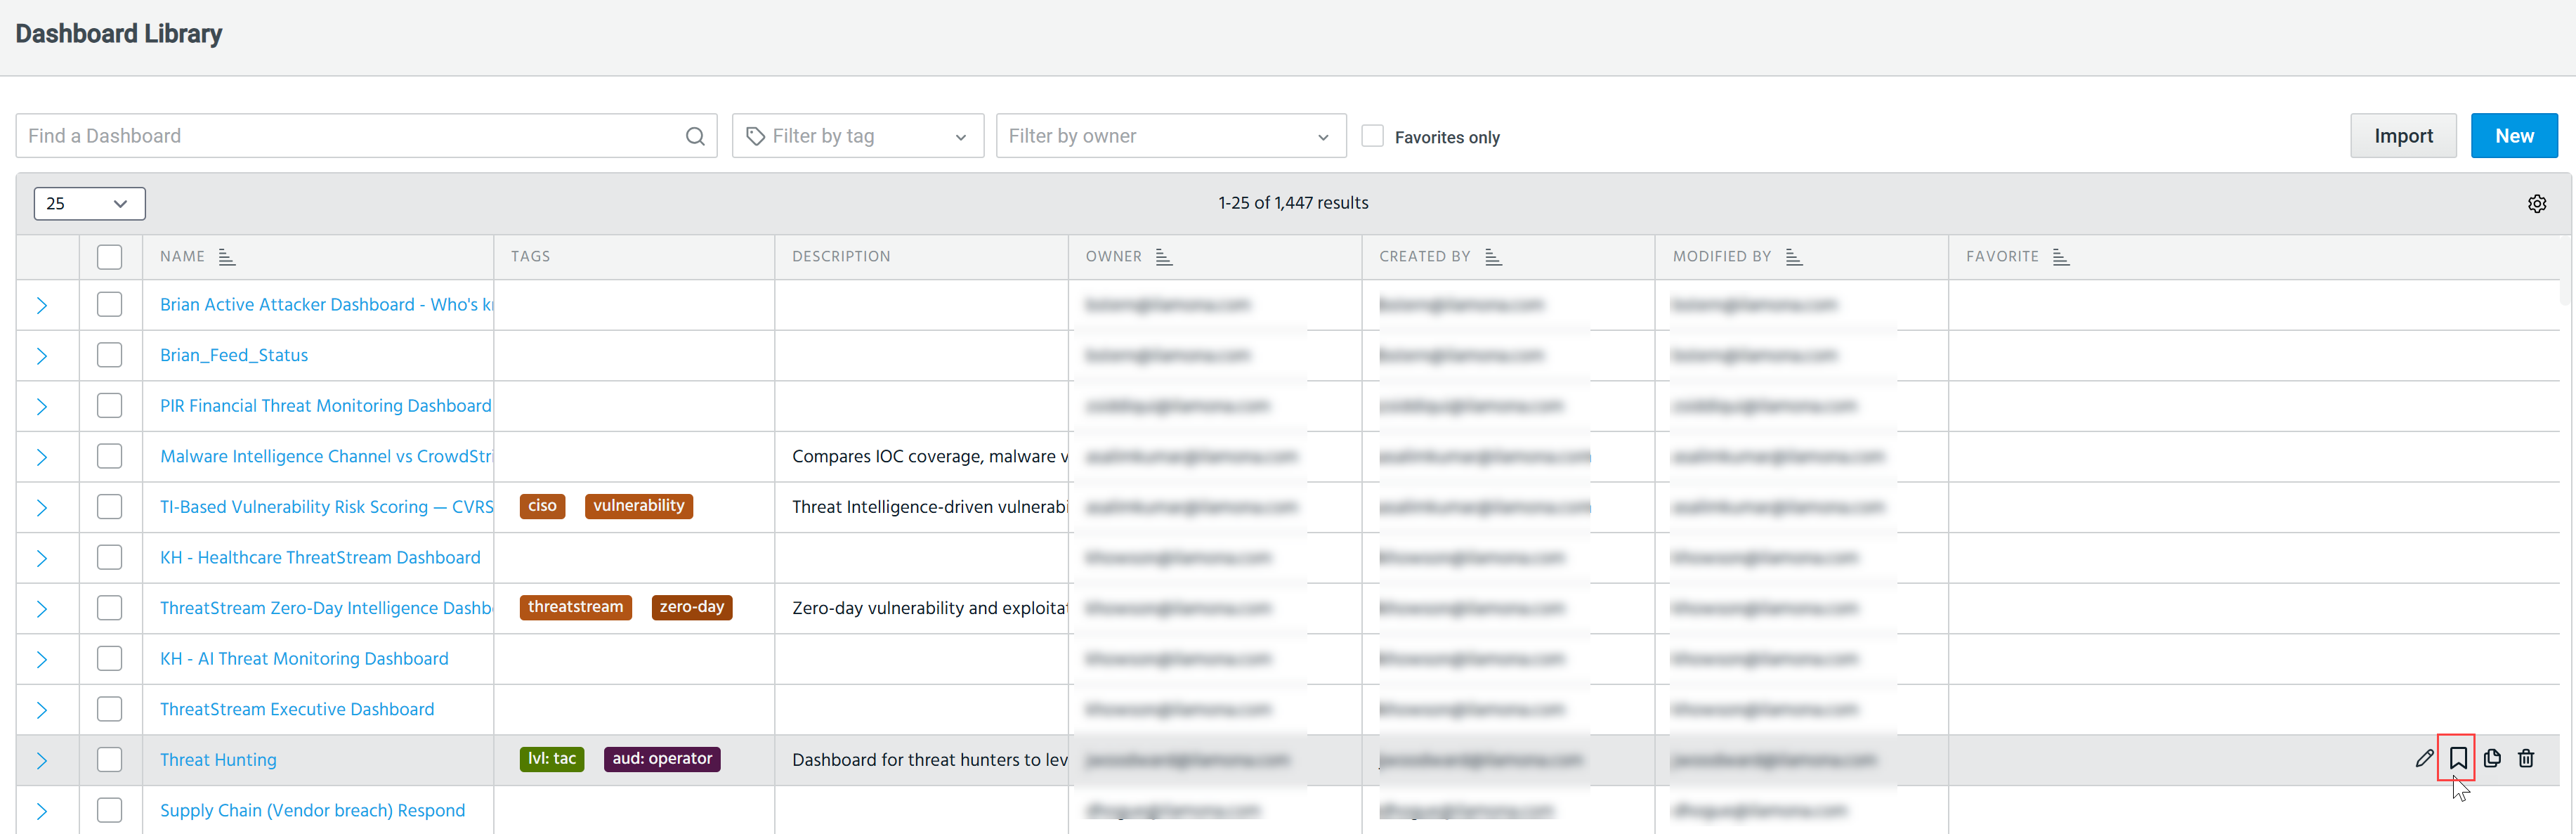
Alternatively, you can bookmark a dashboard by hovering over its row and clicking the bookmark icon.
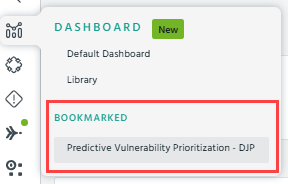
The bookmarked dashboard appears in the Favorite column on the Dashboard Library page and in the Bookmarked section of the main Dashboard menu.
To remove a dashboard from your bookmarks, click the bookmark icon.
Sharing Dashboards
Dashboard owners, Organization Administrators, and users with write permissions can create a URL link to a dashboard to share it with other users.
To share a dashboard:
-
Click the share icon (
 ) on the dashboard that you want to share.
 -
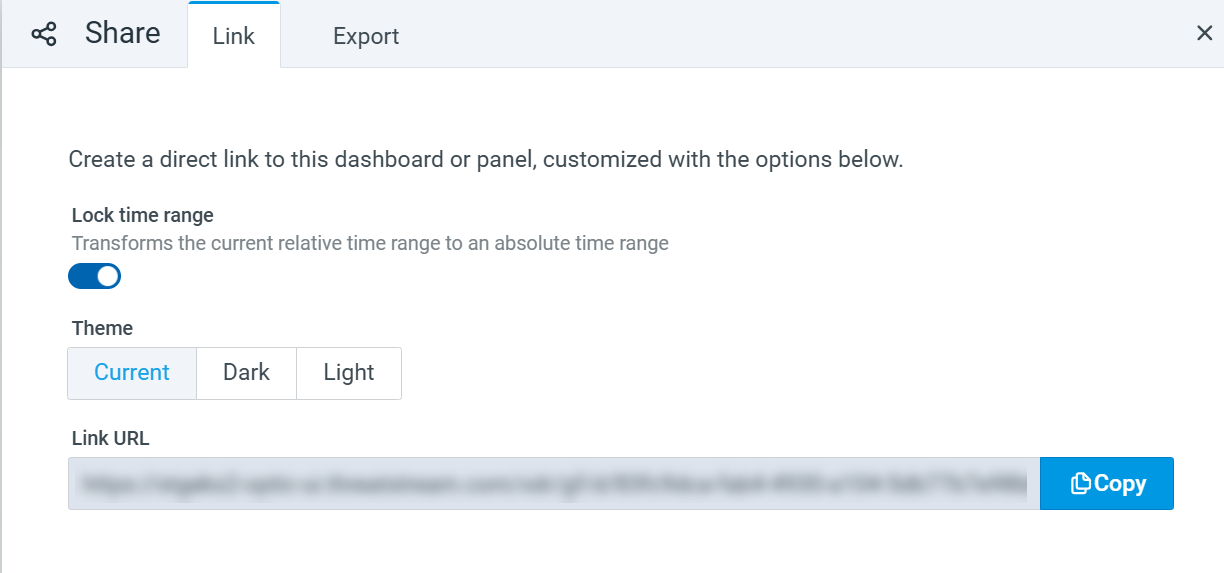
Configure the following parameters on the Link tab:
-
Lock time range: Convert a relative time range to an absolute time.
-
Theme: Dark or Light.
-
-
Click Copy to copy the dashboard URL.
Cloning Dashboards
All users can clone any available dashboard and customize it to suit their needs. Dashboards can be cloned either from the Dashboard Library page or directly from an existing dashboard.
To clone a dashboard from the Dashboard Management page:
-
Navigate to Dashboard > Library.
-
Select the dashboard you want to clone and click Clone.
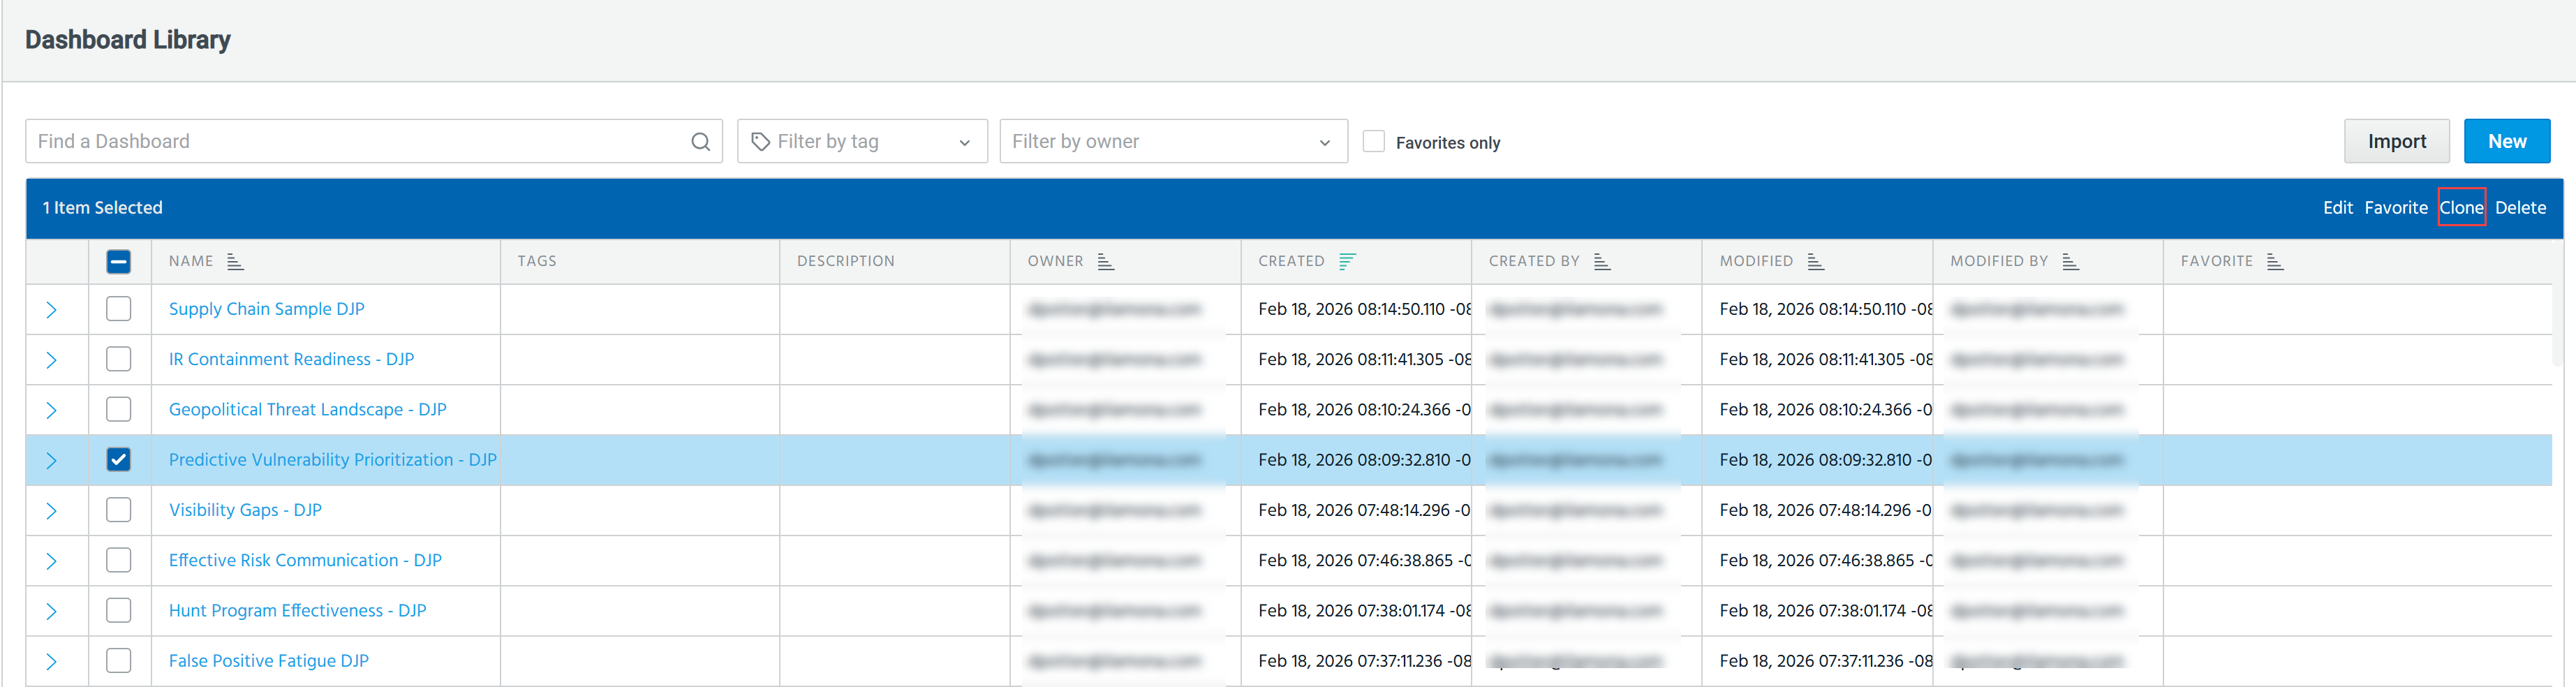
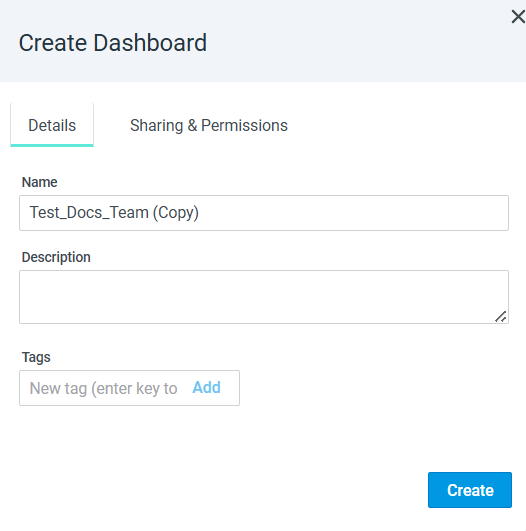
The Create Dashboard dialog box opens.
-
Modify the dashboard name. Optionally, add a dashboard description and tags.
-
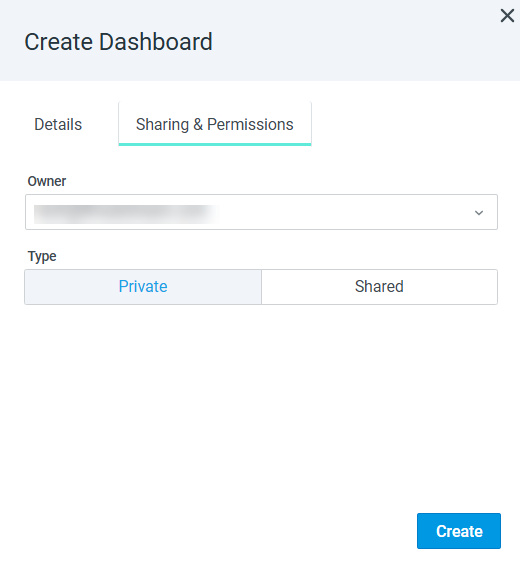
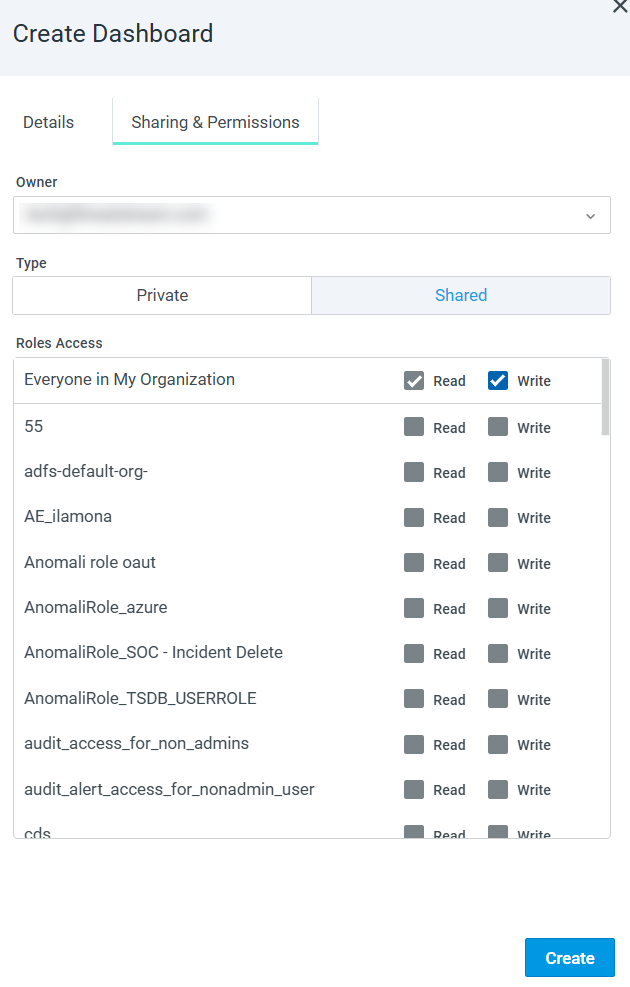
Configure the Sharing & Permissions settings:
-
Select an owner of the dashboard. The owner can edit all data, configure permissions, and delete the dashboard. If no owner is specified, the user creating this dashboard is considered the owner.
-
Define whether the dashboard is private or can be shared. If no type is specified, the dashboard type is set to Private.
If you select Shared, choose which user roles can access the dashboard, and define their read and write permissions. Roles with write permissions allow users to edit dashboard metadata and panels, while read-only permissions grant users view-only access.
-
-
Click Create.
The new dashboard is created and added to the list of dashboards on the Dashboards Management page.
To clone an open dashboard:
-
Navigate to Dashboard > Library.
-
Click the dashboard you want to clone.
-
Click the Clone button on the dashboard.

-
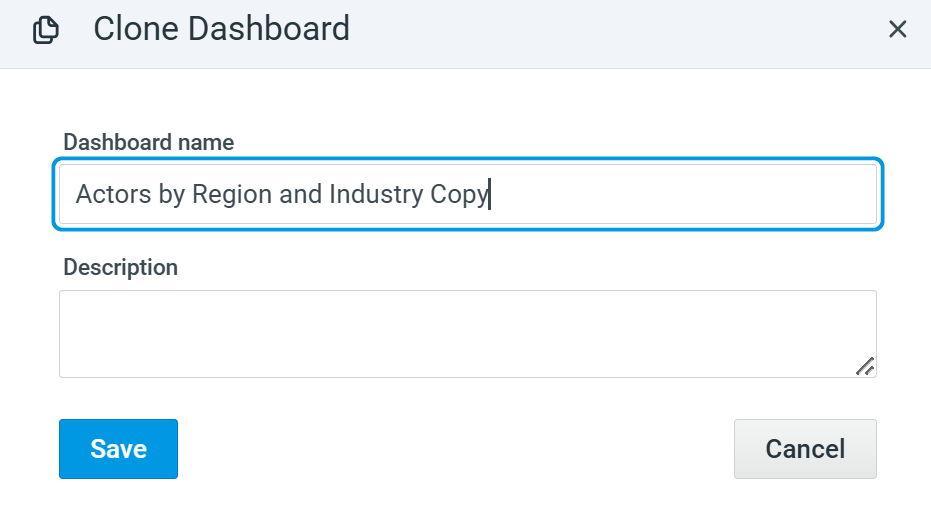
In the Clone Dashboard dialog box that opens, enter a name for the cloned dashboard.
-
Optionally, provide a dashboard description.
-
Click Save.
The cloned dashboard is saved within the folder of the dashboard you cloned.
To configure Sharing & Permissions settings of the cloned dashboard, navigate to the dashboard Settings. See Configuring Dashboard Settings for details.
Exporting Dashboards in JSON Format
Dashboard owners, Organization Administrators, and users with write permissions can export dashboards in JSON format.
To export a dashboard in JSON format:
-
Click the share icon (
 ) on the dashboard that you want to export.
 -
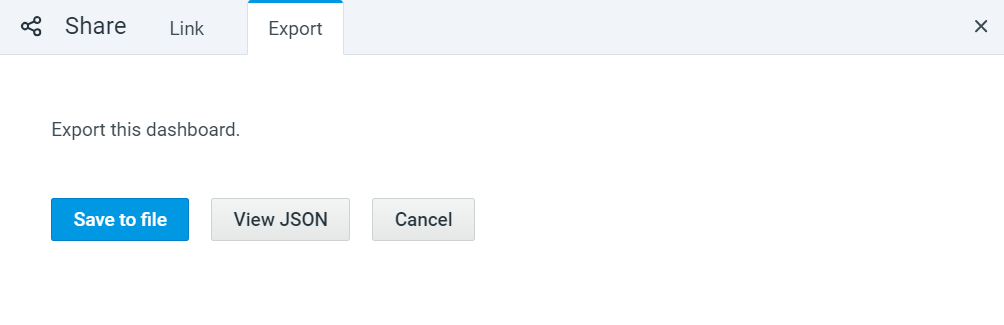
Click one of the following export options:
-
Save to file—to download the dashboard in a JSON file.
-
View JSON—to view the JSON panel of the dashboard and copy it to clipboard.
-
Exporting Dashboards in PDF Format
Every dashboard to which you have access can also be exported in PDF format. The exported PDF file includes all dashboard panels displaying data from the selected time period.
To export a dashboard in PDF format from a dashboard, click the download button ( ) on the dashboard that you want to export and then click Export as PDF.
The download process begins immediately.
Exporting Dashboards in HTML Format
Every dashboard to which you have access can be exported in HTML format. The exported HTML file retains the dashboard layout, look and theme, includes text and visual widgets but excludes hyperlinks, tooltips, and widget pages that are not visible on the dashboard.
To export a dashboard in HTML format from a dashboard, click the download button () on the dashboard that you want to export and then click Export as HTML.
The download process begins immediately.
Creating Scheduled Reports
A scheduled report is a reusable report that is based on a specific dashboard, runs automatically on a schedule (for example daily, weekly, and so on) and generates a static, shareable HTML output of that dashboard.
Every dashboard to which you have access lets you create a scheduled report. The exported HTML file includes all dashboard panels displaying data from the selected time period.
To create a scheduled report, click the download button () on the dashboard for which you want to create a report and then click Create Scheduled Report. You are redirected to the Reports page.
To learn how to create reports, see Scheduled Reports.
Removing Dashboard Tabs
Dashboard owners, Organization Administrators, and users with write permissions can remove tabs from custom dashboards.
To remove a tab:
-
Navigate to Dashboard > Library.
-
Locate and open the dashboard where you want to remove a tab.
-
Click Edit on the dashboard.
-
Mouse over the space to the right of the tab title and click the cross on the top-right. Doing so displays a warning message to confirm the tab deletion.
-
Click Delete.
The tab is removed from the dashboard.
Deleting Dashboards
Dashboard owners and Organization Administrators can delete dashboards.
To delete a dashboard:
-
Navigate to Dashboard > Library.
-
Select the dashboard you want to delete and click Delete. Alternatively, hover over the dashboard you want to delete and click the Delete (
 ) icon.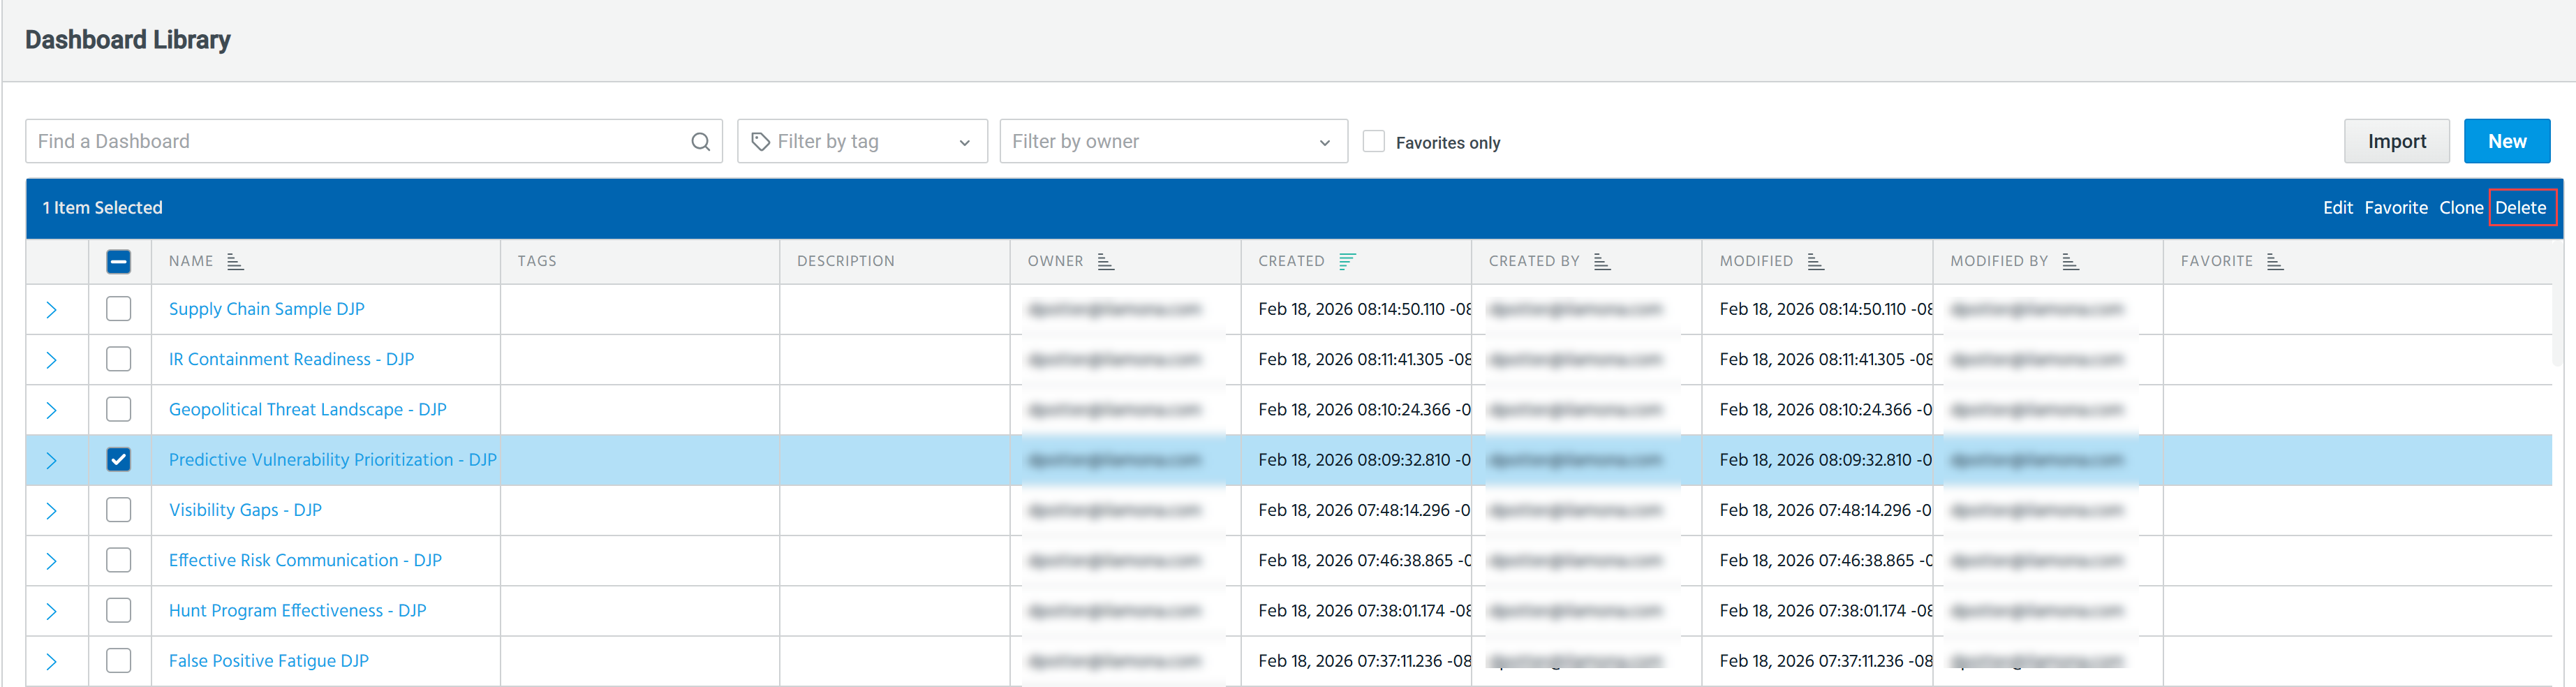
-
In the Delete dashboard dialog box, click Delete.
The dashboard is deleted.