Managing Report Tags
Filtering Reports by Resource Tag
Use the Filter by tag control on the Reports page to narrow the list to reports that carry one or more specific resource tags.

To filter reports by resource tag:
-
On the left navigation pane, navigate to Search > Manage > Reports.
-
Click Filter by tag and select one or more tags from the drop-down list.
-
The drop-down shows only tags you own or that are shared to your organization. Organization administrators can also see private tags owned by other users.
-
When you select multiple tags, only reports that have all selected tags applied are returned.
-
The count displayed next to each tag reflects usage for reports only, not the total across all the supported resource types. A tag used across multiple resource types will show a different count on each resource page, depending on the resource you are viewing.
-
-
Click Clear tags to remove the filter.
Bulk Editing Tags on Multiple Reports
You can apply or update resource tags across multiple reports at the same time using the bulk edit option. Select two or more reports in the Reports list to open the Bulk Edit page.

To bulk edit tags on multiple reports:
-
On the left navigation pane, navigate to Search > Manage > Reports.
-
Select two or more reports.
-
Click Edit. This open the Bulk Edit page, showing the number of selected reports.
-
On the Details tab, click the Tags field and select existing tags or type a new tag name to create one. To create a new tag and set its color, type the name and click Customize tag color. Click the add icon (
 ) to add any new tags you created.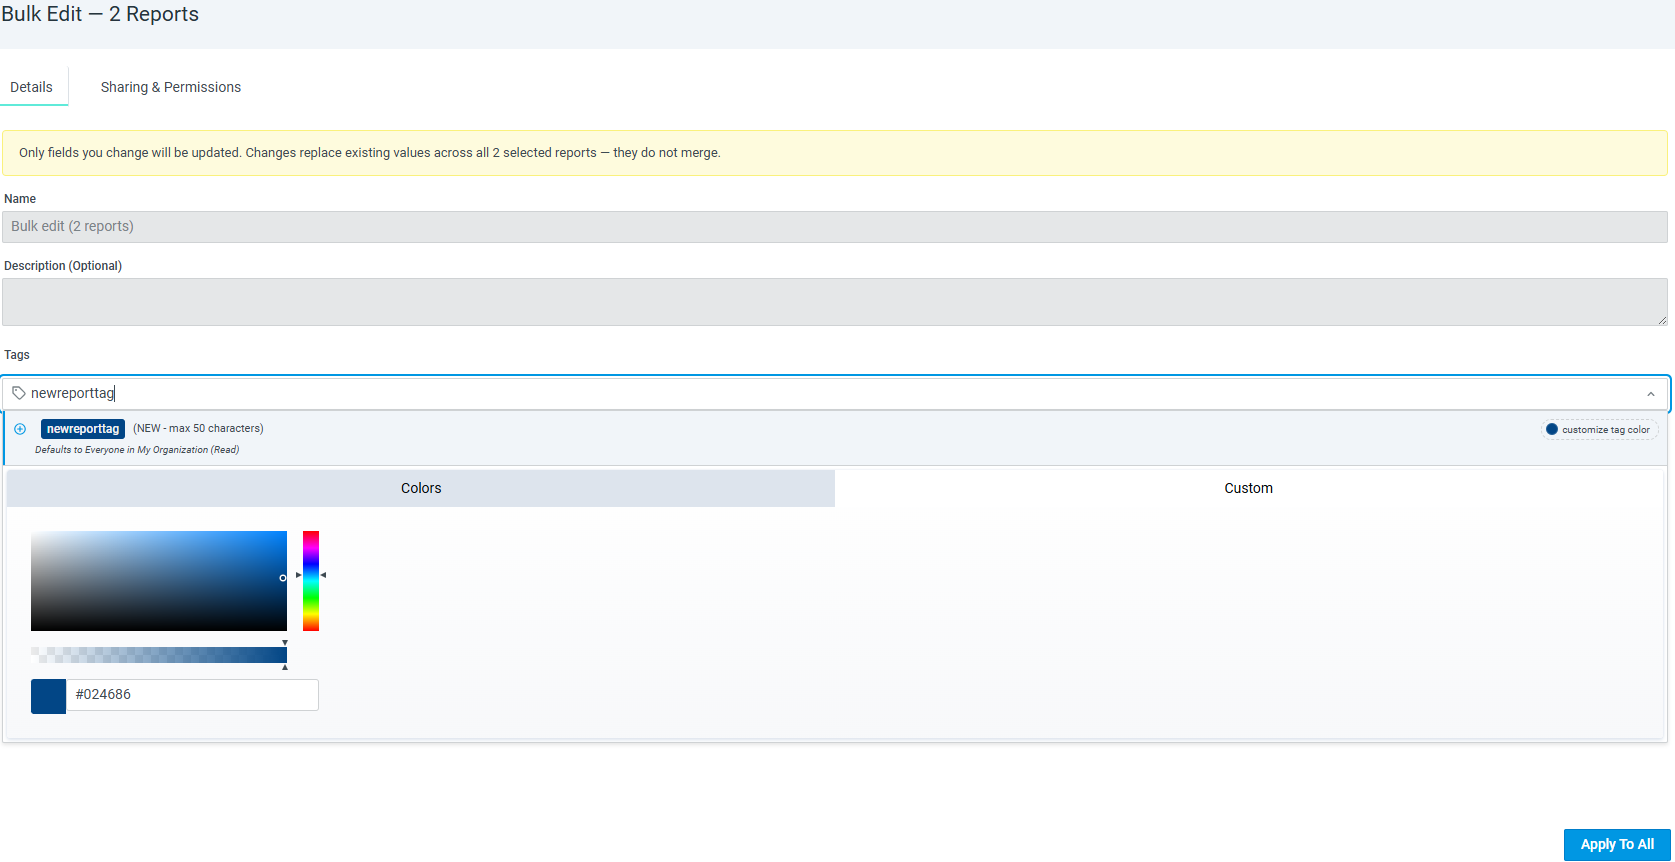
-
(Optional) Click the Sharing & Permissions tab to update the owner or access permissions across the selected reports.
-
Click Apply to All.
Note: Only fields you change are updated. Changes replace the existing values across all selected reports — they do not merge with existing values. Name and Description are read-only in the bulk edit mode.
Exporting and Sharing a Report
To export or share a report:
-
(Optional) After you successfully create a report, click the share icon (
 ) to share and the export icon (
 ) to export the report. When you export a report:
-
By default, the file is saved with a filename in the format:
dashboard_<dashboard_name>_<timestamp>_index, where<dashboard_name>is the name of the dashboard associated with the report you want to export,<timestamp>denotes the UTC time you exported the report (inYYYYMMDD_HHMMSSformat), and an<index>integer to prevent filename collisions when no suffix is provided.-
Example:
dashboard_Windows_Threat_Hunting_20260422_210857_9 -
In this example,
Windows_Threat_Huntingis the dashboard with the report,Apr 22nd 2026 21:08:57 UTCis the timestamp, and9is the index.
-
-
(Optional) You can enter a custom filename by selecting a field from the File Suffix Field drop-down list. This list contains columns from the lookup table you selected when creating the report. The filename format becomes:
dashboard_<dashboard_name>_<custom_value>_<timestamp>, where<custom_value>is the value of the selected column.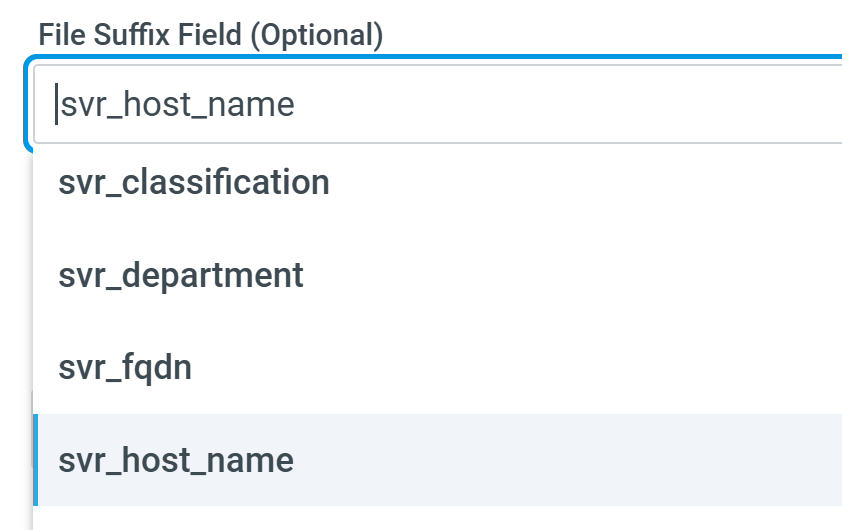
-
Example:
dashboard_Windows_Threat_Hunting_windows1_20260422_210857 -
In this example,
Windows_Threat_Huntingis the associated dashboard, exported on Apr 22, 2026 21:08:57 UTC, followed by the custom suffixwindows1as the value of the file suffix columnsvr_host_name.
-
-