Creating a Report
You can create a scheduled report from the Reports page, or directly from any dashboard, which preselects the dashboard as the source and streamlines configuration. For details, see the Creating Scheduled Reports section in Scheduled Reports.
To configure general settings:
-
On the left navigation pane, navigate to Search > Manage > Reports.
-
Click New Report.
-
Enter a name for the report.
-
(Optional) Enter a description to provide additional context for other users who may view or manage this report.
-
Use the Status toggle switch to enable or disable the schedule.
-
When on, the report runs automatically according to the configured schedule and destination.
-
When off, the configuration is saved but no new runs are triggered until you re-enable it.
-
-
Under Report Configuration:
-
Select the dashboard you want to export as HTML or PDF.
-
A dashboard is pre‑selected if you navigate here from a dashboard by clicking Create Scheduled Report. You can change the dashboard, if needed.
-
To configure tags:
In the Tags field, add or select one or more tags to apply to the report. See Applying Tags to Reports for details.
To configure report output:
-
Select the report type — HTML or PDF. For dashboard exports, HTML is the default format used to generate static dashboard snapshots. These reports:
-
Preserve the layout, look, and theme (light or dark) of the dashboard.
-
Include charts, tables, visual, and text widgets as static content.
-
Exclude interactive elements such as drill‑downs and tooltips.
-
-
In the Report Destinations section, click Add to add one of the following destinations:
-
Anomali S3: Default storage, accessible for download through the Anomali UI or API. Select the report TTL (1–180 days).
-
Customer‑provided S3 endpoint: Select your S3 as the report destination by providing the S3 bucket name, region, access key, and secret key.
-
-
Click Add to save the report destination you selected. Once configured, the Report Destinations panel lists all destinations where each scheduled run will deliver the generated report. You can add multiple destinations to send the same report to different systems or stakeholders.
-
Select Light or Dark Mode as the style theme of the report.
To configure report variables:
Under Report Variables: select either variables or lookup tables to populate the parameter values of the report.
-
Variables: Select the time range and values for all the other variables present in your source dashboard. These variables are the same variables you configured in your dashboard settings.
-
Lookup Tables: Select an existing lookup table from a drop-down list to supply values to your source dashboard and automatically generate a report of the dashboard output, without needing any human intervention. To successfully generate a report, all dashboard variables must be present in the lookup table you select. The lookup table supplies up to a maximum of ten rows (one set of values from each table row) for the corresponding dashboard variables.
-
A report will not be generated since the lookup table
cities_1756406912210is missingaliasas one of its columns, withnameandaliasbeing the two variables in the source dashboard. -
To correctly generate a report, this lookup table must contain
nameandaliasas its columns, while supplying up to a maximum of ten rows (onenameandaliasfrom each table row). -
If you configure this report schedule to run at 10 AM with this lookup table that, for example, has three rows, it will run three times at 10 AM, once with each row and produce three output rows.
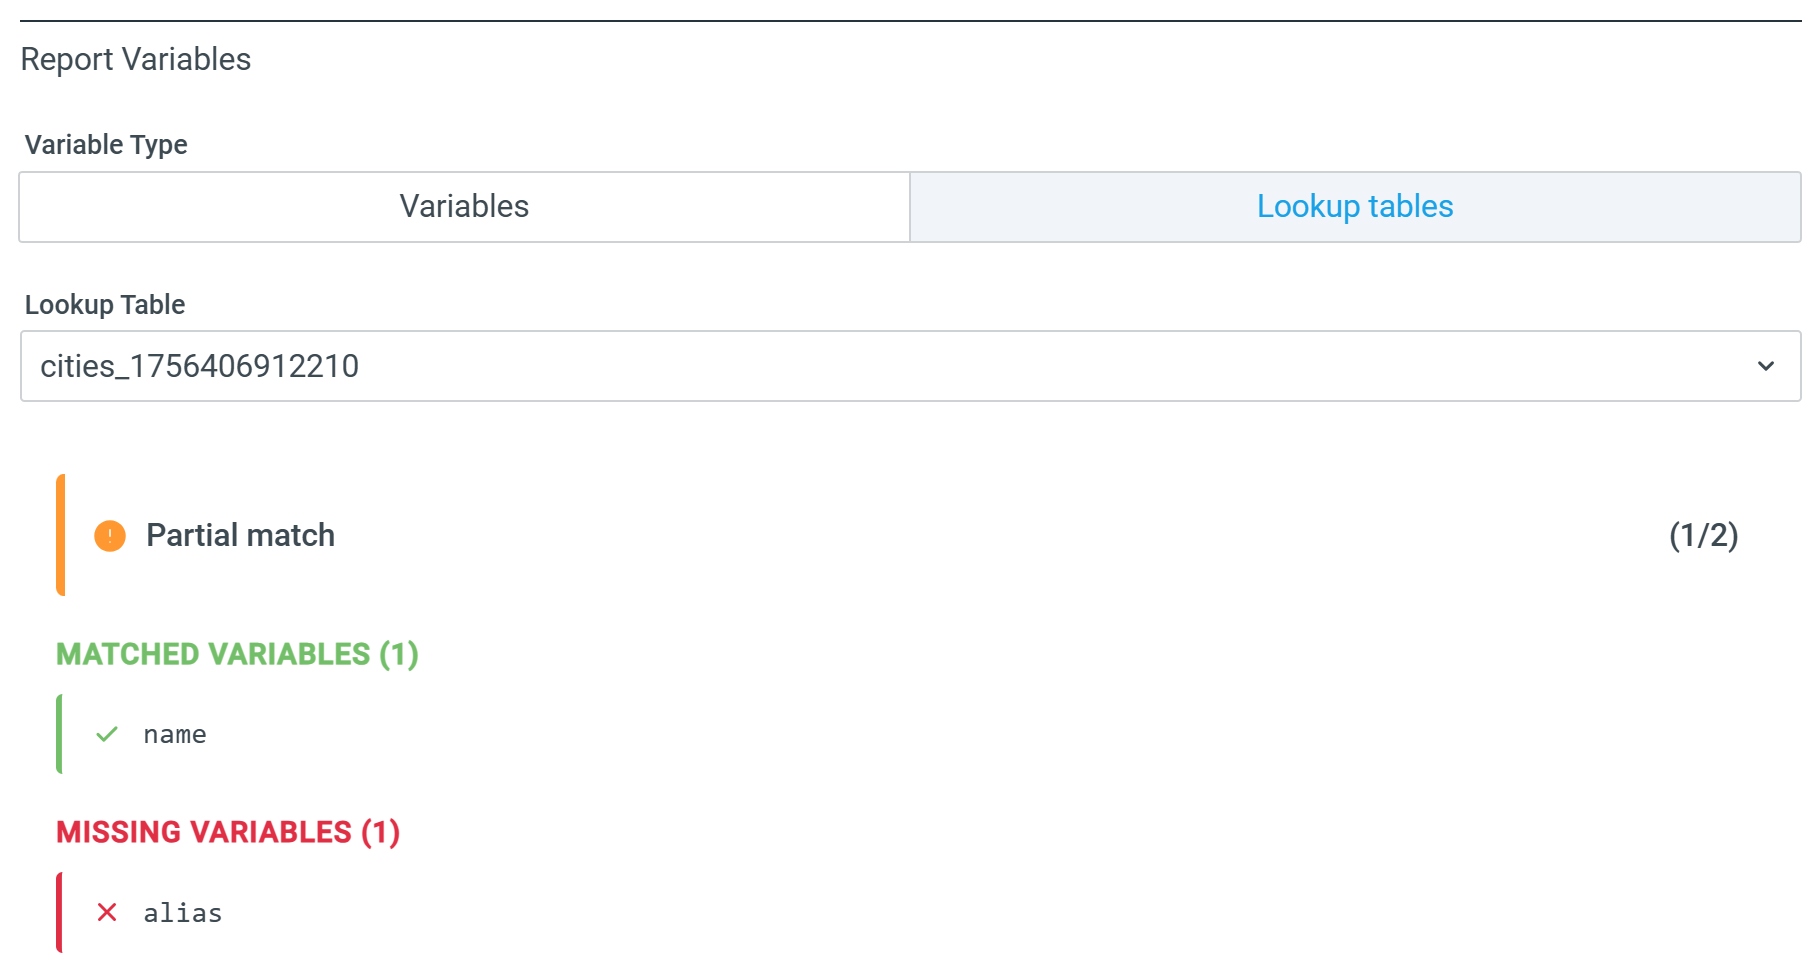
In the example above:
To configure the schedule:
Specify a scheduling frequency for the report:
-
Standard: Select a schedule from a list of pre-defined schedules. Possible values include every hour, every four hours, every six hours, every day, or every week.
-
Custom: Run the schedule after a specified number of hours or days.
-
Cron: Schedule reports using cron expressions:
Default: Schedule a cron job to run either every:
-
hour: runs after the specified number of minutes past the hour
-
day: runs every day at the specified time (in 24-hour format)
-
week: runs only on the specified day of the week at the specified time (in 24-hour format)
-
month: runs on the specified day of the month (between 1-31) at the specified time (in 24-hour format)
Cron: Schedule the cron job using a valid cron expression. For example, using
0 18 14 * *as your cron expression runs the job at 6:00 PM on day 14 of the month. -
To configure sharing and permissions:
Configure Sharing & Permissions:
-
Share reports with all org members — newly created reports are readable by everyone in the org by default.
-
Assign write-only permission to let users read and modify reports without allowing them to delete them.
-
Manage access with admin rights — grant or revoke read or write permissions for other users, keep reports private, or transfer ownership to another user.