Google Workspace
To sync Google Workspace users and groups with the Anomali Agentic SOC Operations for identity management, you must first configure the Google Workspace integration on the Integrations Marketplace page. For details on identity management within the Anomali Agentic SOC Operations, see Identities.
Before You Begin
Before configuring the Google Workspace integration, you must create a Google Cloud service account, generate a service account JSON key, and then authorize the service account for domain-wide delegation in your Google Workspace Admin Console. These tasks require Google Workspace Super Administrator privileges.
-
Create a service account in Google Cloud Console. For details, see Create service accounts.
-
Generate a JSON key for the newly created service account. For details, see Create and delete service account keys.
-
Authorize domain-wide delegation in the Google Workspace Admin Console.
To authorize domain-wide delegation in the Admin Console:
-
In the Google Workspace Admin Console, navigate to Security > Access and data control > API controls.
-
Scroll down to the Domain-wide delegation pane and click Manage Domain Wide Delegation.
-
Click Add new.
-
Enter a Client ID of the service account you created. The Client ID is displayed on the service account details page in Google Cloud Console.
-
In OAuth Scopes, add the following scopes as a comma-separated list:
Scope Purpose https://www.googleapis.com/auth/admin.directory.user.readonlyRead user profiles https://www.googleapis.com/auth/admin.directory.group.readonlyRead groups https://www.googleapis.com/auth/admin.directory.group.member.readonlyRead group members https://www.googleapis.com/auth/admin.reports.audit.readonlyRead login audit logs -
Click Authorize to save the configuration.
Note: While changes typically take effect within minutes, it can sometimes take up to 24 hours to fully replicate across the domain.
Configuring the Google Workspace Integration
To configure the Google Workspace integration:
-
Navigate to ThreatStream Next Gen > Integrations Marketplace > Entity Sources.
-
Click the three-dot vertical menu on the Google Workspace tile and then click Configure.
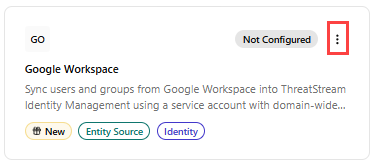
Alternatively, click the Google Workspace tile and then click Connect.
-
On the Configure Google Workspace page that opens, enter the following details:
Field Name Description Name Name of the integration. Description Description for the integration. Credentials Admin Email Email of the Workspace Super Admin.
Service Account Email Service account email address from the JSON key file. Customer ID Your Workspace customer ID. Leave as default unless operating across multiple domains. Private Key PEM-encoded private key from the JSON key file. Private Key ID Key ID from the JSON key file. Sync Configuration Batch Size Number of identity records written per database operation. Default: 500. Note: Anomali recommends keeping the default batch size value unless you experience memory issues. Large values reduce database round trips but consume more memory.Sign-in Activity Window (days) Days of Google Workspace log events to fetch for sign-in activity enrichment.
Default: 30
Users Per Page Number of users fetched per paginated API request. Default: 500 Field Mapping Field mappings let you override which source attribute is used for each canonical identity field. This is useful when your directory uses non-standard attribute names or you want to prefer a specific field over the default. Email/Hostname Source attribute to use as the primary identity key. Status Source attribute that determines active/disabled state. Source ID Source attribute used as the stable internal identity ID. Sync Settings Sync Frequency Interval for incremental syncs. Default: Hourly. -
Click Create.
The Google Workspace integration is activated. Confirm that the integration status shows Active and health shows Healthy.
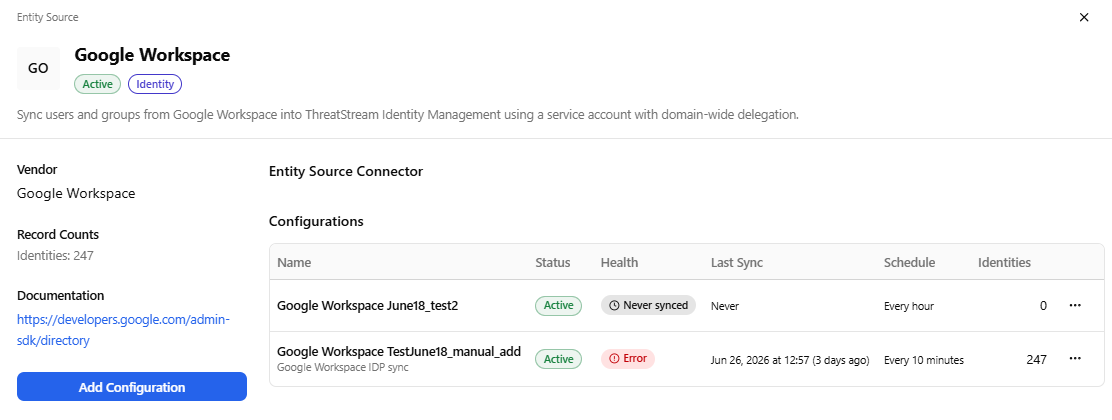
On the integration details page, you can view the integration status, health, the date and time of the last synchronization with the source, the synchronization schedule, and the number of identities available in the configuration. On this page, you can also force sync, edit, deactivate, and delete the integration configuration. For details, see Managing Integrations.