Jira MCP Integration
You can integrate Jira MCP with ThreatStream Next Gen to automatically create Jira tickets based on PIR findings and notify specified Jira users about them.
Configuring Jira MCP Integration
To start using Jira MCP in ThreatStream Next Gen, you need to configure the Jira MCP integration on the Integrations Marketplace.
Before You Begin
Before configuring the Jira MCP integration, you must add the following domain to the list of Atlassian supported domains to allow ThreatStream Next Gen to access Jira.
https://api.threatstream.com/**(for US Cloud)https://api-eu.threatstream.com/**(for EU Cloud)
See Control Atlassian Rovo MCP Server Settings/Add domains for details.
To configure Jira MCP integration:
- Navigate to ThreatStream Next Gen > Integrations Marketplace.
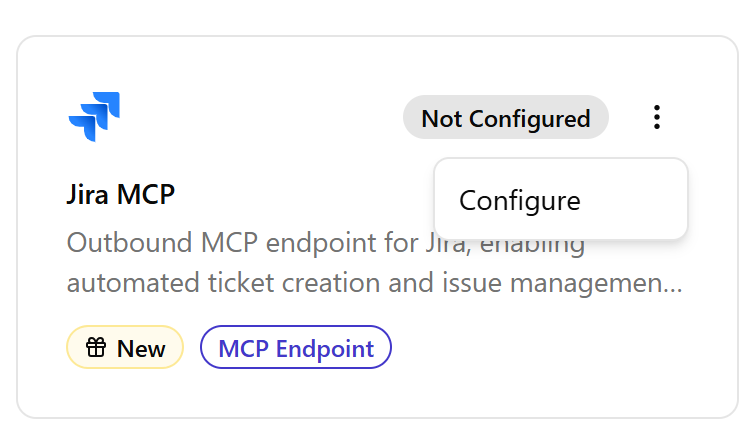
- Locate the Jira MCP tile.
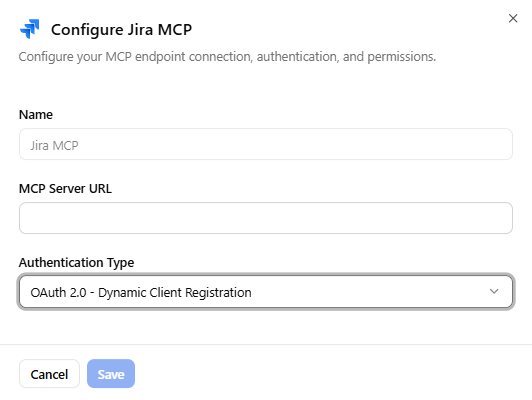
- Click the three-dot vertical menu and then click Configure. The Configure Jira MCP dialog box opens.
- Provide a Name for the Jira MCP integration.
-
Enter the MCP Server URL:
https://mcp.atlassian.com/v1/mcp - Select OAuth 2.0 - Dynamic Client Registration as the Authentication Type.
- Enter your Client ID and Client Secret from the Atlassian developer console.
- Click Save.
The Jira MCP integration is now configured and ready for use.
You can now configure your PIRs to create Jira tickets. For details on enabling Jira integration in PIRs, see Configuring Jira Output.