Viewing Asset Details
Asset details are created and updated every time Anomali scans your organization's assets. The asset details page provides insights into the issues associated with the selected asset and the asset risk score history for the last 6 months. From asset details pages, you can also assign a status to every issue and track all asset changes.
To view asset details:
-
Navigate to ThreatStream > Analyze > Attack Surface Management.
-
Click the Asset Inventory tab.
-
Click the asset of your interest.
Below is the example of an asset details page.
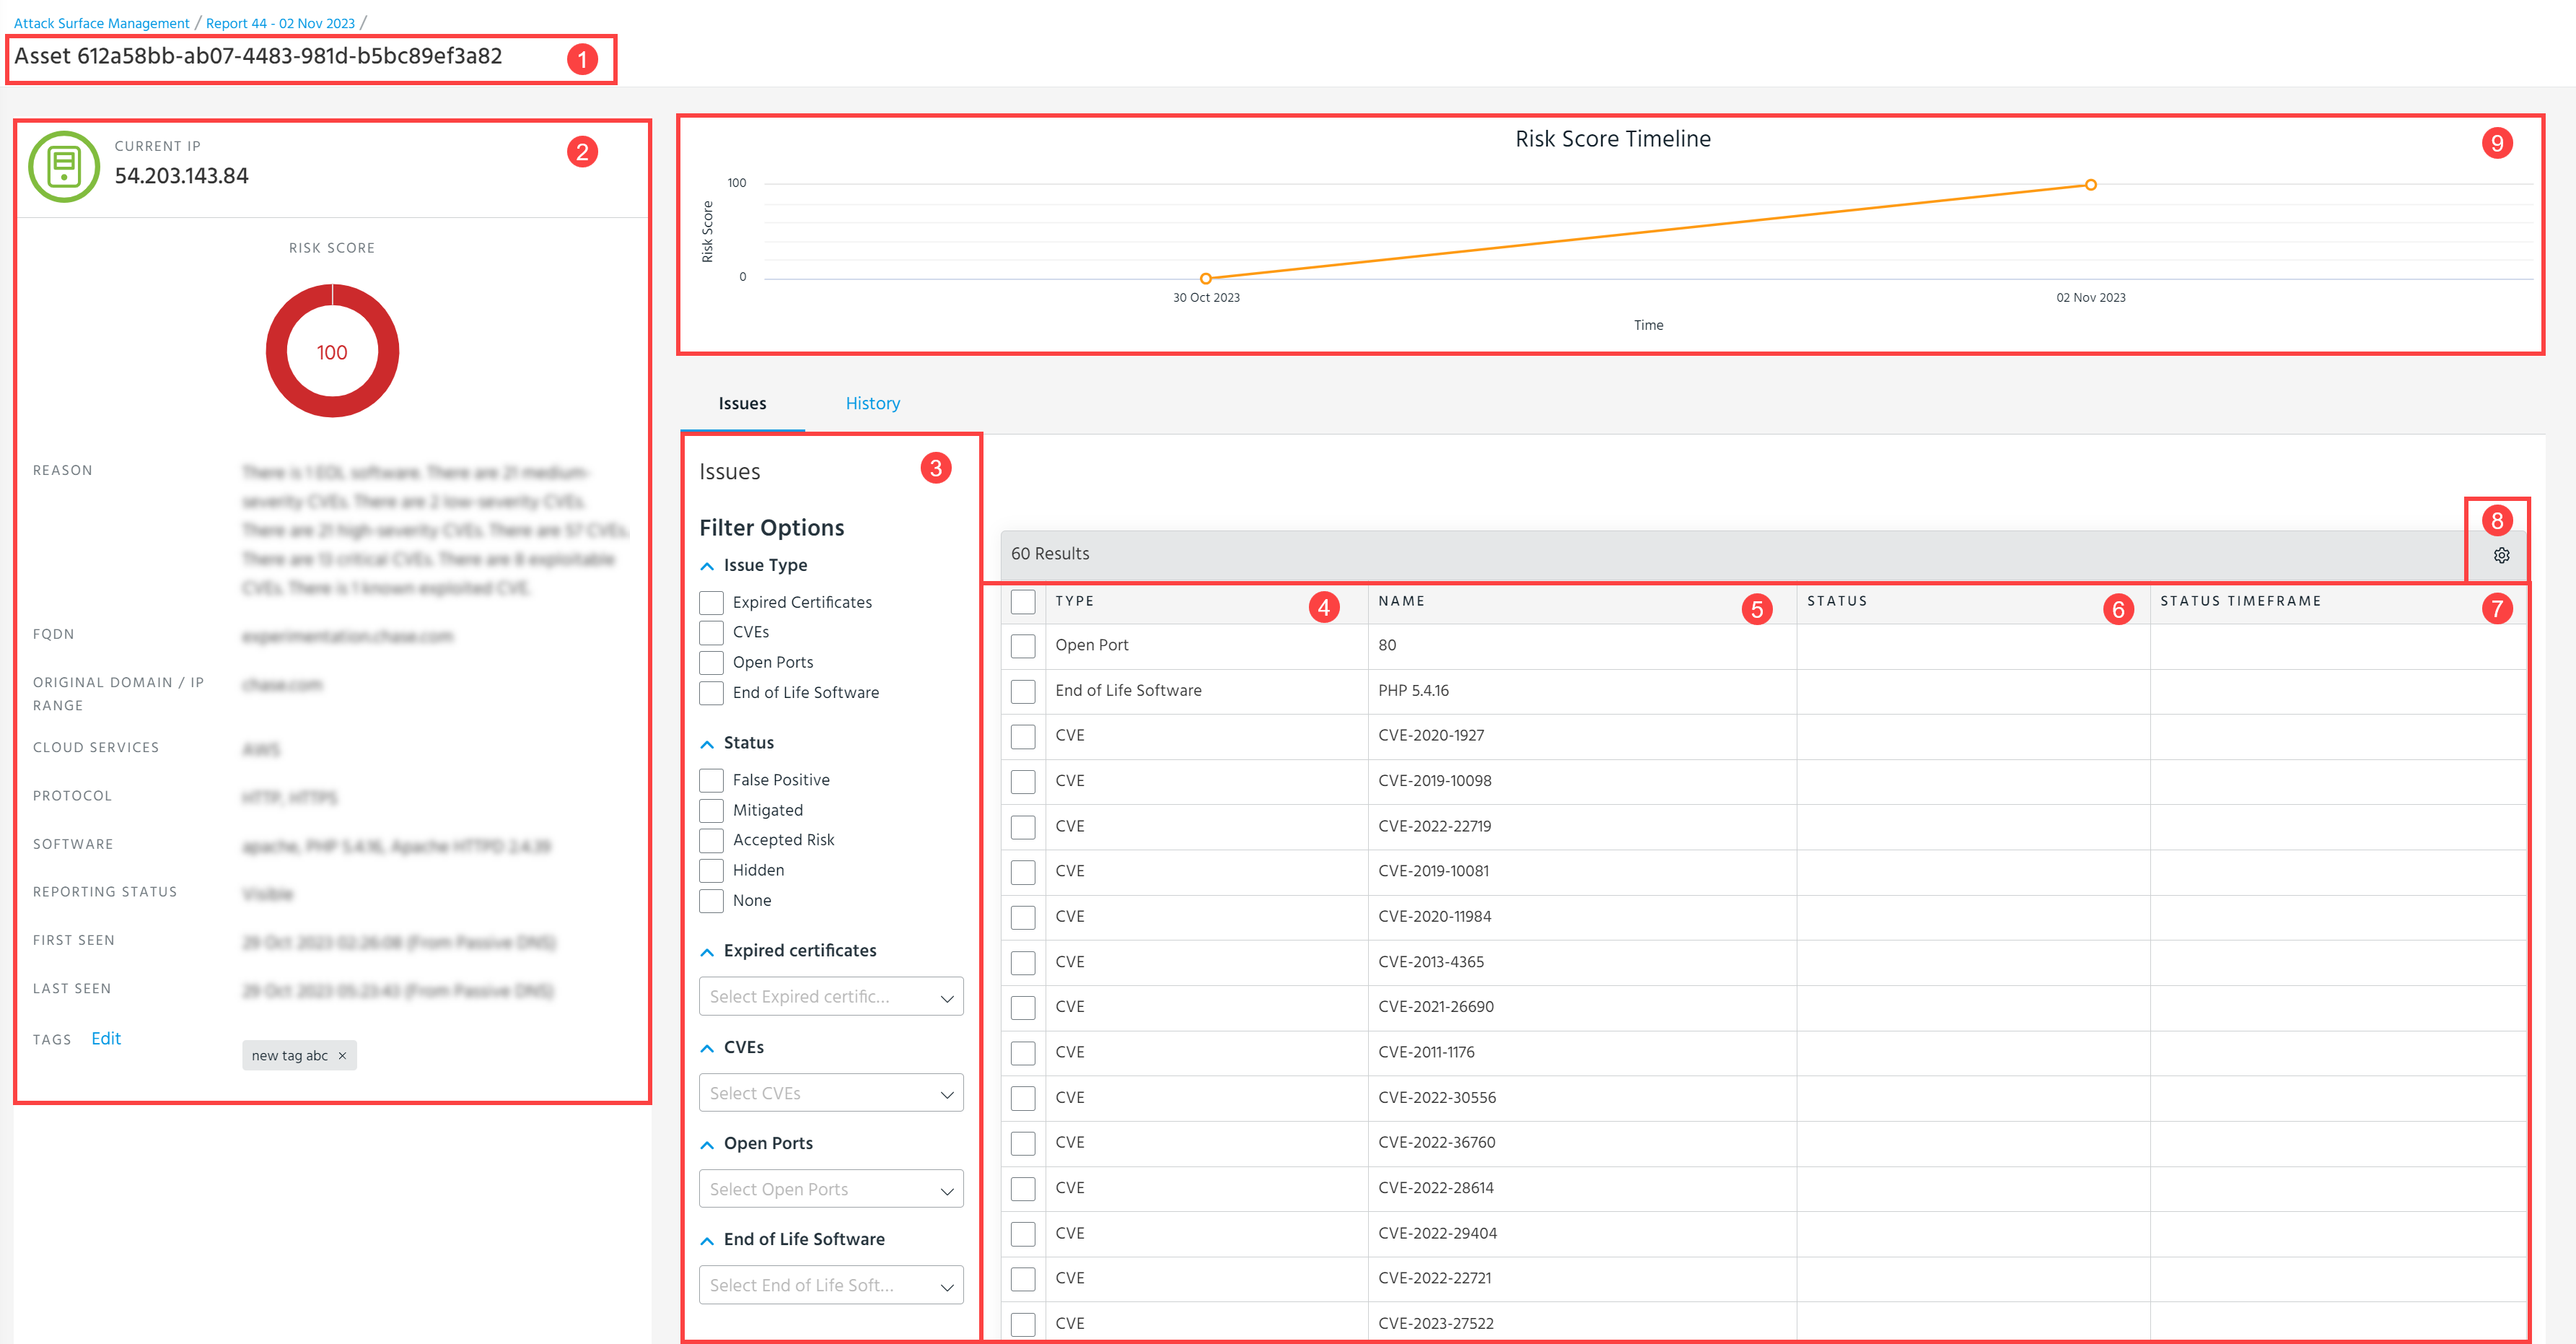
 Automatically generated asset ID.
 Asset Summary.
Parameter Description Current IP Current Asset IP. Risk Score The latest asset risk score. Reason Issues associated with the asset. The issues reflect the details collected over the last 7 days. FQDN Names of discovered fully qualified domains associated with the asset. Original Domain/IP Range Original domain name or IP range associated with the asset. Cloud Cloud provider where the asset is located. Services Exposed services associated with the asset. Software Software associated with the asset. Reporting status Reporting status of the asset. Possible status options: Visible or Excluded. First seen Timestamp when the asset was first seen. Collected from passive DNS. Last seen Timestamp when the asset was last seen. Collected from passive DNS. Tags Tags associated with the asset. To remove or add existing tags, click Edit.  Filter Options: Filter asset issues by Issue Type, Status, Expired certificates, CVEs, Open Ports, and End of Life Software.
  Type: Issue type.
 Name: Name of the issue.
 Status: Status of the issue. The following status options are available: False Positive, Mitigated, Accepted Risk, Hidden.
 Status Timeframe: Duration of the status assigned to the issue.
  Table Settings: Select the columns you want to be displayed on the page. By default, all columns—Type, Name, Status, and Status timeframe—are visible. Additionally, you can change the order of columns in the table by using the drag-and-drop functionality, specify the number of rows to be displayed per page, and enable/disable horizontal scrolling.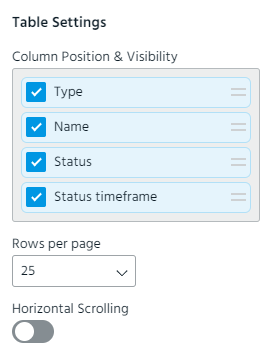
 Risk Score Timeline: Asset Risk Score history over the last 6 months.
 On asset details pages, you can also assign a status to selected issues. See Assigning a Status to Asset Issues for details.
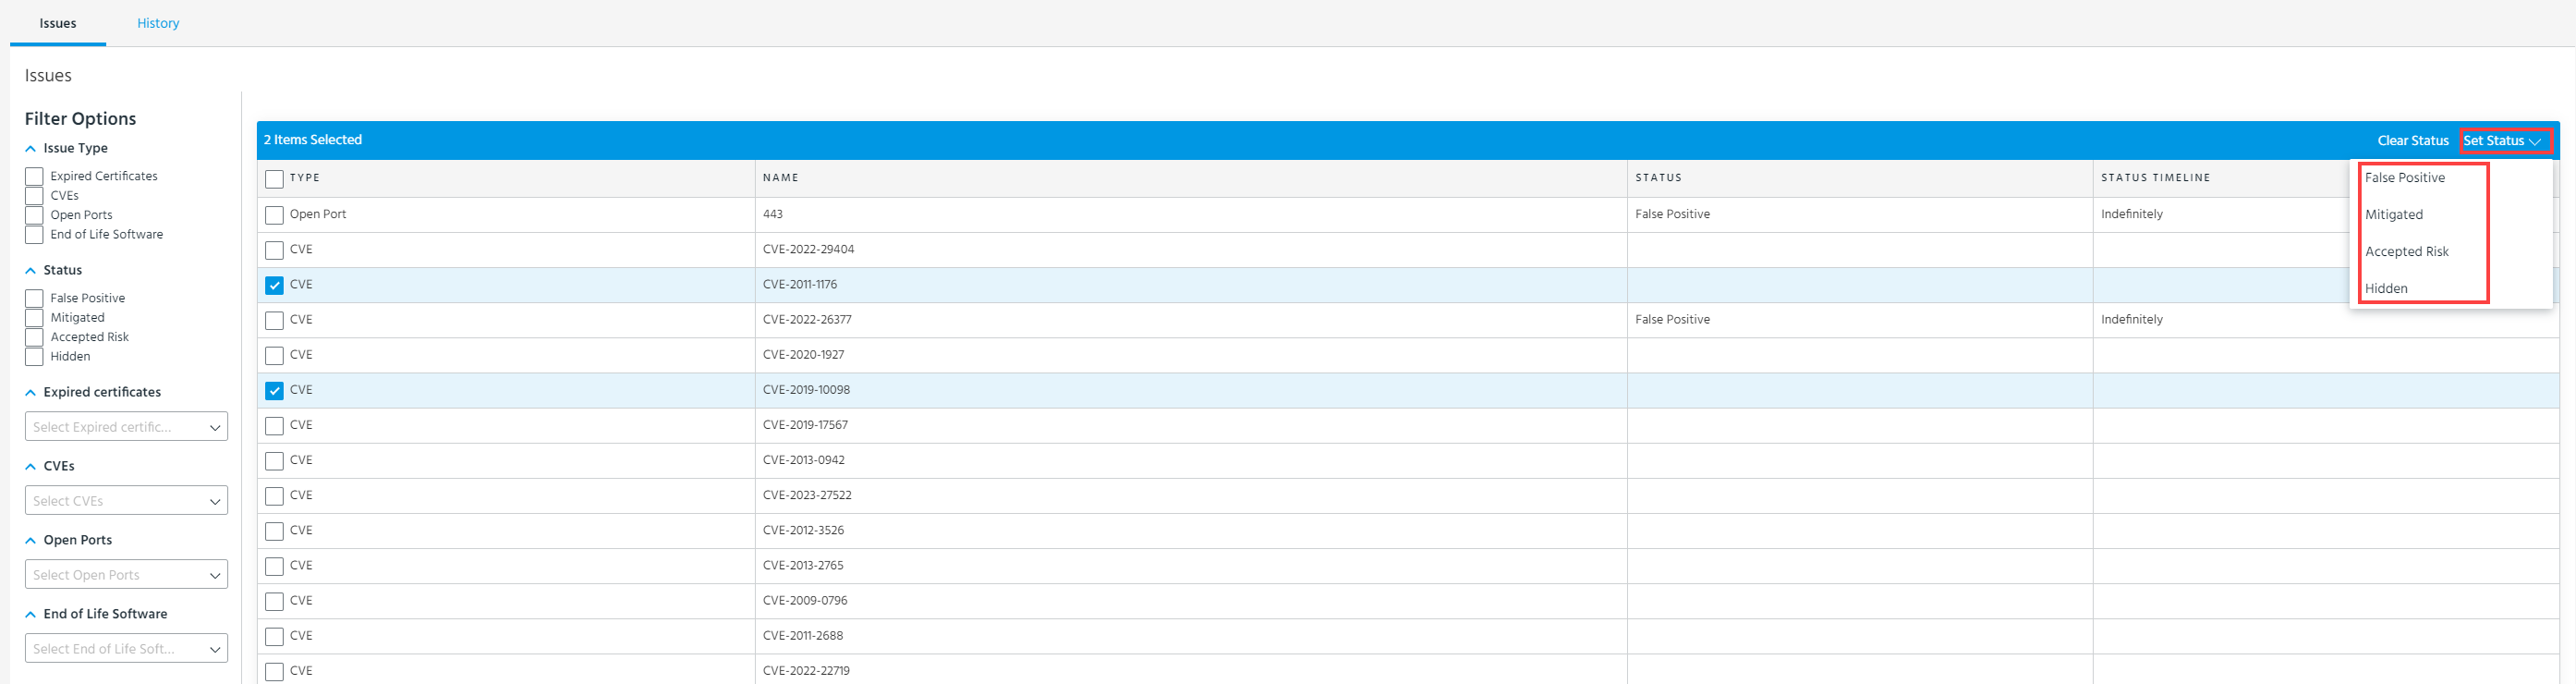
To reset an asset issue status, click Clear Status. After clearing the status, the Asset Risk Score and reporting status will be updated.
Org Admins can also view the history of asset changes.
To view asset history:
-
Navigate to ThreatStream > Analyze > Attack Surface Management.
-
Click the Asset Inventory tab.
-
Click the asset of your interest.
-
Navigate to the History tab.
Below is the example of the asset history.

Date: Date and time the asset issue changes were made.
User: User who made the changes to the asset issue.
Type: Type of the asset issue.
Name: Name of the asset issue.
Old Status: Previous status of the asset issue.
New Status: New status of the asset issue.
Table Settings: Select the columns you want to be displayed on the page. By default, all columns—Date, User, Type, Name, Old Status, and New Status—are visible. Additionally, you can change the order of columns in the table by using the drag-and-drop functionality, specify the number of rows to be displayed per page, and enable/disable horizontal scrolling.