Configuring an Identity Provider for SSO
Use the information in this section to configure an identity provider for SSO on ThreatStream. Your organization can have multiple identity providers configured for SSO.
Refer to the following sections to learn how to set up an IdP of your interest.
Setting up an identity provider with SAML 2.0
Setting up an identity provider with OKTA Marketplace
Activating an identity provider
To set up an identity provider with SAML 2.0:
-
In the bottom-left corner of the side navigation panel, click Settings (
 ) > User & Role Management.
 -
Click the SSO tab.
-
If you are setting up an identity provider for the first time, click Set up identity provider.
If you are adding an additional identity provider, click + tab.
-
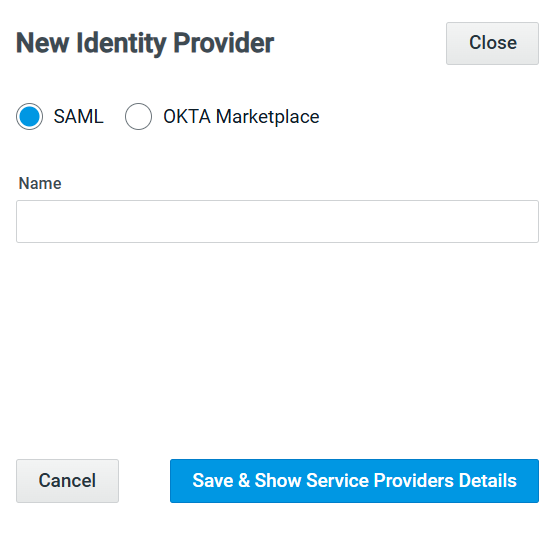
In the window that opens, select SAML, enter a meaningful name, and click Save & Show Service Provider's Details.
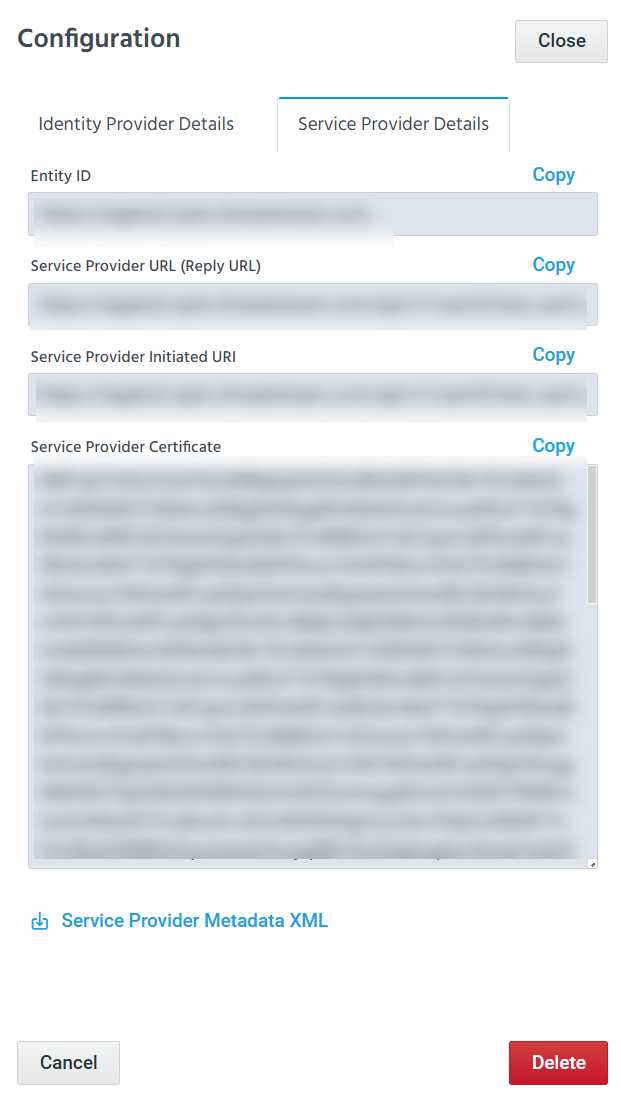
The Service Provider Details tab in the window that opens is automatically populated with the details and certificate from the service provider, which is ThreatStream in this case.
-
Click Service Provider Metadata XML to download and save the file.
-
Use the downloaded service metadata XML file when setting up your identity provider. Then, download the federation metadata XML file from your identity provider to use it in your next step.
-
Click the Identity Provider Details tab and configure the following fields.
Field Description Upload a file Drag and drop or select the downloaded SAML metadata XML file to upload.
Uploading this file automatically populates the next four fields: Identity Provider Entity ID, Identity Provider Single Sign-On URL, SAML Signing Certificate
Alternatively, you can manually enter information for the next four fields.
Name Your organization name. Identity Provider Entity ID The identity provider entity ID for your organization. Identity Provider Single Sign-On URL The identity provider single sign-on URL for your organization. SAML Signing Certificate The SAML signing certificate for your organization.
Note: This certificate must be in PEM format. Additionally, ensure that theBEGIN CERTIFICATEandEND CERTIFICATElines are not included in the file.Use for OnPrem For ThreatStream OnPrem users: check this box if you want to use SAML for SSO on your ThreatStream OnPrem appliance. Under OnPrem FQDN, enter the domain name that you use to connect to the ThreatStream OnPrem user interface.
Note: If you update your IdP configuration on ThreatStream after the initial configuration, you must resynchronize ThreatStream OnPrem appliance to ensure that changes are reflected on your appliance. You can do so by executing the following command on ThreatStream OnPrem:user_setup -uShow advanced settings Configure any of the following optional settings: Attributes names, Sign auth request, Sign assertions, Encrypt assertions, Sign sign-out request, Encrypt name ID, Sign sign-out response, Sign messages, Encrypted name ID, Attribute statement.
You can hover over the question mark next to the setting for more information.
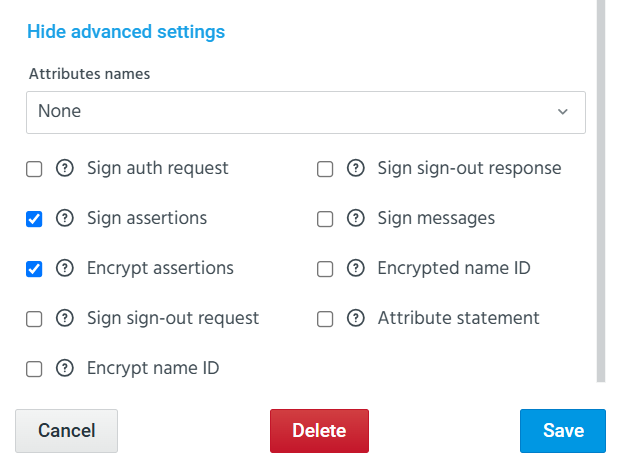 Note: You must set Attributes names to Email Address in cases where email attributes are sent in the SAML response to ThreatStream.
 -
Click Save.
Your SAML identity provider is now configured on ThreatStream.
-
Activate the new identity provider to allow users to authenticate to ThreatStream through it. See Activating Identity Provider on ThreatStream for details.
To set up an identity provider with OKTA Marketplace:
-
In the bottom-left corner of the side navigation panel, click Settings (
) > SSO & Role Management. -
Click the SSO tab.
-
If you are setting up an identity provider for the first time, click Set up identity provider.
If you are adding an additional identity provider, click + tab.
-
Select OKTA Marketplace.
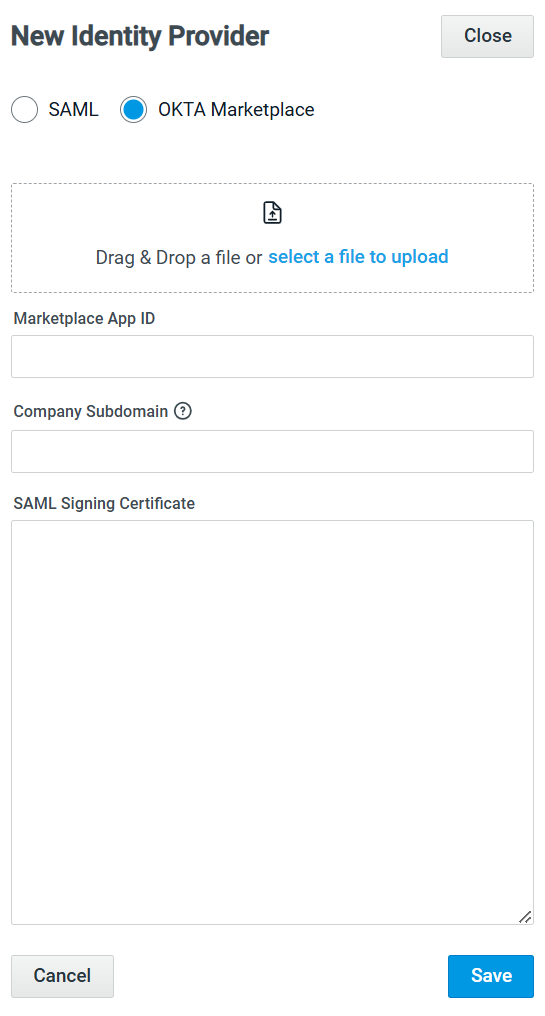
Configure the following fields.
Field Description Upload a file Drag and drop or select the link to upload your SAML metadata XML file.
Uploading a file automatically populates the next three fields: Identity Provider Entity ID, Identity Provider Single Sign-On URL, SAML Signing Certificate
Alternatively, you can manually enter information for the next three fields.
Marketplace App ID OKTA Marketplace app ID of your organization. Company Sub Domain The company subdomain field from your OKTA Marketplace app. SAML Signing Certificate The SAML signing certificate for your organization.
Note: This certificate must be in PEM format. Additionally, ensure that theBEGIN CERTIFICATEandEND CERTIFICATElines are not included in the file. -
Click Save.
Your OKTA Marketplace identity provider is now configured on ThreatStream.
-
Activate the new identity provider to allow users to authenticate to ThreatStream through it. See Activating Identity Provider on ThreatStream for details for details.
-
In the bottom-left corner of the side navigation panel, click Settings (
) > User & Role Management. -
Click the SSO tab.
-
In the Identity Providers section, click the IdP that you need to activate.
-
Enable the Active switch.
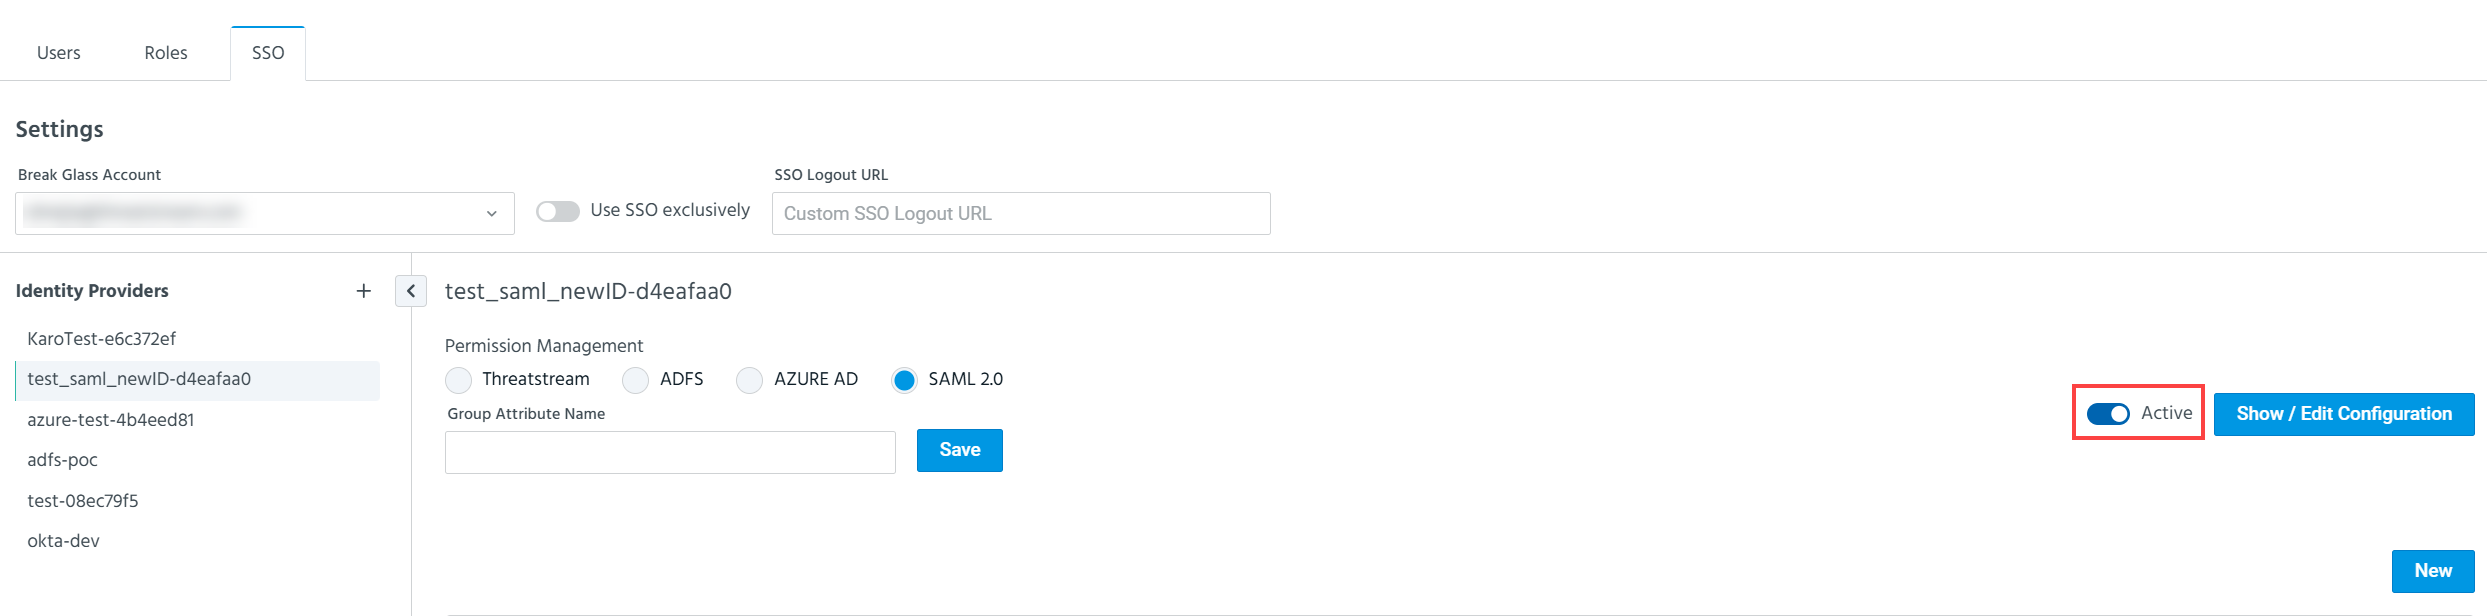
-
In the Change Active Status pop-up message, click Apply Changes.
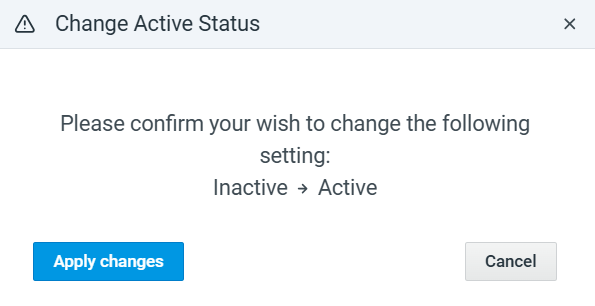
The IdP is now active.
To edit an IdP configuration:
-
In the bottom-left corner of the side navigation panel, click Settings (
) > User & Role Management. -
Click the SSO tab.
-
In the Identity Providers section, click the tab for the IdP configuration you want to edit.
-
Click Show/Edit Configuration.
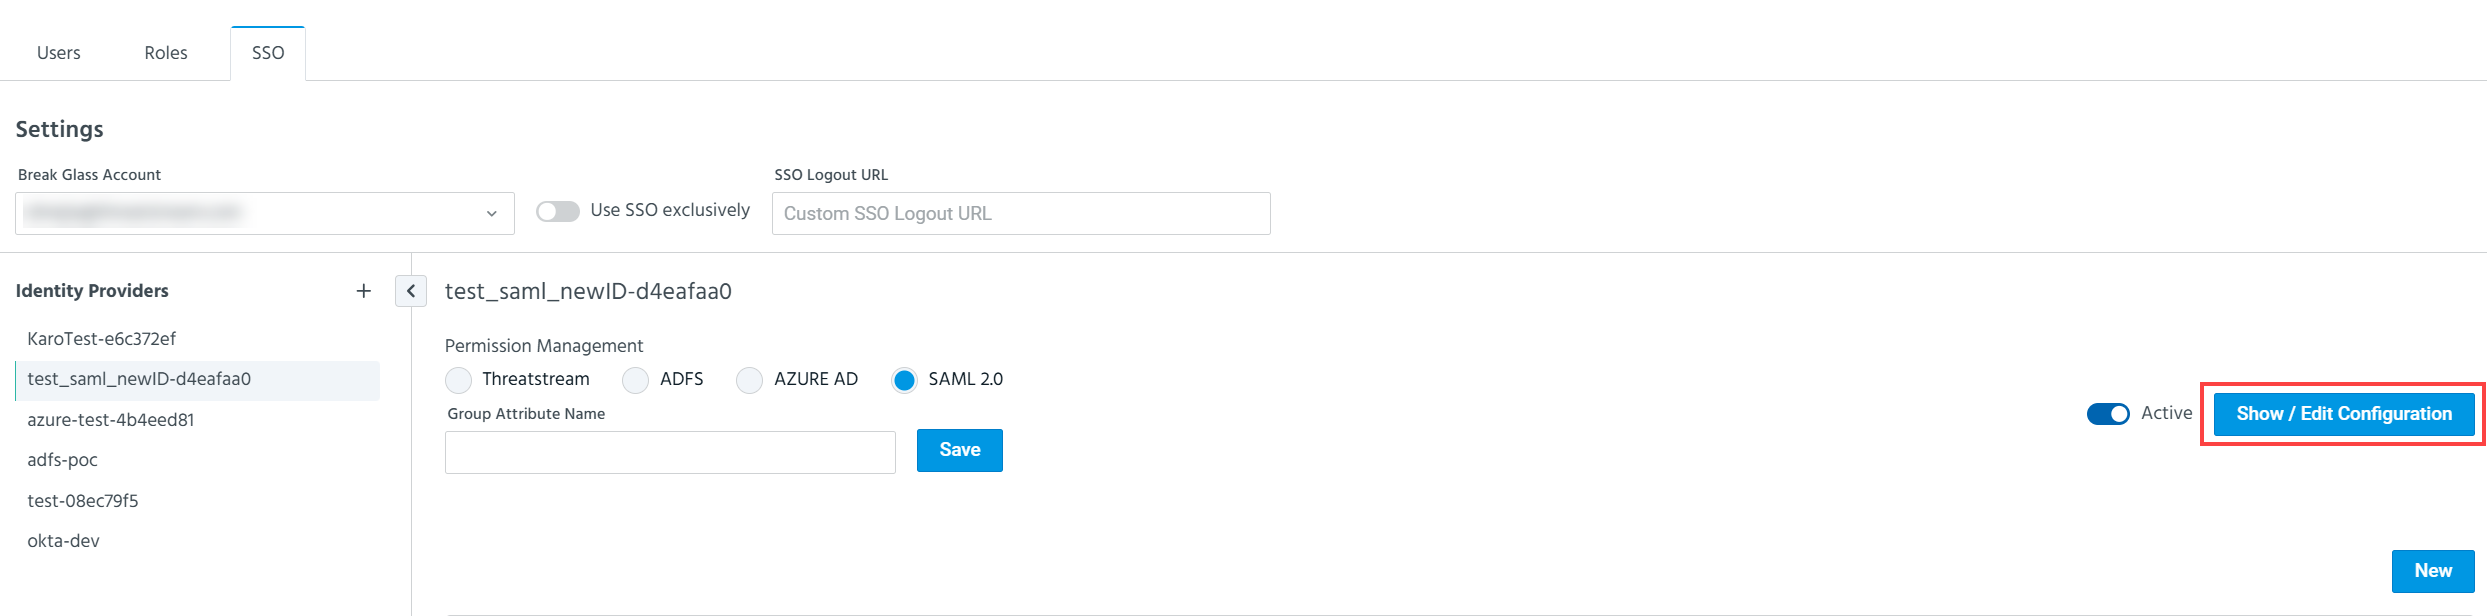
-
Make desired changes.
-
Click Save.
Note: For some organizations that were migrated from an existing IdP configuration to the current SSO self-service configuration, the Use for OnPrem option may be selected erroneously. In these cases, you must deselect the option before saving your changes.
To delete an IdP configuration:
-
In the bottom-left corner of the side navigation panel, click Settings (
) > User & Role Management. -
Click the SSO tab.
-
In the Identity Provider section, click the tab for the IdP configuration you want to delete.
-
Click Show/Edit Configuration.
-
Click Delete.
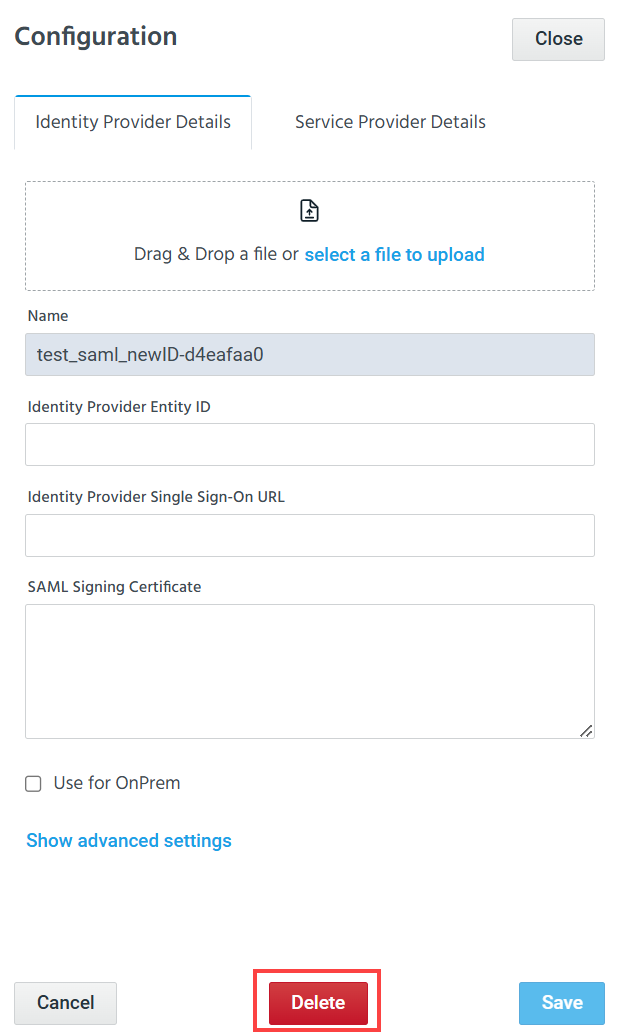
-
On the Delete Configuration window, click Delete to confirm.